
BakerBoy
It's all small stuff.
No, the return fuel is returned into the lower tank.I just remembered the unused gas gets pumped back into the top gas, SO I would say NO , because it will make one hell of a fire/mess.
In the pic below, #4 is the fuel supply into the lower tank from the upper (large so that the lower tank fills quickly during fillups), #1 is the 'air' equalization vent line between lower and upper tanks, #5 is the pressurized fuel supplied to the fuel rail, and #6 is the depressurized fuel return line from the fuel pressure regulator (that regulator is at the tail end of the fuel rail).
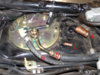
The fuel system runs normally (the bike runs) if both connections 5 & 6 are in place. My bike runs in exactly the configuration shown above.
")
No mess. No fire.
Last edited:


