Panic Time - Where is the oil coming from??

Blrfl

Natural Rider Enhancement
Joined
Aug 24, 2005
Messages
5,602
Age
55
Location
Northern Virginia
Bike
Fast Blue One
STOC #
4837
I think there is some confusion. I did not apply any on the mating surfaces.
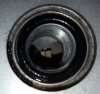
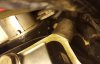
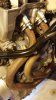
Oh, good. Someone else did that a few years ago.

I only applied a small dab here and there on the backside of the gasket to fix the gasket in place. Honda obviously did this from the factory with some sort of adhesive glue, not a gasket sealant.
I damaged one of mine last year and attached the replacement without adhesive. The rib on the cover side of the gasket and the little rubber protrusions should hold it in place unassisted. Time and heat cycles will make it stick.

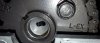
It's hard to say without looking at it, but depending on what you added, where you added it and how long it had to set before the cover was bolted on, it may deform the gasket enough to let oil seep through. It's a lot thinner at temperature, and it doesn't take much of a gap.

--Mark
 

Igofar

Site Supporter
Joined
Jan 8, 2011
Messages
7,104
Location
Arizona
Bike
2023 Honda CT125A
Like John said, the correct way (per service manual) is to coat the half circle on the head with a film of Honda Bond or whatever sealant you choose, then when the gasket presses down onto it, it seals correctly. Its a pain in the :butt1: trying to put it on the gasket itself.
If you didn't do the half moons, that is your problem, and a simple fix, however also check the gaskets around the sparkplug wells (IF) oil is coming out the drain holes by your exhaust port, as you may have two issues going on.
A simple way to clean the old adhesive off is with a wooden Q-tip, break the soft end off and cut the wood at an angle with a knife, and it makes a good (safe) scraper. Even a brass brush can scratch aluminum.
I believe the brown stuff your speaking of that Honda uses, is for assembly procedures, 3-M type spray, so when the cover is being handled or passed down the line, the gasket remains in place. The service manual indicates what is needed and where.
Good luck, let us know how it turns out.
Igofar

Note: had an 09 police motor come through a while back (after the shop checked the valves) and the entire front, side, and bottom of the engine was covered with oil after every ride! Same thing you found, they didn't put ANY sealant on the half moons. Simply doing that stopped 100 % of the oil leaks.
 
Last edited:
OP
OP
STPaulK
Joined
Feb 11, 2006
Messages
1,102
Location
Bloomington, MN
STOC #
273
As long as you realise that sealant it is most definitely needed around the half moons - quote section 8 of the shop manual "Apply sealant to the cylinder head semi-circular cut-outs as shown", with a diagram that shows sealant around the entire semi circle.

As I said - if it isn't sealed, oil will get out at that point and coat the front or rear of the engine casing. I know because I couldn't be bothered to do my own shims last time and 'trusted' it to the dealer - who didn't seal it. It was a right mess.
Curiously there was no sealer applied to the half moon from the factory. So why would there need to be any applied to a new gasket?
 
OP
OP
STPaulK
Joined
Feb 11, 2006
Messages
1,102
Location
Bloomington, MN
STOC #
273
To be clear, the leaking is not at the half moon. All the fresh oil is occurring somewhere behind the valve cover. I will apply a bit of sealant to the half moon on my next attempt. I'll leave the other right side valve cover alone since it's not leaking (yet.)
 
Last edited:

Igofar

Site Supporter
Joined
Jan 8, 2011
Messages
7,104
Location
Arizona
Bike
2023 Honda CT125A
Can you take a picture of where the oil is leaking from for us?
I'd be interested to see the drain holes under the exhaust ports.
If you PM me a contact number, or email address, I will be happy to send you a couple photos of the areas I am talking about.
Igofar
 
OP
OP
STPaulK
Joined
Feb 11, 2006
Messages
1,102
Location
Bloomington, MN
STOC #
273
Can you take a picture of where the oil is leaking from for us?
I'd be interested to see the drain holes under the exhaust ports.
If you PM me a contact number, or email address, I will be happy to send you a couple photos of the areas I am talking about.
Igofar

I did not see anything coming from the drain holes under the exhaust ports. The majority of the oil was finding it's way to the drain path on the right side of the engine so the oil is clearly in the Vee. As you look beyond the valve cover, you can see the throttle bodies are coated and so is the back side of the valve cover. There is also oil migrating along the rubber mat to the back and dripping down the back side of the engine. It all points to the same thing, the cover was either not seated properly, or the mat was indeed pinched near the back.

I took a mental break from the garage yesterday and will resume tonight. The first thing is to check the valve clearances again, although I already had checked the clearance for the two exhaust that I re-shimmed and they were right where I wanted them after the gap correction, so I don't see how there is a chance the cam holder is not properly in place. But there is no downside to going through the whole clearance check again for the entire bank.

Provided that is fine, then I am going to remove the coil and breather tube as suggested to provide room to move and see and fabricate the thin sheet of plastic or cardboard to force the mat out of place. I also have a brand new valve cover gasket, this time nothing will be applied anywhere except at the half circles.
 
Last edited:

Igofar

Site Supporter
Joined
Jan 8, 2011
Messages
7,104
Location
Arizona
Bike
2023 Honda CT125A
Can you post pictures of how much oil is leaking? This may help someone identify the area of the leak.
Did you check the cam chain tensioner bolt and sealing washing?
My money is on the sealant/half moons. I believe once you seal this area, your leak will go away.
While you have everything open (plastic removed) now would be a good time to wash away all the oil with some simple green type cleaner, then flush the entire area out so you can verify if the leak(s) are truly gone or not.
Another quick and simple way to find oil leaks is to clean the area and dry, then spray foot powder all over the area, then start the bike, the oil will show a trail in the foot powder directly to the source.
Good luck.
 
OP
OP
STPaulK
Joined
Feb 11, 2006
Messages
1,102
Location
Bloomington, MN
STOC #
273
Can you post pictures of how much oil is leaking? This may help someone identify the area of the leak.
Did you check the cam chain tensioner bolt and sealing washing?
My money is on the sealant/half moons. I believe once you seal this area, your leak will go away.
While you have everything open (plastic removed) now would be a good time to wash away all the oil with some simple green type cleaner, then flush the entire area out so you can verify if the leak(s) are truly gone or not.
Another quick and simple way to find oil leaks is to clean the area and dry, then spray foot powder all over the area, then start the bike, the oil will show a trail in the foot powder directly to the source.
Good luck.
I already cleaned up the oil so the evidence is gone. I hope I won't have any more leaks to take pictures. BTW, you can eat off my engine so there isn't any gunk at this point. :D

Yes, the tensioner bolt was checked. The leak isn't anywhere in this area.

Trust me, the leak was no where near the half moons. I have all the plastic off so it's easy to see that area. I just can't see behind the valve cover, where the mess is originating. Please note that I have pointed out the fresh oil is coating the throttle bodies and rubber mat and is not at the sides or lower end of the engine.
 
Last edited:
OP
OP
STPaulK
Joined
Feb 11, 2006
Messages
1,102
Location
Bloomington, MN
STOC #
273
One very important observation I left out is during the second test run, I did poke an inspection mirror behind the valve cover and it immediately was coated with fresh oil. It really does point to the valve cover not sealing back there.
 

dduelin

Tune my heart to sing Thy grace
Site Supporter
Joined
Feb 11, 2006
Messages
9,681
Location
Jacksonville
Bike
GL1800 R1200RT NC700
2024 Miles
008131
STOC #
6651
I've done it as have many others. A pinched heat mat is not only easy to do it creates a huge mess exactly where and how you describe it.
 
OP
OP
STPaulK
Joined
Feb 11, 2006
Messages
1,102
Location
Bloomington, MN
STOC #
273
Well I'm glad I decided to make a sanity check of my clearances as it seems like there is an issue with the cam chain timing. When the timing mark is lined up, the intake "R-IN" is not lined up with the valve cover mating surface. Curiously I did not have this cam removed, only the exhaust cam was taken out. Was this an example of slipping at the crank and how do I go about correcting it? Is it a matter of taking the cam holder off, releasing the cam chain tension and then rotate the intake cam one tick?
 

Attachments

Igofar

Site Supporter
Joined
Jan 8, 2011
Messages
7,104
Location
Arizona
Bike
2023 Honda CT125A
I bet your oil leak isn't looking so bad now huh? :rolleyes:
Sorry, couldn't resist that after the last couple days I had replacing a crank case sub wiring harness on a police motor.
Ever think about using nylon ties through the chain/sprockets to keep everything lined up?
Rotate the engine around a few times (by hand) and check it again to make sure your really off, or if tension is just pulling it off a little bit.
 
OP
OP
STPaulK
Joined
Feb 11, 2006
Messages
1,102
Location
Bloomington, MN
STOC #
273
Actually I only removed the exhaust cam and left the intake cam in place to hold the chain. I then marked the exhaust cam sprocket and chain and lined them back up on reinstallation. The only thing I can think of is that the crank moved a bit while the chain was loose.
 

dduelin

Tune my heart to sing Thy grace
Site Supporter
Joined
Feb 11, 2006
Messages
9,681
Location
Jacksonville
Bike
GL1800 R1200RT NC700
2024 Miles
008131
STOC #
6651
If you marked the marked the timing chain and gears with the tensioner unwound it could make a small difference in how they line up with the tension back on but probably less than a tooth. It would seem unusual that the crankshaft moved and you didn't notice the other three marks being off.
 
OP
OP
STPaulK
Joined
Feb 11, 2006
Messages
1,102
Location
Bloomington, MN
STOC #
273
I removed the coil and moved the harness up and back and boy, that really does make a big difference!

I believe I found where the leak was sourced. First off, I took a shot of the throttle bodies. These were coated with oil. Note the picture showing the upper right hand corner of the valve cover and note the rubber piece. I suspect that was pinched and displaced the gasket. There is apparent oil crust at the corner and if you zoom in, you can see the rubber is compressed. For the life of me, I can't figure out what this boot is covering (parts fiche for head does not show this.) The third picture is my proof you can eat off my engine, LOL.
 

Attachments

Igofar

Site Supporter
Joined
Jan 8, 2011
Messages
7,104
Location
Arizona
Bike
2023 Honda CT125A
I don't understand why more folks don't remove the coil, it does really make a big difference on seeing what your doing!
That piece of rubber, that your calling a boot, is put there to protect the main wire harness from rubbing on the sharp/hot corner of the engine.
You'll see when you put things back together that the wire harness is routed to rest on that piece of rubber, make sure you do not disturb it, as it NEEDS to be there to protect your $770.00 dollar wire harness!
Good find on the oil leak!
 
Last edited:

jfheath

John Heath
Site Supporter
Joined
Mar 18, 2006
Messages
2,823
Age
69
Location
Ilkley, W Yorkshire, UK
Bike
2013 ST1300 A9
2024 Miles
000679
STOC #
2570
Well I'm glad I decided to make a sanity check of my clearances as it seems like there is an issue with the cam chain timing. When the timing mark is lined up, the intake "R-IN" is not lined up with the valve cover mating surface. Curiously I did not have this cam removed, only the exhaust cam was taken out. Was this an example of slipping at the crank and how do I go about correcting it? Is it a matter of taking the cam holder off, releasing the cam chain tension and then rotate the intake cam one tick?
First of all, well done on identifying the source of the leak. It is surprising how much oil gets circulated throgh the cams, and how much can subsequently lubricate the outside of the engine casing.

Re the cam chain. Once the tensioner is released, it is so very easy for the chain to slip off the sprocket at the end of the crankshaft, way down in the engine. It is only half the size of the cam shaft sprockets. So while marking the chain and the sprockets at the top end, or cable tying them seems like a good idea, it would be folly to assume that this is enough to keep the timing spot on. Its is also possible to have a loop forming under the crank shaft sprocket - effectively loosing a tooth of timing, until the engine is turned over.

There is also a protrusion partway down inside the crank case, and it is possible to get the chain running on the wrong side of it - which will wipe out all of the slack in the cam chain.

Regarding the timing marks. It is impossible to see some of the alignments properly - you need to have your eyes in direct line with the mating surface of the camshaft casing - and that isn't possible as the forks and front wheel get in the way. Looking from slightly above can seem to give you the correct alignment, but it is easy to be one tooth out.

I use a mirror on a flexible rod, and a flashlight. Shine the light directly horizontally so that it casts the shadow of the crankcase edge onto the sprocket marks. The shadow should align perfectly with the timing marks. The mirror helps to see this more clearly.
 
OP
OP
STPaulK
Joined
Feb 11, 2006
Messages
1,102
Location
Bloomington, MN
STOC #
273
First of all, well done on identifying the source of the leak. It is surprising how much oil gets circulated throgh the cams, and how much can subsequently lubricate the outside of the engine casing.
I sure hope that's all it is. I'm still having bad dreams of a cracked crankcase (although I couldn't fathom how that would happen). :confused:


Re the cam chain. Once the tensioner is loosened, it is so very easy for the chain to slip off the sprocket at the end of the crankshaft, way down in the engine. It is only half the size of the cam shaft sprockets. So while marking the chain and the sprockets at the top end, or cable tying them seems like a good idea, it would be folly to assume that this is enough to keep the timing spot on. Its is also possible to have a loop forming under the crank shaft sprocket - effectively loosing a tooth of timing, until the engine is turned over.
Well this is a bit of serendipity! I just got in from a two hour session of frustration. You described perfectly what obviously is happening! I made two attempts to correct the alignment (of the marks to the valve head) and both times, the alignment wound up a tooth off again. What I found is that by loosening the tensioner, it's already allowing the chain to start finding a "new place" on that lower sprocket. Releasing the tensioner gives a false feeling, it's still not where it should be until I start rotating the crank. I hear the tensioner spring back into place but then I am back to a tooth off again. :mad: So it seems the chain must be riding halfway engaged, or as you suggest, a loop is under the crank.


There is also a protrusion partway down inside the crank case, and it is possible to get the chain running on the wrong side of it - which will wipe out all of the slack in the cam chain.
I'll have to check that out and see if it's playing a role.

But....you never did explain how you overcome the issue with the chain (or maybe you did earlier and I missed it.)

Regarding the timing marks. It is impossible to see some of the alignments properly - you need to have your eyes in direct line with the mating surface of the camshaft casing - and that isn't possible as the forks and front wheel get in the way. Looking from slightly above can seem to give you the correct alignment, but it is easy to be one tooth out.

I use a mirror on a flexible rod, and a flashlight. Shine the light directly horizontally so that it casts the shadow of the crankcase edge onto the sprocket marks. The shadow should align perfectly with the timing marks. The mirror helps to see this more clearly.
I've got that solved with the attached photo of the Stanley extension LED mirror. Don't leave home without it! :)

Someone asked me today if I have regrets about deciding to change the shims out. Actually there was not much choice. Both exhaust valves on #1 came from the factory at the tight limit and after 60k miles, one crept out far enough to make the 0.008 shim start fitting and I can't allow this. My only regret about the whole thing is starting out this project with a bit of impatience. Thank goodness for a second motorcycle. :D
 

Attachments

Last edited:

jfheath

John Heath
Site Supporter
Joined
Mar 18, 2006
Messages
2,823
Age
69
Location
Ilkley, W Yorkshire, UK
Bike
2013 ST1300 A9
2024 Miles
000679
STOC #
2570
I sure hope that's all it is. I'm still having bad dreams of a cracked crankcase (although I couldn't fathom how that would happen). :confused:
The mind imagines all sorts of either expensive or dangerous scenarios for what are in fact very simple issues. Or is that just me? Two examples drawn from my old ST1100 - there is a heat shield that is bolted to the exhaust downpipes. With age, it is prone to crack, and it rattles at certain revs with a high pitched key jangling noise. This translates into clutch about to fall to bits; broken metal in gearbox; broken piston rings; excessive pre- ignition; .....
Same bike - at certain speeds i would get a noise which sounded exactly like the a flat tyre rolling across a rough surface, or like riding over a patch of wet tar on the road. There were a few buttock clenching moments before i found that the plastic radiator grill was rattling in its mount as the airflow picked up.


Well this is a bit of serendipity! I just got in from a two hour session of frustration. You described perfectly what obviously is happening! I made two attempts to correct the alignment (of the marks to the valve head) and both times, the alignment wound up a tooth off again. What I found is that by loosening the tensioner, it's already allowing the chain to start finding a "new place" on that lower sprocket. Releasing the tensioner gives a false feeling, it's still not where it should be until I start rotating the crank. I hear the tensioner spring back into place but then I am back to a tooth off again. :mad:
I think if you are doing this job regularly, you wouldn't come across such issues. I have done it just twice. Fist time was straight forward. Second time it took me ages to work out why everything felt so tight as I secured the cam shaft bolts. Those experiences are described in the link from post 17. Linked again here

So it seems the chain must be riding halfway engaged, or as you suggest, a loop is under the crank.


I'll have to check that out and see if it's playing a role.

But....you never did explain how you overcome the issue with the chain (or maybe you did earlier and I missed it.)

i hid a link in post # 17. Sorry, it isn't very obvious. The word 'link' is a hyperlink - but it doesn't show up very clearly on my ipad. Easy to miss. So here is the same link again for anyone else looking in!https://www.st-owners.com/forums/showthread.php?124417-2nd-Valve-Shim-change-59-000-miles&highlight=


As for regrets .... I have to confess that with the state my back was in a few months ago, I didn't really fancy crawling around the floor to sort out the valve clearances - which definitely needed doing on the left and the right side were just over the limit on two of the clearances.

I let the dealer sort it out.

I do regret that. When i picked it up the mechanic commented that he had forgotten how difficult it was to adjust the clearances on the st1300. When i rode it home it sounded, smelled and felt wrong. I invetsigated before taking it back. The air box hadn't been taken off at all, there was oil spraying over the front of the engine. He found a kink in one of the air tubes. - reckoned it had always been like that, and when quizzed about the right hand side, he said that they were all in spec when he measured

Lesson learned.
 
Last edited:
Top Bottom