Rear Wheel - Dry Drive Splines

RobbieAG

Robert
Joined
Apr 4, 2014
Messages
526
Location
Greensboro NC
Bike
2005 ST1300
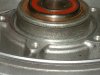
I was pulling the rear wheel off the other day so I can get new tires installed. When I did, the final drive flange separated from the rear wheel rather than the splines separating. I wasn't aware that it's just kind of pressed in there and not bolted on. At first I was worried something was seriously wrong; it didn't happen that way the last time I pulled the wheel (13k miles ago). When I did finally get it off, the splines were dry and a little rusty which explains why they didn't come apart that easily. I know I put on what I considered at the time plenty of moly lube per the service manual. Maybe I underestimated how much is needed. It says 3g or .11 ounces (from memory) but I have no idea how to translate that into an amount I can use. It doesn't sound like that much. Can someone advise me on how much lube to use or give me some other tips that would prevent having dry splines between tire changes? Thanks in advance.
 
Joined
Jun 3, 2006
Messages
3,519
Location
British Columbia
Bike
2021 RE Meteor 350
You should have a look at the rubber dampers and aluminum inserts in the wheel hub. Usually if that spider stays attached to the splines, it indicates the rubbers and/or the inserts are well worn and due for a change. As Dean says, clean the splines and spider well and apply enough Moly to lightly coat the surfaces. Don't forget to make sure the thrust washer is well coated both sides too and the hub of the wheel, where the thrust washer sits against. New O -ring on the hub is usually required too.
 
Joined
Jul 12, 2017
Messages
89
Location
So-cal
Bike
2000 ST1100
I wondered about that too. This is what 3 grams (by weight) of toothpaste looks like. Perhaps it will help. Chunk.
 

Attachments

Joined
Jun 3, 2006
Messages
3,519
Location
British Columbia
Bike
2021 RE Meteor 350
If you have rusty splines, you aren't using enough Moly. If you have Moly flung out all over the inside of the hub, you are using too much. Practice makes perfect.
 
Joined
Sep 10, 2011
Messages
2,210
Location
West Michigan
Bike
'98 ST1100
STOC #
8470
Clean off all the old moly before re-coating. And make sure the three o-rings are in good condition so the moly stays in place.

Maybe you should take a pic after you clean off the old moly and let us have a look/see.
 

ReSTored

Site Supporter
Joined
Nov 6, 2005
Messages
1,481
Location
Mississauga, Ontario
Bike
2019 Tracer GT
STOC #
4463
As others have said clean up everything, new O rings, inspect the dampers and inserts and apply a thin coating of moly and you're good to go. I probably use too much moly, but it takes an extra minute or so to clean up the excess next check vs. using too little.

Make sure you pull the dampers and inserts to check them. They can appear OK on top, but be worn through on the bottom.

After 15+ years and 110,000 km my splines look like new.
 
Joined
Sep 4, 2013
Messages
8,178
Location
Cleveland
Bike
2010 ST1300
The problem is, as you said, they are a little rusty. Clean off the rust with fine sandpaper (wet-or-dry with a bit of oil or WD40). I'd probably start with 400 or 500 grit, you can always go coarser if these are simply polishing the splines. You want to take off as little metal as possible, but get rid of all the rust. Guaranteed this is going to be a tedious job - sanding splines is not easy. Wrap the sandpaper around a piece of wood like a tongue depressor or wood shim. Then, as has been said several times already, clean 'er up, moly it, and assemble. Don't forget to check the wheel bearings before you put everything together.
 

Byron

Moderator
Joined
Mar 3, 2006
Messages
2,311
Location
KY
STOC #
6091
The other thing to remember is the manual calls for "moly paste" and not "moly grease." The grease has less moly and does not provide the necessary load protection that the paste does.
 
OP
OP
RobbieAG

RobbieAG

Robert
Joined
Apr 4, 2014
Messages
526
Location
Greensboro NC
Bike
2005 ST1300
And make sure the three o-rings are in good condition so the moly stays in place.
I have a question about this. I'm not sure where all of these o-rings are. I know about the one that goes on the final drive flange (#21 on the parts fiche - 91358-MG9-003). I see another one on the parts fiche (#20 - 91302-MA6-003) which appears to go between the thrust washer and wheel bearings, but don't see it in the service manual and don't see it on my bike. I don't see a third o-ring on the parts fiche or service manual, though I have a vague recollection that there is one. Is that the one (#33) on the Final Driven Gear parts fiche?
 
Joined
Jun 3, 2006
Messages
3,519
Location
British Columbia
Bike
2021 RE Meteor 350
Do you see the groove on the hub, where the thrust washer sits against and which the spider fits on top of? That's the one that usually needs replacing most often, as it is subject to more wear from the spider. It will wear even faster if the rubber dampers and aluminum inserts are worn, allowing the spider to rub on that hub area. The one that is buried inside the splines in the final drive is likely in good shape. I rarely change that one. It's the hard one to see. The big one on the spider itself is also usually in good shape. Did you check the dampers and inserts?
 

Slydynbye

Will ride for Pie
Joined
Sep 3, 2007
Messages
1,614
Location
Fremont, California
Bike
2000 ABSII
STOC #
7331
I have a question about this. I’m not sure where all of these o-rings are. I know about the one that goes on the final drive flange (#21 on the parts fiche - 91358-MG9-003). I see another one on the parts fiche (#20 - 91302-MA6-003) which appears to go between the thrust washer and wheel bearings, but don’t see it in the service manual and don’t see it on my bike. I don’t see a third o-ring on the parts fiche or service manual, though I have a vague recollection that there is one. Is that the one (#33) on the Final Driven Gear parts fiche?
A quick google search for " elusive 3rd oring " will show pictures and facts.
 
Joined
Jun 3, 2006
Messages
3,519
Location
British Columbia
Bike
2021 RE Meteor 350
Thanks, I found this link which shows it very clearly. It's true what they say that a picture is worth a thousand words.
Looking at that linked page, I was surprised to read that notice at the bottom and I heartily disagree with that. Who wrote that? Was it written by Adam K.? The reason we have often seen excessive wear on that aluminum hub was worn rubber dampers and inserts being neglected for too long, allowing the spider to twist and severely rub against the aluminum hub.
 
Joined
Jul 28, 2007
Messages
3,142
Location
finger lakes ny
Bike
1999 ST1100
STOC #
7959
The reason we have often seen excessive wear on that aluminum hub was worn rubber dampers and inserts being neglected for too long, allowing the spider to twist and severely rub against the aluminum hub.
Something like this?
This is a spare wheel that I got either here or ebay. Good wheel other than the non existent o-ring groove, which as far as I know renders it unuseable.
 

Attachments

OP
OP
RobbieAG

RobbieAG

Robert
Joined
Apr 4, 2014
Messages
526
Location
Greensboro NC
Bike
2005 ST1300
I may have found a culprit. The o-ring on the wheel hub is not in great shape and barely protrudes past the groove. The one on the flange needs to be replaced, but it's not as bad as the one on the hub. The one on the spider (the elusive one) looks okay but is maybe a little loose. I have the other two, but would need to order this one. Do you all use moly paste on the o-rings or just a bit of oil like usual with o-rings?

Do I need to take the damper holder off to check the dampers and inserts? They look good as far as I can tell without removing the cover.
 
Joined
Jul 28, 2007
Messages
3,142
Location
finger lakes ny
Bike
1999 ST1100
STOC #
7959
I may have found a culprit. The o-ring on the wheel hub is not in great shape and barely protrudes past the groove. The one on the flange needs to be replaced, but it's not as bad as the one on the hub. The one on the spider (the elusive one) looks okay but is maybe a little loose. I have the other two, but would need to order this one. Do you all use moly paste on the o-rings or just a bit of oil like usual with o-rings?

Do I need to take the damper holder off to check the dampers and inserts? They look good as far as I can tell without removing the cover.
I moly the o-rings,
Yes, take off the holder to check for their snuggness.
 
Joined
Jun 3, 2006
Messages
3,519
Location
British Columbia
Bike
2021 RE Meteor 350
I don't lube the o-rings with anything. Their intent is to hold the Moly in place as well as is possible and some Moly will inevitably get distributed on them anyway. They appear to be a near friction fit and they only wear, the one on the hub especially, when the dampers are worn.

You can not tell what condition the rubbers and inserts are in just by looking at them. Take that bronze coloured plate off, noting the arrow marks and direction of rotation for removal and installation. There should be zero play of the rubber dampers in their pockets and a new set will actually be a very tight fit, generally requiring a rubber mallet to hammer them home, in order to get the holding plate back on.

Also, check that the aluminum inserts have not damaged the back face of the hub. This also indicates that they are well past due for replacement. You must replace them as a set, dampers AND aluminum inserts. Send pics if you have any concerns.

EDIT: The dampers and inserts have generally lasted about 50,000 miles on my bike.
 
Last edited:
OP
OP
RobbieAG

RobbieAG

Robert
Joined
Apr 4, 2014
Messages
526
Location
Greensboro NC
Bike
2005 ST1300
I checked on the dampers tonight and everything is tight and undamaged - no problem there.
 
Top Bottom