Protecting the Swing Arm and the Tool to Remove and install it

Joined
Oct 22, 2017
Messages
57
Location
CT
Bike
2002 ST1100
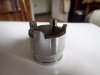
I plan on removing the swing arm on my '02 ST1100 and I'm wondering if someone can tell me how they made the special tool. With instruction and pictures I should be able to make one.

Also, should I be putting some kind of anti-rust treatment inside the swing arm? Do I need to worry about the bearings etc when I apply it?

I was think of Por-15 for the outside of the swing arm. Is there a better choose?

Dan
 
Joined
Jun 9, 2012
Messages
400
Location
Paris, TN
Bike
'99 ST1100
STOC #
8606
I used a 1 3/16" 6-point socket with a 1/2 drive. I made a template with a piece of thin cardboard and used something like grease or shoe polish to transfer the pattern. Then I used a cutoff wheel and grinder to shape the socket. It wasn't perfect at first but it was good enough to get the nut off. Once the nut was off I made some adjustments to the socket. The teeth are approximately 3/8" wide and 1/4" tall. Two of the teeth are opposite on the vertex of the hexagon and two teeth are opposite on the flats.


re_P2090612.JPGre_P2090613.JPG
 
OP
OP
Dan T
Joined
Oct 22, 2017
Messages
57
Location
CT
Bike
2002 ST1100
Thanks for the help Mike. I should have any problem making one thanks to the help from you two.

For the side that I have to hold a allen wrench while torque the nut is that done with this special socket and how? :)
 
OP
OP
Dan T
Joined
Oct 22, 2017
Messages
57
Location
CT
Bike
2002 ST1100
When it came time to clean up the swing arm what is normal / recommended for treating the inside of the swing arm?
 

John OoSTerhuis

Life Is Good!
Joined
May 10, 2005
Messages
5,224
Location
Bettendorf, Iowa
Bike
1991 SSMST1100
STOC #
1058
Dan, you shouldn’t have to do anything to the inside of the swingarm.

The right swingarm pivot bolt is torqued into the frame to 76 ft lbs. Then when you’ve positioned the swingarm, the left swingarm pivot bolt is torqued to 13 ft lbs (the bearings preload). Then the special tool is used to lock the preload in. To do that a 17mm hex-bit socket on a breaker bar is inserted through the center of the special tool into the socket in the pivot bolt and held there to stop any movement (increase of bearing preload) while your 1/2” torque wrench applies 76 ft lbs to the special tool at its offset “tang” to the lockring.

The driveshaft can then be slid forward onto the transmission output shaft.

Do you have the Honda Service Manual? Recommended.

HTH I replied to your email with an offer to loan you the special tool and 17mm socket for the price of postage.

John
 
Last edited:
Joined
Feb 5, 2005
Messages
8,538
Age
77
Location
Kingman, Arizona
Bike
2000 ST1100 ABS TCS
STOC #
004
Just a hint that worked for me: Before removal, mark the lock ring and frame, tighten on reinstall to that point. Probably not perfect torque, but when good enough is good enough, then good enough is perfect. :D

The arm on the Honda tool lets ya have the hex bolt _and_ torque wrench in place at the same time. The home made socket doesn't allow this, hence the need to guestimate the torque.
 
OP
OP
Dan T
Joined
Oct 22, 2017
Messages
57
Location
CT
Bike
2002 ST1100
John, I held off from replying to your post until I had a chance to look at the swing arm on the bike.
It is actually in very good condition so I cleaned it up the best I could, took some pictures for documented the condition and then I painted it twice with POR-15.

The splines on the drive shaft and the final drive have a good coating of moly 60. The bike must have been service just before I bought it. The PO was going to do a cross country trip with it then cancelled the trip do to health reasons. I'm replacing the rubber dampers in the wheel and will be putting it back together soon.

Thank you all for the help and pictures of the special tool. John, thank you for your loan offer but I wont be needing it this year.
 
OP
OP
Dan T
Joined
Oct 22, 2017
Messages
57
Location
CT
Bike
2002 ST1100
JMHO, but if you’re replacing the dampers I’d sure replace the aluminum inserts also.

John
Good idea. I thought due to the age along I should replace the rubber dampers and was thinking the aluminum inserts would not have much wear to them.
I looked at them again and sure enough I found 3 out of the 5 to have more play/slop then the others. To say the least, I ordered the five inserts. Thanks for the suggestion.
 
OP
OP
Dan T
Joined
Oct 22, 2017
Messages
57
Location
CT
Bike
2002 ST1100
JMHO, but if you’re replacing the dampers I’d sure replace the aluminum inserts also.

John
You were spot on with the replace insert suggestion. With only 20K miles on the bike I did not think the inserts needed to be replaced. I installed the new rubber bushing and new inserts then compared the fit of the FD flange with the old bushing & inserts and was surprise by the play in the old inserts.

Dan
 
Top Bottom