
- Joined
- Feb 5, 2005
- Messages
- 8,537
- Age
- 77
- Location
- Kingman, Arizona
- Bike
- 2000 ST1100 ABS TCS
- STOC #
- 004
Thought I'd write this up as I needed to do the work anyway. Could be an article(?).
First order of business: forget about NOT scratching yur rims. Nobody but you will ever look that closely. This same job can be done with rim protectors, but (in my case) that's just more to carry.
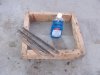
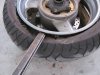
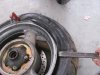
Necessary tools, three tar arns and some 2x4. I made this box several years ago, works fine. Add a bottle of soap. Work surface is the garage floor. I carry the arns and some soap but not the box on trips.
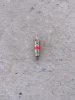
One of my valve stems always has a metal cap with valve tool built in
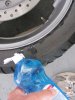
Soap up the old tar, makes it much easier to break the bead.
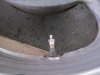
Insert the curved end of the arns under the rim, two outside ones pointed up, center one pointed down and pushed behind the edge of the tar bead. Push down on the two outside, pull up on the center arn to distribute the soap.
On this old BT-020-R I had to stack the two big arns to get enuff travel to get the bead into the center. Wasn't necessary when I did the front.
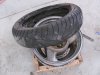
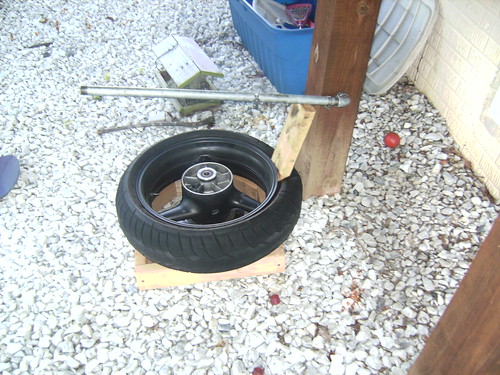
Here's the old tar off the rim.
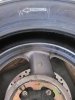
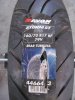
Here's the new Avon AV56 ready to install. Note the reversed arrow, on purpose because this side gets soaped up first, then reversed 180? and pushed onto the rim.
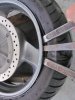
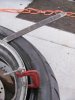
One additional tool: the C-Clamp holds the edge down into the groove and keeps it from backing out as the rest of the bead is forced over the rim.
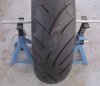
Here's the last of the bead just ready to pop over the rim.
Side note: some valve stems have a black band instead of red. Use only red banded stems on yur tars.
I always set the beads before putting the stem in, pressure up to 50 lbs then release. Install the stem and set to 42#. Check again the next day. I've used my 12V compressor to set a bead but ya gotta be lucky to do that. Assume you'll want to be close to a real compressor.
Continued on page 2
First order of business: forget about NOT scratching yur rims. Nobody but you will ever look that closely. This same job can be done with rim protectors, but (in my case) that's just more to carry.
Necessary tools, three tar arns and some 2x4. I made this box several years ago, works fine. Add a bottle of soap. Work surface is the garage floor. I carry the arns and some soap but not the box on trips.
One of my valve stems always has a metal cap with valve tool built in
Soap up the old tar, makes it much easier to break the bead.
Insert the curved end of the arns under the rim, two outside ones pointed up, center one pointed down and pushed behind the edge of the tar bead. Push down on the two outside, pull up on the center arn to distribute the soap.
On this old BT-020-R I had to stack the two big arns to get enuff travel to get the bead into the center. Wasn't necessary when I did the front.
Here's the old tar off the rim.
Here's the new Avon AV56 ready to install. Note the reversed arrow, on purpose because this side gets soaped up first, then reversed 180? and pushed onto the rim.
One additional tool: the C-Clamp holds the edge down into the groove and keeps it from backing out as the rest of the bead is forced over the rim.
Here's the last of the bead just ready to pop over the rim.
Side note: some valve stems have a black band instead of red. Use only red banded stems on yur tars.
I always set the beads before putting the stem in, pressure up to 50 lbs then release. Install the stem and set to 42#. Check again the next day. I've used my 12V compressor to set a bead but ya gotta be lucky to do that. Assume you'll want to be close to a real compressor.
Continued on page 2
Attachments
-
 125.1 KB Views: 232
 -
 133 KB Views: 186
 -
 155.7 KB Views: 162
 -
 136.8 KB Views: 182
 -
 159.2 KB Views: 181
 -
 147.1 KB Views: 163
 -
 151.5 KB Views: 153
 -
 139.3 KB Views: 182
 -
 160.4 KB Views: 164
 -
 129.7 KB Views: 155
Last edited by a moderator:


 Meant to add, I learned the bead breaker trick from Will at Willville Campground in Meadows Of Dan, VA a couple years ago. We installed a used tar on Landon's 1300 at CampSTOC 08(?). Good learning exeperience. Will runs a nice shop.