
Hi all,
This is more of a story to share really.
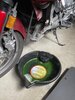
So I worked on my bike for the first time really, last weekend replaced the coolant on my 1993 st1100 (that I owned for only 3 weeks). Few days prior, I practiced removing the fairing all to the point of access to the radiator cap. I read and read the service manual and was confident in what I need to have and do. I was taken almost by surprise the extra effort I needed to make to get to the radiator drain plug -that's on me not evaluating properly, totally overlooked before starting the process. Anyway, I made sure to organize bolts so they are properly returned to their exact spot. Started to get overwhelmed by the number of bolts once I started removing the left middle fairing. Once I made it to the radiator drain, the actual process of draining, flushing, and filling coolant (including reservoir) went smooth. Unfortunately I didn't make it to drain the reservoir, was not ready for taking more fairing apart, in order to reach to the drain host. The older coolant there was way below the 'low' line anyway. I placed the radiator cap on top of the radiator opening, loosely, so I can run the engine a bit in idle to let some air out, and add more as necessary. After that I started bolting the fairing back. In the process of taking the middle left fairing off, a loose bolt came off from somewhere, but luckily I figured out where that was supposed to go. What I was unable to tell is that after bolting the left middle fairing back, I was left with one bolt that for 20 minutes I was unable to figure out where it was supposed to go (lesson learned to document better), but really, nothing seemed to be missing (wait, it's getting even better). Once all fairing was placed back I took a long break with the intent of taking a ride for assessment later that day. As I prep to get on the bike I REALIZED that the radiator cap was only loose on top, never tightened. Had to take the fairing off again. How lucky was I? Anyway, left with a bolt that really does not seem to be missing. The fairing seems to be actually more secure than before, if I can say so.
The one bummer is the realization of the 'amount' of fairing I'll have to take off in order to reach the oil filter when time comes. Oh well. It is not that big of a deal after all.
I initially bought the bike as I wanted something for a long trip, use on weekends, and to learn how to maintain a bike. I'm becoming more and more confident getting hands-on, something I would have never thought I would be able to do just six months ago. (heck, the thought of a motorcycle and motorcycle license was not in my mind up to August this year). I don't know if I'll get to go on a long trip anytime soon. So I will be considering replacing it in the next season or two with a lighter bike, and less fairings to take off. I do gravitate toward a Honda. We'll see.
I'm glad I 'invested' in a good foam pad for my knees while on the floor -life saver!
If you got this far, thank you for reading.
Thanks.
This is more of a story to share really.
So I worked on my bike for the first time really, last weekend replaced the coolant on my 1993 st1100 (that I owned for only 3 weeks). Few days prior, I practiced removing the fairing all to the point of access to the radiator cap. I read and read the service manual and was confident in what I need to have and do. I was taken almost by surprise the extra effort I needed to make to get to the radiator drain plug -that's on me not evaluating properly, totally overlooked before starting the process. Anyway, I made sure to organize bolts so they are properly returned to their exact spot. Started to get overwhelmed by the number of bolts once I started removing the left middle fairing. Once I made it to the radiator drain, the actual process of draining, flushing, and filling coolant (including reservoir) went smooth. Unfortunately I didn't make it to drain the reservoir, was not ready for taking more fairing apart, in order to reach to the drain host. The older coolant there was way below the 'low' line anyway. I placed the radiator cap on top of the radiator opening, loosely, so I can run the engine a bit in idle to let some air out, and add more as necessary. After that I started bolting the fairing back. In the process of taking the middle left fairing off, a loose bolt came off from somewhere, but luckily I figured out where that was supposed to go. What I was unable to tell is that after bolting the left middle fairing back, I was left with one bolt that for 20 minutes I was unable to figure out where it was supposed to go (lesson learned to document better), but really, nothing seemed to be missing (wait, it's getting even better). Once all fairing was placed back I took a long break with the intent of taking a ride for assessment later that day. As I prep to get on the bike I REALIZED that the radiator cap was only loose on top, never tightened. Had to take the fairing off again. How lucky was I? Anyway, left with a bolt that really does not seem to be missing. The fairing seems to be actually more secure than before, if I can say so.
The one bummer is the realization of the 'amount' of fairing I'll have to take off in order to reach the oil filter when time comes. Oh well. It is not that big of a deal after all.
I initially bought the bike as I wanted something for a long trip, use on weekends, and to learn how to maintain a bike. I'm becoming more and more confident getting hands-on, something I would have never thought I would be able to do just six months ago. (heck, the thought of a motorcycle and motorcycle license was not in my mind up to August this year). I don't know if I'll get to go on a long trip anytime soon. So I will be considering replacing it in the next season or two with a lighter bike, and less fairings to take off. I do gravitate toward a Honda. We'll see.
I'm glad I 'invested' in a good foam pad for my knees while on the floor -life saver!
If you got this far, thank you for reading.
Thanks.