Actually...before leaping into modifying the suspension, it is most important to ensure that the various components are in good health and properly installed. Depending on the age of forks, you could have badly worn bushings which are causing excessive friction, these have teflon-coated surfaces to reduce friction but that wears through with time. Next would be the fork seals which can degrade and either allow water in/oil out, or just add unwanted drag. The oil itself accumulates all the various wear particles from the bushes and seals plus any dirt that makes its way past the seal; that accumulates in the bottom of the leg especially in/around the compression valve in the base of the damper.
I know the manual only ever refers to inverting the fork to drain out old oil, but really unless you properly disassemble the fork and the damper, I doubt you would get the worst of the grotty stuff out of the bottom of the forks. If you are not planning on inspecting the bushes/seals then you need not fully separate the stanchions and sliders, just pull the damper hex bolt out of the fork bottom and the damper assembly can be lifted out making fork cleaning a simple process.
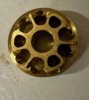
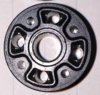
Damper disassembly is as simple as pushing the compression base (this is the bit the hex bolt under the fork leg screws into) into the damper tube to expose a circlip, popping that out, and then using the damper rod to push the compression valve back out of the tube. No parts go flying, but you can now fully clean components.
One tip I would share is ensuring that the threads on the damper hex bolt, and the compression valve base are fully cleaned of old threadlock and easy to assemble without any binding. I use a tap and die to gently chase out any remaining debris. The reason for this is there is little to stop the damper from spinning when you try to tighten the parts back up. Clean threads and a little fresh threadlock make it an easy job.
When you reassemble the forks into the triples and tighten the axle, you need to ensure the forks are sitting parallel so they slide easily without binding. Before fitting the wheel, check the axle will slip easily into both fork legs, and slip one fork up or down a fraction if you need to improve the alignment. With wheel, brakes and axle in place, tighten the axle nut and the right side axle clamp, then bounce the forks a few times to let the left leg find its most natural spot on the axle, then tighten the left axle clamp.

") I would like to know the forks are in first class condition, they are currently as they came from the Honda factory 13 years ago, although the ST is a baby in terms of km travelled (50,000 km).
I would like to know the forks are in first class condition, they are currently as they came from the Honda factory 13 years ago, although the ST is a baby in terms of km travelled (50,000 km).