Throttle Body Removal and
Sub-harness replacement
Sub-harness replacement
In all of the procedures below follow the detail steps in the Service Manual. This documentation discusses only those items that are not in the SM or not covered adequately.
If at all possible, ride the bike until the last segment of the fuel gauge starts blinking indicating that the upper fuel tank is empty. If this is not possible because the bike is not in running condition, the gas will have to be siphoned out before the tank is propped up on the supplied prop rod.
Before proceeding, be sure to have on hand the following parts:
* Throttle body sub-harness (if replacing it) 32103-MCS-770
* Fuel joint tube 17545-MCS-G00
* Clip to hold joint tube to upper fuel tank 90661-SLO-A01
* Clamp to hold joint tube to lower fuel tank 91405-MCS-G00
* Sealing washers (2) for TB fuel inlet banjo bolt 90428-PD6-003
Remove the saddle bags and the seats.
Remove the left and right side covers.
Remove the lower cowls.
Remove the middle cowls.
Remove the upper fuel tank.
If the tank is not empty, siphon as much fuel out as possible before opening the tank up on the prop rod then open the tank lid and siphon the remainder from the bottom of the standing tank. Be careful to keep the siphon hose from poking the fuel level sensor.
Two of the three hoses entering the bottom of the tank, the ones not secured by clips, will be dry. Disconnect them. The thicker one, called the drain hose, does not drain the tank. It drains to the ground any over splash from the annular space around the filler neck. The breather hose connects the tank to the EVAP canister.
Remove the clip from the air vent hose, pinch it shut and disconnect it, then pull it out to the right side under the tank and drain out about a quart more of gas into a container. Disconnect the fuel joint hose at the lower tank and expect to sop up about an ounce of gas that was in it. Remove the tank the rest of the way as per the SM.
Remove the air cleaner housing
Disconnect the IAT sensor connector which is part of the TB sub-harness. When removing the screws that hold the lid, loosen but don't remove the two closest to the steering head. Lift those out with the lid.
Use a marker and note the cylinder each funnel and its base belong to and also the direction they face. When removing the funnel bases use an impact driver to loosen the screws if this is the first time they are being taken out since torqued down at the factory. These screws strip easy, very easy. When replacing them use only thumb and one finger on the screw driver.
The two hoses connecting to the bottom of the air cleaner housing (PAIR hose in the rear, crank case breather hose in front) are held on with clips that can be squeezed open by hand. Before loosening the PAIR hose clip, be sure to put something on the hose to keep the clip from sliding down to disappear for ever.
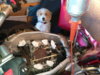
Remove the throttle body
The band screws holding the TB to the insulators can be reached from the side under the frame. You'll need an 8mm socket or a phillips bit on an extension; a universal joint will be helpful when working on the band for cylinder #1. The bands will have to be very loose to allow passage for the neck of the throttle bore.
The throttle cable bracket is held on by two 5x10mm phillips screws that have to be removed blindly. If the screwdriver is not held exactly perpendicular to the screw head, the phillips slot will strip out. Consider replacing these with same size allen head screws. Because the OEM screws have lock washers, be sure that the replacements do too or else use blue Locktite on the threads. It is not necessary to remove the throttle cables from the bracket unless they need major adjustment. If so then this may be a good time to do that too.
The TB sub-harness has four electrical connections to the rest of the bike:
* The grey 13P connector to the main harness outside the left frame by the coolant overflow bottle
* a black 2P connector to the cam pulse generator inside at the right front
* a blue 2P connector to the EVAP purge control solenoid on the right outside of the frame
* and the white 2P connector to the IAT sensor on top of the air filter housing, already disconnected at this point.
In addition, there is a rubber hose connecting the TB to the EVAP canister, two coolant hoses connecting to the SE thermal valve at the bottom and the fuel supply and return hoses to the secondary fuel tank. These hoses and the four electrical connectors mentioned above will have to be disconnected before the TB can be removed from the frame.
The SM says to drain the coolant for TB removal but just siphoning it out of the radiator is sufficient. The thermal valve connections are higher than the bottom of the radiator and there is no possibility of spillage. The coolant hoses are held to the thermal valve with spring clips that may be inadequate and the chances are good that you'll find coolant seepage in that area. If so, the clips should be replaced with good quality helical screw bands at reassembly. Be careful that the sharp end of the screw band doesn't rub against any of the many vacuum lines in the area.
The TB can now be levered off the insulators on the left and right side by using a heavy duty screw driver or small pry bar under the corner of the TB and against the left and right cylinder banks. Carefully apply pressure with a rocking motion and the TB will pop loose. If you're replacing the sub-harness, disconnect the remaining six connectors: the four 2P black connectors at the fuel injectors, the grey 3P connector at the MAP sensor and the 3P blue connector at the TP sensor while taking note of the wire routing. Reconnect and route the new harness in the same order. Note that the injector wires are marked with their respective cylinder numbers.
While the TB is off this is a good time to check all coolant hose connections under the rubber blanket and tighten any loose ones. Check and tighten if necessary the lower screw bands holding the insulators to the cylinder intake ports. You may also wish to lube the throttle cables as long as they are easily accessible.
Replace the throttle body
Lubricate the insulators with engine oil so the TB will slide in easier. Place the TB on top of the insulators then tip up onto its left side to reattach and secure the coolant hoses to the SE thermal valve. Lay the TB back on the insulators. Route the grey 13P connector of the sub-harness out under the left frame where it attaches to the main harness and connect it securely. Route and connect the 2P black connector to the cam pulse generator then route the wire and hose under the right frame to the EVAP canister; attach the hose and connect the 2P blue connector to the canister purge control solenoid. Lay the wire with the white connector loosely over the frame on the right rear; this will connect to the IAT sensor on top of the air filter housing later.
Inspect and make sure that the screw bands on the insulators are oriented correctly. After making sure that all connectors are secure and nothing is being pinched, push down on the right side of the TB to seat it into the insulators. Align the TB on the left side and apply pressure to seat it on the left side too. Tighten the screw bands to the specification in the SM.
If the sub-harness was replaced, route and connect the remaining six wires to the TB: the 4 injector wires, the Map sensor and the TP sensor. Insure that all are securely connected!
Reconnect the fuel return hose to the fuel pressure regulator. Reconnect the fuel inlet hose banjo to the fuel rail using the new washers. Tighten the retaining nut to the torque value specified in the SM.
Reattach the throttle cable bracket to the TB.
Replace the air filter housing
as per the directions in the SM. When replacing the lid, put the two screws closest to the steering head in their respective holes on the lid while it is off then put the lid on the base. Less chance for them to fall and disappear into the engine.
Replace the upper fuel tank
as per the directions in the SM. Use the new fuel joint hose and clips but be sure not to slide the hose on too far because then the tank will sit too far to the rear and the front mounting holes will not line up with the holes in the steering head.
Pete.
Last edited by a moderator: