
- Joined
- Dec 12, 2004
- Messages
- 1,282
- Age
- 76
- Location
- Weatherford, TX
- Bike
- '16 Versys 650LT
- STOC #
- 1134
Every time I've traveled through the West during the warm months, I've wished that I had a hydration system that I could use while ridding. I've seen some folks suggestion about using a camel back but that just wouldn'?t work for me. The air flow through my Aerostich is restricted enough as it is because of the Bohn back protector I wear. A camelback would be that much worse. An alternate commercial system I've seen has a small plastic jug and drink tube/bite valve that mounts at the spot where the passenger foot peg normally goes. It is for an FJR (http://www.skywaymotorcycleaccessories.com/store/ccp0-prodshow/personalHydrationSystem.html ) but I've no idea if it could be adapted to an ST1100. At any rate, at $135 (IIRC) it is more than I'd want to pay.
Last night I finally found the hydration solution I'd been looking for! While at Academy looking to just buy a water bladder to throw into a tail bag, I saw something I'd been looking for for quite some time... a little cooler just small enough to fit into my small tail bag. I grabbed that puppy then went running all over town trying to find everything else I needed to make it work. After four hours and 6 stores of various types, I managed to purchase everything I needed. Below is the jerry rigged, "hillbilly hydration system" I put together. It ain't purdy but I think it's a gonna work :
:
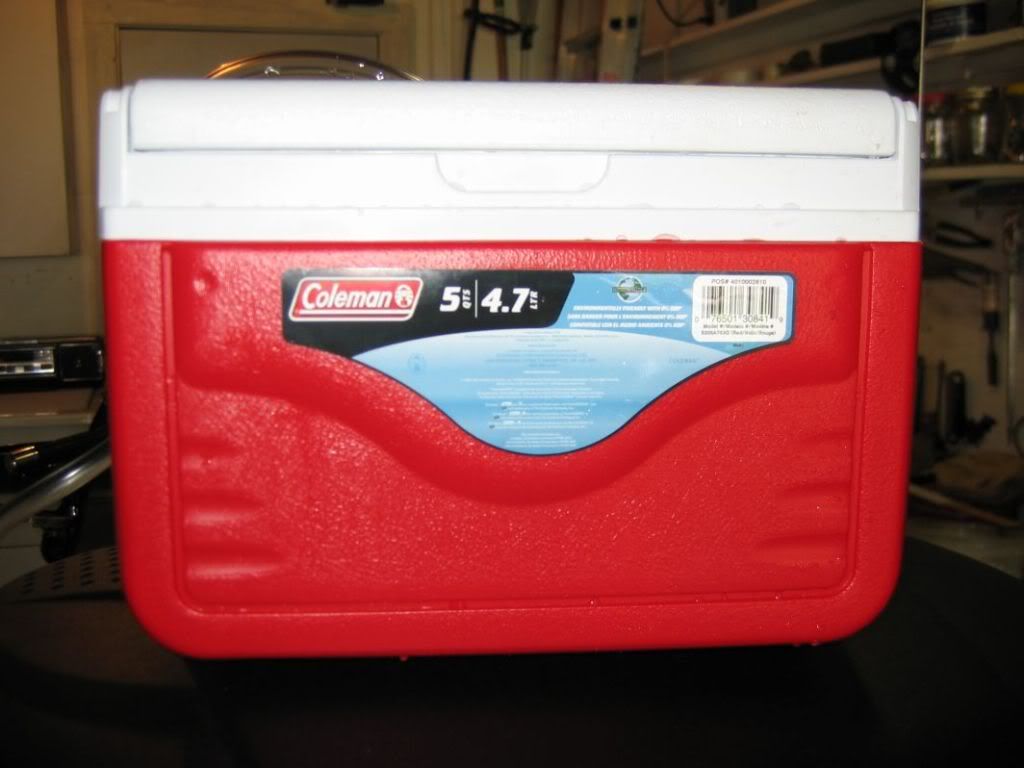
The "system" starts with a Coleman 4.5 quart cooler purchased at Academy :
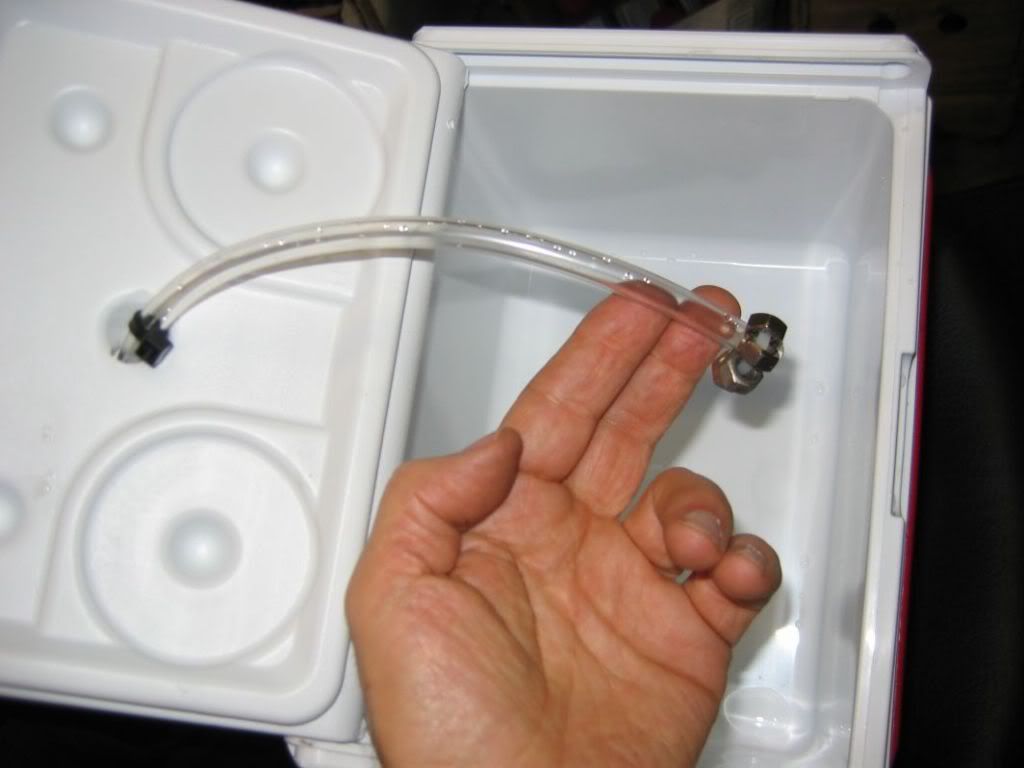
I drilled a hole through the lid and inserted a plastic tube that I later attached to a drinking tube & bite valve. The end of the tube is weighted with stainless steel nuts to keep the tube on the bottom of the cooler. A zip tie was used to secure the nuts and a large zip tie was used (black) to keep the tube from being pulled out of the lid:
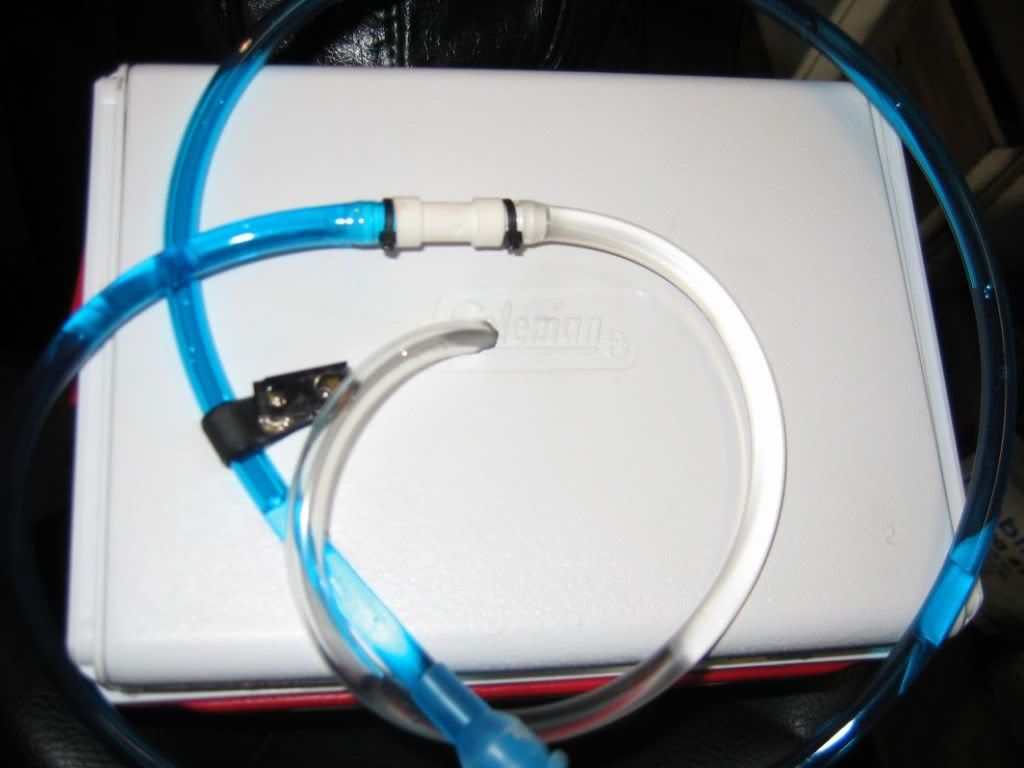
This picture shows the tube emerging from the top of the lid. The hole was drilled about 40 degrees from horizontal so that the tube would lay flat rather than fold over and restrict water flow. Notice that the clear tube is connected to the blue drink tube / bite valve combo (from REI) via a vacuum connector (clear 3/8" tubing & connector from Advanced Auto Parts). The drink tube as purchased was way too short so I added the 2' section of clear tube:
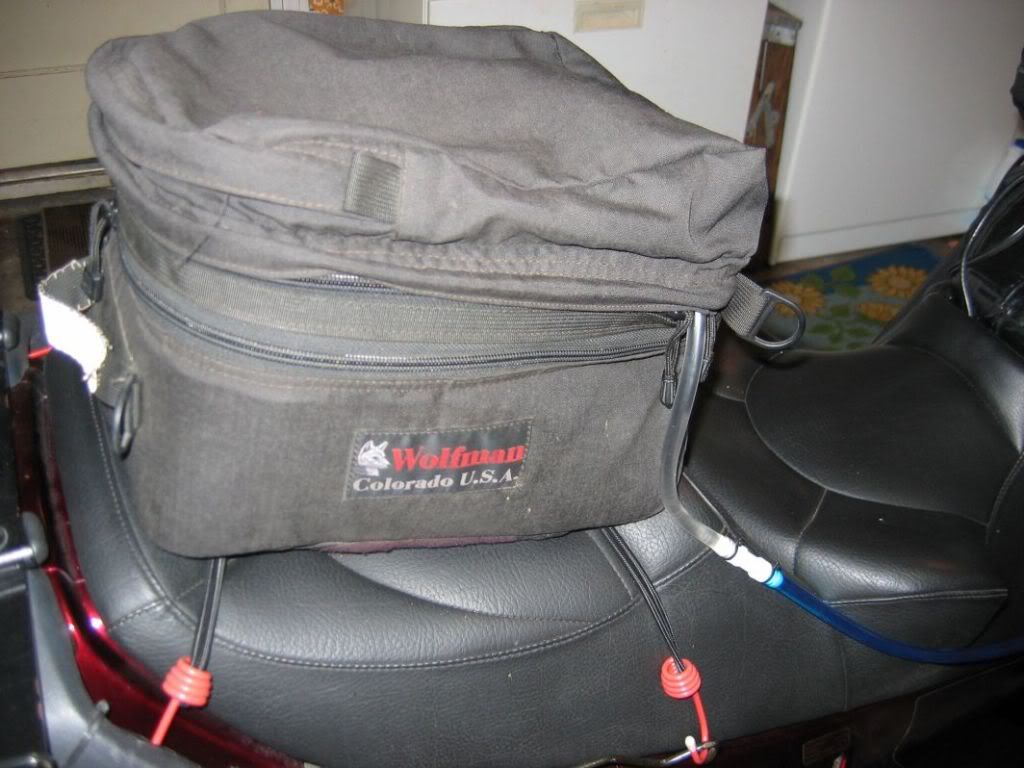
Note how the little cooler fits perfectly into this old tail bag I've had laying around for years:

This shot shows how the drink tube emerges from the tail bag:
Final shot shows the drink tube/bite valve attached to a retractable badge holder on my tank bag. That way I can take a drink and not have to take my eyes off the road to put it back after use. All I need to do now is fill that puppy with ice & water and GO RIDE!:

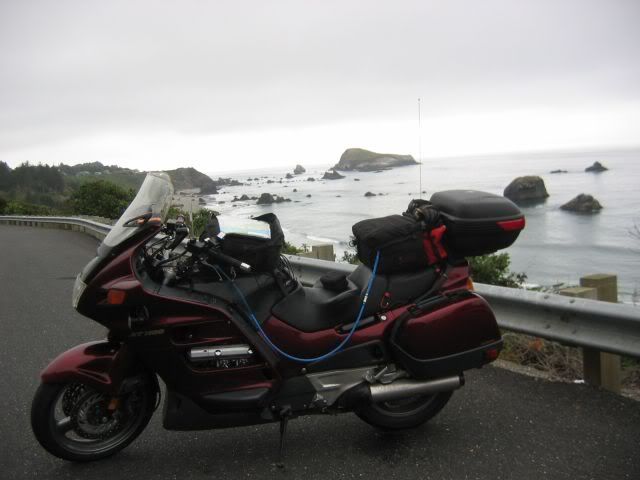
Edit 5/2014: Ran across a picture showing this system mounted and in use during a 2009 trip to Oregon:
Last night I finally found the hydration solution I'd been looking for! While at Academy looking to just buy a water bladder to throw into a tail bag, I saw something I'd been looking for for quite some time... a little cooler just small enough to fit into my small tail bag. I grabbed that puppy then went running all over town trying to find everything else I needed to make it work. After four hours and 6 stores of various types, I managed to purchase everything I needed. Below is the jerry rigged, "hillbilly hydration system" I put together. It ain't purdy but I think it's a gonna work
:The "system" starts with a Coleman 4.5 quart cooler purchased at Academy :
I drilled a hole through the lid and inserted a plastic tube that I later attached to a drinking tube & bite valve. The end of the tube is weighted with stainless steel nuts to keep the tube on the bottom of the cooler. A zip tie was used to secure the nuts and a large zip tie was used (black) to keep the tube from being pulled out of the lid:
This picture shows the tube emerging from the top of the lid. The hole was drilled about 40 degrees from horizontal so that the tube would lay flat rather than fold over and restrict water flow. Notice that the clear tube is connected to the blue drink tube / bite valve combo (from REI) via a vacuum connector (clear 3/8" tubing & connector from Advanced Auto Parts). The drink tube as purchased was way too short so I added the 2' section of clear tube:
Note how the little cooler fits perfectly into this old tail bag I've had laying around for years:
This shot shows how the drink tube emerges from the tail bag:
Final shot shows the drink tube/bite valve attached to a retractable badge holder on my tank bag. That way I can take a drink and not have to take my eyes off the road to put it back after use. All I need to do now is fill that puppy with ice & water and GO RIDE!:
Edit 5/2014: Ran across a picture showing this system mounted and in use during a 2009 trip to Oregon:
Last edited: