OP
OP
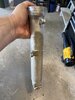
Already have the DIY seal mates from the other bike. They did nothing for STella, plus she needed a lot of fluid replaced.I replaced the fork springs and rear shock on my 1300 last year. I ordered springs from Traxxion Dynamics and picked up new bushings and seals and oil from the dealer. It was perfect timing to adjust the oil weight as well. The process was pretty simple as well.
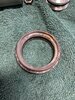
Looks like you have it all under control. As someone mentioned about the Seal Buddy. You should make yourself one. It's easy. I've used mine a few times because I find myself on gravel roads. Any debris really is a problem. Wondering if your proximity to the ocean has anything to do with the corrosion?
My two cents.
Dave
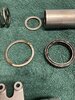
All the parts are OEM except for the upgraded springs I ordered.
Got a set of Racetech 1.0kg ones from Fortnine.
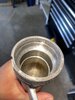
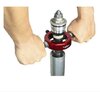
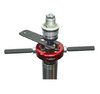
Working on installing them tonight but adding in the spacers for the preload is proving a challenge by myself.
I've got 2 spacers in but need at least 2-3 more. Using the 12mm wrench as a pry is proving to be a challenge with the preload washers. I need to come up with a way to hold the OEM spacer snugly and apply a downward force so I can put more preload washers in and then get the cap back on.
The Racetechs call for 25mm of preload but I'm only getting about 20 currently.
")