CYYJ
Michael
Hi All:
This story can be classified as "A lesson from the School of Hard Knocks".
A few weeks ago, I took the cylinder head covers off my ST 1300 to do valve clearance measurements. While I had the covers off, I took the cap that covers the PAIR (Pulse Secondary Air Injection) reed valves to inspect the reed valves and ensure that they were not stuck or blocked. I found both the PAIR reed valves and the perforated port plates under the PAIR reed valves to be very dirty, just covered in carbonized gunk.
Closer inspection of the PAIR reed valves revealed that portions of the valve around the perimeter of the reed valve opening had been coated with some kind of anti-stick compound by Honda - maybe teflon, maybe molybdenum, I don't know, but very similar to the coating on the inside of the throttle bodies. That meant that I couldn't use really harsh chemicals like gasket remover to clean them.
My attempts to clean the PAIR reed valves with generic solvent and a toothbrush helped a bit, but there was still a lot of gunk stuck to the valves. I noticed that a single small cross-head screw held the PAIR reed valve assembly together, so, I thought the obvious next step would be to remove the screw, take the reed valves apart, and clean the pieces individually. The screw put up a lot of resistance when I turned it, but eventually broke free. I thought the resistance came from the gunk coating the screw. Wrong. The resistance was there because the threads on that screw are deliberately deformed in the manufacturing process, likely to comply with emission control 'anti-tamper' legislative requirements. The resistance I felt was the deformed end screw coming up against the plate, and the sudden drop in resistance was the result of the screw breaking in half, leaving the last millimeter jammed in the plate.
Net result: I had to buy four new PAIR reed valves at a cost of about $70 US plus shipping. I hope the EPA and the atmosphere appreciate my efforts. The photos below tell the story.
Michael

The dirty PAIR reed valves & port plates

A dis-assembled reed valve (don't try to take them apart!)

Note the intentionally deformed end of the screw on a new PAIR reed valve

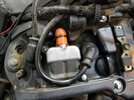
New PAIR reed valves and (cleaned-up) port plates in place

This story can be classified as "A lesson from the School of Hard Knocks".
A few weeks ago, I took the cylinder head covers off my ST 1300 to do valve clearance measurements. While I had the covers off, I took the cap that covers the PAIR (Pulse Secondary Air Injection) reed valves to inspect the reed valves and ensure that they were not stuck or blocked. I found both the PAIR reed valves and the perforated port plates under the PAIR reed valves to be very dirty, just covered in carbonized gunk.
Closer inspection of the PAIR reed valves revealed that portions of the valve around the perimeter of the reed valve opening had been coated with some kind of anti-stick compound by Honda - maybe teflon, maybe molybdenum, I don't know, but very similar to the coating on the inside of the throttle bodies. That meant that I couldn't use really harsh chemicals like gasket remover to clean them.
My attempts to clean the PAIR reed valves with generic solvent and a toothbrush helped a bit, but there was still a lot of gunk stuck to the valves. I noticed that a single small cross-head screw held the PAIR reed valve assembly together, so, I thought the obvious next step would be to remove the screw, take the reed valves apart, and clean the pieces individually. The screw put up a lot of resistance when I turned it, but eventually broke free. I thought the resistance came from the gunk coating the screw. Wrong. The resistance was there because the threads on that screw are deliberately deformed in the manufacturing process, likely to comply with emission control 'anti-tamper' legislative requirements. The resistance I felt was the deformed end screw coming up against the plate, and the sudden drop in resistance was the result of the screw breaking in half, leaving the last millimeter jammed in the plate.
Net result: I had to buy four new PAIR reed valves at a cost of about $70 US plus shipping. I hope the EPA and the atmosphere appreciate my efforts. The photos below tell the story.
Michael

The dirty PAIR reed valves & port plates

A dis-assembled reed valve (don't try to take them apart!)

Note the intentionally deformed end of the screw on a new PAIR reed valve

New PAIR reed valves and (cleaned-up) port plates in place


