ChucksKLRST
Team Colorado
Checking your Drive Flange Bearings on your ST1300
Here is a pictorial for checking your Drive Flange Bearings on your ST1300.
Photo 1 Ice pick method to remove large Snap Ring.
Photo 2 Screwdriver method to remove large Snap Ring.
Photo 3 Snap Ring pliers is the preferred method for removal.
Photo 4 Carefully work ring out of grove. Do not force or bend.
Photo 5 Snap ring removed
Photo 6 Clean off spline with rag.
Photo 7 Lay wheel over about 2 inched above floor and gently drop on floor. Flange assy will come out.
Photo 8 Flange assy out of wheel, laying on floor.
Photo 9 Flange assy with rubber drive cushions
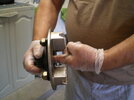
Photo 10 Check bearing by turning with your finger. Should be smooth turning.
Photo 11 Check other side the same way.
Photo 12 Inspect O-ring on Wheel.
Photo 13 Inspect O-ring on Flange.
Photo 14 Inspect rubber drive cushions
Photo 15 apply Honda Molly to wheel bearing face.
Photo 16 install Rubber drive cushions in wheel
Photo 17 Lay wheel in your lap so as not to damage disk and install Drive Flange into wheel.
Photo 18 Install snap ring into grove in wheel.
Photo 19 Inspect and make sure snap ring is in grove all around wheel
Photo 20 apply Honda Molly to Flange Splines in preparation for reinstallation of wheel on to rear drive.
This whole procedure takes about 15 to 20 min. to do. It is well worth the piece of mind. My bearings were good this time. Next time if they are bad I will do a bearing replacement episode.
Here is a pictorial for checking your Drive Flange Bearings on your ST1300.
Photo 1 Ice pick method to remove large Snap Ring.
Photo 2 Screwdriver method to remove large Snap Ring.
Photo 3 Snap Ring pliers is the preferred method for removal.
Photo 4 Carefully work ring out of grove. Do not force or bend.
Photo 5 Snap ring removed
Photo 6 Clean off spline with rag.
Photo 7 Lay wheel over about 2 inched above floor and gently drop on floor. Flange assy will come out.
Photo 8 Flange assy out of wheel, laying on floor.
Photo 9 Flange assy with rubber drive cushions
Photo 10 Check bearing by turning with your finger. Should be smooth turning.

Photo 11 Check other side the same way.
Photo 12 Inspect O-ring on Wheel.
Photo 13 Inspect O-ring on Flange.
Photo 14 Inspect rubber drive cushions
Photo 15 apply Honda Molly to wheel bearing face.
Photo 16 install Rubber drive cushions in wheel
Photo 17 Lay wheel in your lap so as not to damage disk and install Drive Flange into wheel.
Photo 18 Install snap ring into grove in wheel.
Photo 19 Inspect and make sure snap ring is in grove all around wheel
Photo 20 apply Honda Molly to Flange Splines in preparation for reinstallation of wheel on to rear drive.
This whole procedure takes about 15 to 20 min. to do. It is well worth the piece of mind. My bearings were good this time. Next time if they are bad I will do a bearing replacement episode.
Attachments
-
 IMGP1418r.jpg106.8 KB · Views: 230
 -
 IMGP1419r.jpg98.8 KB · Views: 206
 -
 IMGP1420r.jpg83.7 KB · Views: 197
 -
 IMGP1421r.jpg118.2 KB · Views: 193
 -
 IMGP1422r.jpg73.3 KB · Views: 190
 -
 IMGP1423r.jpg85.8 KB · Views: 203
 -
 IMGP1424r.jpg65 KB · Views: 203
 -
 IMGP1426r.jpg98.8 KB · Views: 212
 -
 IMGP1425r.jpg70.5 KB · Views: 206
Last edited by a moderator:


