Don't be surprised if your victory is short lived. 
You should spend some time reading Mr. Heaths write ups on avoiding the pitfalls etc.
Several things wrong with what you did, and a couple quick explanations of why it was probably not a long term fix.
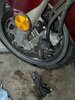
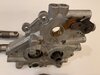
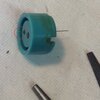
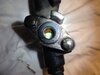
1. The factory service manual warns you not to take your SMC apart, the reason being, is that it is measured and set at the factory to work correctly.
The small return port hole rests between the two seals, and its possible to get the length wrong and block the flow of fluid.
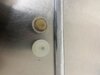
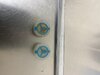
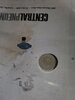
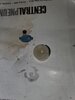
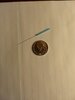
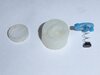
2. The small screen cartridge on the back side of the SMC inlet has an O-ring (not supported by Honda) and a nylon mesh type filter system that is easily torn or damaged, and between the
screens of this cartridge, there is a very small hole, that clogs and blocks the return port flow etc.
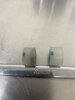
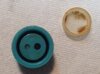
3. Unless you removed this cartridge, the HP seal, O-ring, and cleaned it with an ultrasonic cleaner (which still only works about 50% of the time) you more than likely simply moved the dirt inside
the screen cartridge around, and as soon as it settles, your problem will return again.
There have been other members who have tried to clean and rebuild these units only to have the SMC fail again a short time later.
If the SMC shows signs of failure, its best to replace it with a complete, measured, correctly put together assembly, rather than hope you got it back together correctly etc.

You should spend some time reading Mr. Heaths write ups on avoiding the pitfalls etc.
Several things wrong with what you did, and a couple quick explanations of why it was probably not a long term fix.
1. The factory service manual warns you not to take your SMC apart, the reason being, is that it is measured and set at the factory to work correctly.
The small return port hole rests between the two seals, and its possible to get the length wrong and block the flow of fluid.
2. The small screen cartridge on the back side of the SMC inlet has an O-ring (not supported by Honda) and a nylon mesh type filter system that is easily torn or damaged, and between the
screens of this cartridge, there is a very small hole, that clogs and blocks the return port flow etc.
3. Unless you removed this cartridge, the HP seal, O-ring, and cleaned it with an ultrasonic cleaner (which still only works about 50% of the time) you more than likely simply moved the dirt inside
the screen cartridge around, and as soon as it settles, your problem will return again.
There have been other members who have tried to clean and rebuild these units only to have the SMC fail again a short time later.
If the SMC shows signs of failure, its best to replace it with a complete, measured, correctly put together assembly, rather than hope you got it back together correctly etc.