Slydynbye
Will ride for Pie
Double check the Wheel Bearings for any resistance or Notchy movement. That Rubber MIGHT have gotten inside them.

John, I won't be able to get back to the bike until this weekend. I'll clean everything up then. I still haven't gotten a good look at the female splines on the final drive yet, I'm just hoping that they are still in decent shape, but I'll let you know.Ahem... What do the female splines in the Final Drive look like? That’s where the worst of the wear will be evident. That is the most expensive damage to resolve.
John
Yeah, that kind of makes sense.Do I remember some mention a long while ago of loosening the 4 nuts holding the donut to the swingarm, bolting the wheel/brake together, then tightening the 4 nuts again? Something about ensuring best alignment across the width of the axle.....?
I thought this was done only when you took the swingarm off? Or is this insurance in case previous owner had messed around in this area?Do I remember some mention a long while ago of loosening the 4 nuts holding the donut to the swingarm, bolting the wheel/brake together, then tightening the 4 nuts again? Something about ensuring best alignment across the width of the axle.....?
Yeah, since the axle is keeping the rear wheel perpendicular to the drive pumpkin this wouldn't seem to be something that can get very far out of alignment in the first place. There might be a little slop in the path the axle takes through the pumpkin, but not enough that it would allow the splines to mis-match enough to cause damage.I thought this was done only when you took the swingarm off? Or is this insurance in case previous owner had messed around in this area?
Edit: Here is a link to the procedure, just in case: http://www.st-riders.net/index.php?topic=3748.0
Those rubbers should be tight in there, as tight as a camels arris in a sandstorm, if you can easily pull the rubbers out they're toast.I did remove the pumpkin so I could get at everything and clean it up, the axle through the bearings and swing arm should be pretty good since it's its all meshed at the time of assembly.
I guess you would have to make absolutely sure that you're not pulling any gaps closed once some items are already torqued to specs. Especially where the drive mounts to the swing arm. But as of yet I haven't seen anything that looks like Honda made something out of whack.
I don't have my manual here, so I can't see what that has for an assembly sequence.
hmm... interesting concept/idea, but I always saw the aluminum as "sacrificial" parts... better those wear off then the 5 steel pins on the pretty expensive drive spline...Or you can refurbish the aluminum. You're at Honda's mercy for the rubber parts. I think I got the pictures from Han's site.
bushings of bronze or brass will still be softer than the steel pinshmm... interesting concept/idea, but I always saw the aluminum as "sacrificial" parts... better those wear off then the 5 steel pins on the pretty expensive drive spline...
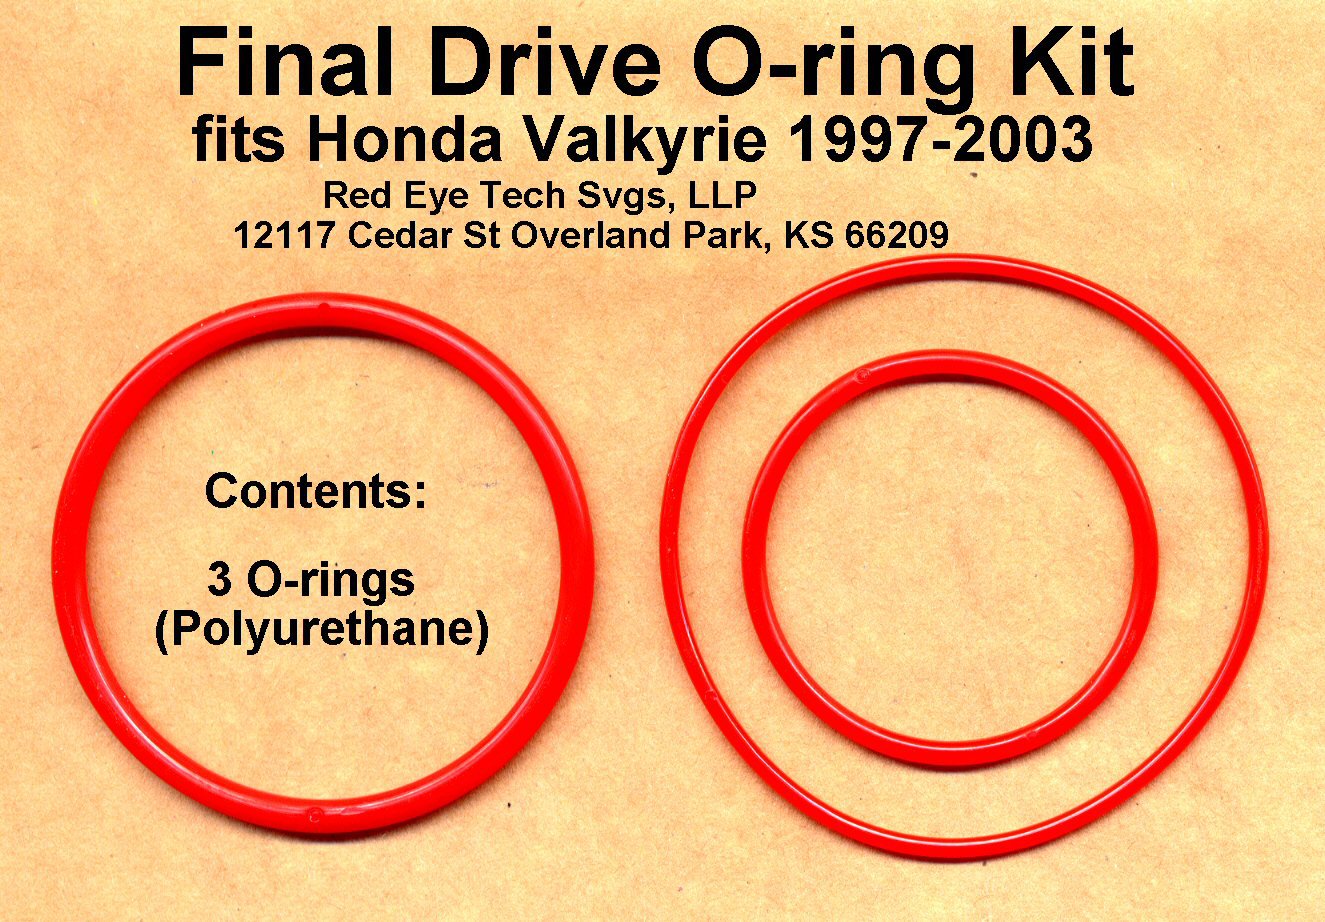
I upgraded to Polyurethane ones...Do we know what material the OEM O-rings are made of? Buna-N or Viton?
They don't mention ST1100 or ST1300.I upgraded to Polyurethane ones...
Final Drive O-rings for Valkyrie, Polyurethane, GL1500C GL1500CD GL1500CT GL1500CF
Three o-rings for the final drive of the Honda Valkyrie 1997-2003 GL1500C GL1500CD GL1500CF GL1500CT These o-rings are made of a very tough polyureredeye.ecrater.com
Way more durable...
I upgraded to Polyurethane ones...
Final Drive O-rings for Valkyrie, Polyurethane, GL1500C GL1500CD GL1500CT GL1500CF
Three o-rings for the final drive of the Honda Valkyrie 1997-2003 GL1500C GL1500CD GL1500CF GL1500CT These o-rings are made of a very tough polyure
Way more durable...
Are these harder than oem, Or still pretty flexible?I wasn't pleased with the polyurethane o-rings. Ran them for one tire and found they had flat-spotted and didn't appear to be sealing well. I went back to OEM o-rings and will change them every time.