
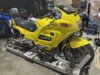
I bought this YELLOW ST1100 late last year with the idea of a Winter project. Boy did I get that.
The list of needs was pretty straightforward:
* New Back Tire (replaced the front as well so they were matching)
* Both shocks were leaking oil, so I rebuilt both of them
* Headlight LED upgrade
* Exhaust leak - I ended up replacing the headers/collector and of course fitting new copper gaskets
* New Air Filter
* Fresh oil/filter
* Valve cover gaskets
* New brake pads all around, new brake fluid.
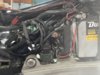
The PO had told me that the oil leak was from the valve cover gaskets. And, yes, part of it was. However, the majority of the oil was coming from - you guessed it - the wire seal on the stock 28A alternator. Although it was running fine, I knew it would be penny-wise but pound-foolish to not replace it with a 40A. Found a plate and "kit" on eBay, and set about collecting the other parts necessary. The kit came with the alternator bearings, unfortunately the large one was damaged and the vendor would not honor a replacement.
Contacted John O to see about borrowing The Kit. I received it, but shortly afterwards it was needed by another ST'er and it was too cold to work in my garage here in Maine. When the other user was done, he sent it back to me.
There are plenty of how-to's and write-ups on this procedure, so I'll just add my own observations:
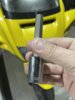
* Although I was super-careful to line everything up properly, the Lewis Pin did not work for me - couldn't dislodge it despite a considerable tug (and several "test tugs" on the bench to gauge how much force would be necessary. Instead, I used a 12mm Hex in the same manner as the Frenstick to first engage the outer teeth, then rotate the works to align the second set and it slipped right in. Tight fit, but the bolts snugged it right up.
* Having a friend along for many of the steps would be a big help - especially with the drive shaft - but it can be done by one person.* I purchased a motorcycle ramp/table last Summer and I cannot imagine doing this job without it. I guess my motorcycle/ATV jack would also get it up off the floor, but not nearly as stable and removing a LOT of weight off the back might unbalance things to the point of tipping forward.
* I didn't find the wiring instructions to be very well-organized, but all the information is there if you read EVERYTHING and remember that you're going to be removing most of the wiring associated with the existing Voltage Regulator/Rectifier. I bought a salvage Main Fuse from a later ST and it bolted right up and looked like it belonged there.
* There will be a TON of fasteners, bolts, nuts, etc. As you remove components, put the fasteners in a baggie and label it with a sharpie!
* Yes you have to remove the swingarm. Yes you have to remove the gas tank. Yes, you have to remove most of the Tupperware. It's not hard, just tedious.
The list of needs was pretty straightforward:
* New Back Tire (replaced the front as well so they were matching)
* Both shocks were leaking oil, so I rebuilt both of them
* Headlight LED upgrade
* Exhaust leak - I ended up replacing the headers/collector and of course fitting new copper gaskets
* New Air Filter
* Fresh oil/filter
* Valve cover gaskets
* New brake pads all around, new brake fluid.
The PO had told me that the oil leak was from the valve cover gaskets. And, yes, part of it was. However, the majority of the oil was coming from - you guessed it - the wire seal on the stock 28A alternator. Although it was running fine, I knew it would be penny-wise but pound-foolish to not replace it with a 40A. Found a plate and "kit" on eBay, and set about collecting the other parts necessary. The kit came with the alternator bearings, unfortunately the large one was damaged and the vendor would not honor a replacement.
Contacted John O to see about borrowing The Kit. I received it, but shortly afterwards it was needed by another ST'er and it was too cold to work in my garage here in Maine. When the other user was done, he sent it back to me.
There are plenty of how-to's and write-ups on this procedure, so I'll just add my own observations:
* Although I was super-careful to line everything up properly, the Lewis Pin did not work for me - couldn't dislodge it despite a considerable tug (and several "test tugs" on the bench to gauge how much force would be necessary. Instead, I used a 12mm Hex in the same manner as the Frenstick to first engage the outer teeth, then rotate the works to align the second set and it slipped right in. Tight fit, but the bolts snugged it right up.
* Having a friend along for many of the steps would be a big help - especially with the drive shaft - but it can be done by one person.* I purchased a motorcycle ramp/table last Summer and I cannot imagine doing this job without it. I guess my motorcycle/ATV jack would also get it up off the floor, but not nearly as stable and removing a LOT of weight off the back might unbalance things to the point of tipping forward.
* I didn't find the wiring instructions to be very well-organized, but all the information is there if you read EVERYTHING and remember that you're going to be removing most of the wiring associated with the existing Voltage Regulator/Rectifier. I bought a salvage Main Fuse from a later ST and it bolted right up and looked like it belonged there.
* There will be a TON of fasteners, bolts, nuts, etc. As you remove components, put the fasteners in a baggie and label it with a sharpie!
* Yes you have to remove the swingarm. Yes you have to remove the gas tank. Yes, you have to remove most of the Tupperware. It's not hard, just tedious.
