dash mounted farkle wiring

Josh_ST

I love my 2 wheeled therapy machine!
Site Supporter
Joined
Feb 21, 2022
Messages
283
Location
Marysville, OH
Bike
2003 Honda ST1300
2024 Miles
000237
I'm curious as to how others have dealt with dash mounted farkle wiring. I have made the dash shelf, and have a USB/Volt meter combo, Garmin GPS, and a TPMS gauge mounted on mine, and a RATS NEST of wires to go along with it all! I've tried to neatly bundle and zip tie up the mess, but it's still hideous! How have others dealt with this wiring nightmare? Did you terminate things inside the headlight fairing, or outside? Power connectors you used? I had considered going to Anderson power pole connectors, as I'm a HAM operator and use them already on my radio power connections. Or EC3 or XT30 connectors from the RC car field.

dash wiring1.jpg

dash wiring2.jpg
 

STRider

Site Supporter
Joined
Mar 17, 2020
Messages
1,114
Age
64
Location
Oregon
Bike
2012 ST1300A
STOC #
50
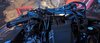
Well, unless you choose to shorten the wiring for your GPS as an example, you have no choice but to zip tie and bundle as I see you've already done. I've done the same, as I suspect many others have as well.

But to attach them to the 1300's wiring I used the OEM Quartet Harness. That link is to a site catering to the police accessories for the ST1300 which has generally had it available to order, though at the moment they don't. They come and go on various sites, so if you have the time and are patient you should be able to source one. Here's a link to the installation instructions on my Google Drive. Honda Quartet Harness & Power Plug Installation Instructions_2

It allows you to plug into an unused 9-pin connector below the left fairing pocket and attach up to 4 accessories with combinations of switched and unswitched power feeds. Honda intended these to be used for their accessory heated grips, accessory power outlet (typical cigarette lighter plug socket) and radio.

I sourced a set of Hitachi connectors and terminals from Amazon to connect the wiring from my GPS, heated grips, and USB power outlet in place of the socket. 2 3 4 6 9 Pin Plug Housing Pin Header Crimp Electrical Wire Terminals Connector

Stay within the expected power levels for these accessories and you should be fine regarding loads.

Go beyond this and you'll want to consider a third party wiring block like the PC-8 Fuse Panel from Eastern Beaver or the one by Fuzeblock.
 
Last edited:
OP
OP
Josh_ST

Josh_ST

I love my 2 wheeled therapy machine!
Site Supporter
Joined
Feb 21, 2022
Messages
283
Location
Marysville, OH
Bike
2003 Honda ST1300
2024 Miles
000237
I guess I'm just paranoid to terminate them deep in the fairing, should I need to change a fuse, or unplug it. But if it blows a fuse, it's likely toast anyways.

I bought the Hitachi kit and crimper a few months back to replicate a "Quartet Harness" based on one of your threads, since they are unobtanium. Thanks for your input. I think the only other powered doo-dad I might add would be heated grips. That might be in the winter, as I picked up a MC Cruise. I need to de-install the Rostra unit and the GW controls and go back to the stock right side controls and install a new throttle tube, grips and dry dogs.
 

Willsmotorcycle

Ride more...
Site Supporter
Joined
Oct 26, 2020
Messages
1,764
Location
Makefield Highlands PA
Bike
2016 ST1300P
2024 Miles
002771
@STRider Is right on, as are you with the build your own with hitachi. I put all my wires "under" the left mirror. For the most part I just have to take off the front inner cowl to fix something. The fairing off to run it all is much easier, also you have access from removing the top dash cover. There is plenty room under the left mirror, less under the right. Wrapped nicely and zip tied to the fairing stay.

I used hitachi connectors to my wires and plugged right into the quartette. Heated grips, Phone mag charger, Garmin XT, probably something else, and there is one circuit left I think.

You can see where I snuck the wires through, filed a bit on the inner part of the dash.

1665427125771.png
 

STRider

Site Supporter
Joined
Mar 17, 2020
Messages
1,114
Age
64
Location
Oregon
Bike
2012 ST1300A
STOC #
50
I guess I'm just paranoid to terminate them deep in the fairing, should I need to change a fuse, or unplug it. But if it blows a fuse, it's likely toast anyways.

I bought the Hitachi kit and crimper a few months back to replicate a "Quartet Harness" based on one of your threads, since they are unobtanium. Thanks for your input. I think the only other powered doo-dad I might add would be heated grips. That might be in the winter, as I picked up a MC Cruise. I need to de-install the Rostra unit and the GW controls and go back to the stock right side controls and install a new throttle tube, grips and dry dogs.
Yeah, I can totally understand your paranoia. I applaud your homemade Quartet Harness too. If you have the connectors, it's not too hard to make except for the number of leads you need to double up in a couple of the terminals.

Not to bad-mouth the Rosta or Audiovox cruise controls, but I think you'll love the MC Cruise. I think it gets universal praise and approval around here, and it's not just to justify the price we paid for it. It really is impressive.

One of my few criticisms of the MC Cruise for the 1300 is that the button function pairings - SET/ACC and RES/DEC are opposite of what years of Honda and Acura ownership have conditioned me for. Tony Guymer at MC Cruise gave me instructions for how to exchange the assignment of those functions between the buttons to SET/DEC and RES/ACC like on my cars! Let me know and I can share that with you too. Let me know if you'd like some labels to remind you of the button functions as the newer control pods ditched the text for some not-so-obvious symbols (this picture was pre-button assignment update, btw).


20210918_134612_resize.jpg
 
Joined
Sep 4, 2013
Messages
8,196
Location
Cleveland
Bike
2010 ST1300
I installed a powerlet plug in an aluminum cover that duplicated the plastic that goes between the handlebars. I machined this cover out of a chunk of aluminum (ok. lets dress that up - it was machined out of billet aluminum) using a milling machine and belt sander. I basically duplicated the cover. The powerlet was centered over the steering post and the wiring was fed up this hollow pipe from below. I had a Garmin 590 and I opened up the holder and removed all of the wires for speakers, cb, etc. leaving only two - black and red for power. After pulling the wires out of the sheath, I installed a male powerlet plug on the end of the now altered and shortened harness. The GPS base was mounted dead center to a RAM ball on a metal strip attached to the top of the dash. The now shortened and modified power cord arced around the instrument panel down to the powerlet.

I also had installed powerlet #2 and #3 on the flat area below the glove boxes, one right, one left. When I used my cell phone, it sat in an X-grip RAM holder and grabbed on to another of the 3 balls on the bar atop the dash. A power cord for my phone looped around one side and down past the glove box to a plug in adapter for USB. The FOBO app took care of my TPMS. I thought about a voltmeter and would have installed that below the glove boxes.

There is no way around a rats nest of wires if you are not willing to cut off extra length. I dithered a lot but eventually came around to the need to get out the wire cutters.
 
Last edited:
Top Bottom