THis is the one to which I was referring - I've sent it as a Private Message as it is a lift from a Honda document, so not really for publishing on Joe's website - It is 5x larger than this reduced version and is crystal clear. I think it is USA 2003-2004.
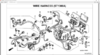
The other diagrams are the ones like this
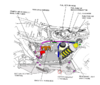
Every now and then when I'm feeling that I can't concentrate on anything, I get out my colouring book and brushes, stick my tongue out of the corner of my mouth and do a bit of colouring in.
There is no single diagram for the harness - but you can always spot it in most diagrams - its in the general section chapter 1 from about Page 1-28 onwards - if the one I gave you was the one that I have as a pdf file. I think it will be. It is the cable that shown as spiral wound - in the above diagram it is labelled and shown crossing over the lower fuel tank.
And that gives a clue. Most of it is easily accessible, and it has to have been fitted after the lower fuel tank. It goes to the rear on the right hand side of the bike, crosses the fuel tank and goes up the spar under the upper fuel tank. You can see the 'lined' cable. I think that is the only one that they illustrate with those wide cross hatching - so the main harness is easy to spot in the other diagrams.
PM me your email address - I have a few things that you will find handy - including all of the microfiche images put together in a pdf with all of those linked arrows eg --> E35 hyperlinked to the appropriate page. So it is is easy to flick from one diagram to the fitted part shown on another diagram. And back again. It is too big to send as an attachment, but I could use one of those drop off and pick up sites. But it can't be this week. I've no time left. I've removed the part numbers though. But I also have the Parts Catalogue for the 2003/2004 models. Found that online somewhere. I don't use that nearly as much as the interactive pdf version that I made from it though.
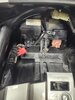
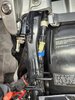
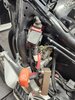
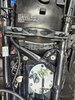
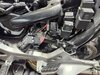
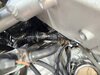
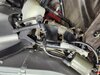
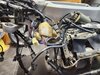
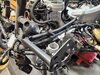
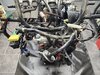
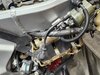
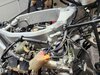
And yes - thank you for the horn - I did say, but it took me a while before I fitted it, that was a brilliant surprise. The horn was fitted - in more or less the same place as the original. I had to change the angle of the supporting bracket and although securely bolted - it is only one bolt - so it has a couple of thick cable ties to stop it wandering. The problem was getting that extra bulk between the inner and outer faring. But it fits beautifully, and has its own chunky power cable and relay operated by the original horn button. I'm not someone to just throw in an extra cable - I hate the mess. I have one single additional connection to the battery all nicely protected and fused to feed my hron and ancilliary equipment - through 2 relays (Ign & acc) and distribution fuses.
VERY effective - although I think it makes me jump more than anyone else, nearly everytime I use it - which isn't very often which is why it catches me out. But it has proved invaluable on motorways for alerting the driver that doesn't do a shoulder check before moving out - ie most of them, far too many times. They get back into line pretty quickly "where the hell did that come from ?"
"Right where I was sir - where you were supposed to have checked".
Check your PM. Post me a very brief reply in a couple of days so that I pick it up when I get back to remind me.

") .
.