Now I have something "new" to me... and a new project

Joined
Feb 25, 2016
Messages
4,784
Location
Northumberland UK
Bike
VStrom 650
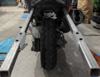
All kind of important things are bolted on vehicles. How are your engine, wheels and forks held on? How are tow bars fitted to cars? What about that prop shaft coupling? Plus just about every motorcycle subframe is bolted to the main frame. Nuff said.
What is important is to use the correct size and strength. Plus the correct locking nuts.
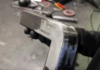
Bolts are good, they're everywhere. Unless you intend pulling 40 tons and never carry out inspection, keep it simple. A great way to check for tightness, either a tap with a light hammer or a dedicated torque checker paint. Or both.
Upt.

By the way the semi trailer hitches...yes....bolted. Or they were.
 
Joined
Sep 4, 2013
Messages
8,196
Location
Cleveland
Bike
2010 ST1300
I worked with a certified welder, who thought “pretty” was better than strength. His welds looked like machine welded joints, but would break off, at the first hammer blow. We kept him away from critical welds.
His current was too low. A now deceased buddy once told me that you get 0.001" of penetration per amp. I don't know if that is true, but higher amps mean more penetration. Sounds to me like he was laying the welds on the surface and they simply popped off. I've done that, but learned to follow the chart on the machine.
 
OP
OP
rjs987

rjs987

Robert
Site Supporter
Joined
Sep 25, 2009
Messages
3,056
Age
68
Location
West Des Moines, IA
Bike
2022 Kymco AK 550
2024 Miles
001059
STOC #
8058
I do know that there are many many parts that are bolted rather than welded. There is usually always a very good reason to use bolts instead of welds. Most common is to be able to more easily replace. Engines and frame parts do need to be replaceable in some circumstances and breaking a weld to do that would be worse than the slight compromise of using bolts. I do remember back when I bought my Gold Wing GL1500 the new (at the time) GL1800 bikes were just getting on the road around 2002. A year or two later I was hearing all sorts of issues with the bottom of the main frame welds cracking and breaking near the swing arm. There was a recall to fix that.

I guess I am leaning more to using bolts for that end plate now. Simply for the reason that I may have to remove the hitch frame at some point.
I am still thinking of using M8 stainless bolts/nuts/washers since both the frame tubes and plate are stainless. The plate is 4 inches high so that would be what is bolted to the frame tubes on each side. I would use two bolts on each side.
Would that be good? Or should I be using M10 bolts/nuts/washers or make it 3 bolts on each side in the 4 inch sections? I would think 3 bolts each side would be too many for a 4 inch plate.

Maybe weld a bar on each side of the plate that would fit snug beside the inner side of each tube as a guide or stopper to reinforce from lateral forces.

To use bolt-on solution, he should use 6” long square sleeves that slide over the bare square tubing ends. Use 2x sets of 8mm bolts per side drilled vertically all way through both sleeves and beams for double-shear loading. Once those 2 sleeves are done and bolted into final position, then mark and weld the connecting piece onto them that holds receiver.
Why 6" long sleeves? And what do you mean to drill the bolts "vertically" when the tubing ends are vertical? Wouldn't it really be to drill the bolts in horizontally (either front to back or side to side)?

Additional note: I WAS thinking of using lock washers but those are proven to be ineffective in many cases. Perhaps better to use Loctite since that will coat the threads and provide some corrosion protection in addition to locking the bolt/nut better than a lock washer.
 
Joined
Aug 11, 2013
Messages
3,559
Location
kankakee
Bike
R1200rt
I do know that there are many many parts that are bolted rather than welded. There is usually always a very good reason to use bolts instead of welds. Most common is to be able to more easily replace. Engines and frame parts do need to be replaceable in some circumstances and breaking a weld to do that would be worse than the slight compromise of using bolts. I do remember back when I bought my Gold Wing GL1500 the new (at the time) GL1800 bikes were just getting on the road around 2002. A year or two later I was hearing all sorts of issues with the bottom of the main frame welds cracking and breaking near the swing arm. There was a recall to fix that.

I guess I am leaning more to using bolts for that end plate now. Simply for the reason that I may have to remove the hitch frame at some point.
I am still thinking of using M8 stainless bolts/nuts/washers since both the frame tubes and plate are stainless. The plate is 4 inches high so that would be what is bolted to the frame tubes on each side. I would use two bolts on each side.
Would that be good? Or should I be using M10 bolts/nuts/washers or make it 3 bolts on each side in the 4 inch sections? I would think 3 bolts each side would be too many for a 4 inch plate.

Maybe weld a bar on each side of the plate that would fit snug beside the inner side of each tube as a guide or stopper to reinforce from lateral forces.


Why 6" long sleeves? And what do you mean to drill the bolts "vertically" when the tubing ends are vertical? Wouldn't it really be to drill the bolts in horizontally (either front to back or side to side)?

Additional note: I WAS thinking of using lock washers but those are proven to be ineffective in many cases. Perhaps better to use Loctite since that will coat the threads and provide some corrosion protection in addition to locking the bolt/nut better than a lock washer.
I'm looking at the whole thing, start over. Cut 3 sides of the tube off about 2-3 inches. Now you acheived what the welded on plate did and I'll bet the tubes should be almost parallel. If needed you can shim it to get it right. download.jpg
 
Joined
Sep 4, 2013
Messages
8,196
Location
Cleveland
Bike
2010 ST1300
Perhaps better to use Loctite since that will coat the threads and provide some corrosion protection in addition to locking the bolt/nut better than a lock washer.
Nylock nuts do not vibrate loose. Loctite is also good - be sure to clean the threads first with something like acetone. You could use red loctite - the permanent stuff until you apply a torch and heat the bolt up to around 350ºF or so. Once heated, it yields to a wrench easily. I'm not sure how much corrosion protection loctite will provide, but I don't think corrosion will be a problem - unless you ride in salt slush in the winter.
 
OP
OP
rjs987

rjs987

Robert
Site Supporter
Joined
Sep 25, 2009
Messages
3,056
Age
68
Location
West Des Moines, IA
Bike
2022 Kymco AK 550
2024 Miles
001059
STOC #
8058
I'm looking at the whole thing, start over. Cut 3 sides of the tube off about 2-3 inches. Now you acheived what the welded on plate did and I'll bet the tubes should be almost parallel. If needed you can shim it to get it right. download.jpg
I considered something like that early on. But there were 2 factors that made that idea not as good as welding on 1/4" flat bar. First, the alignment of the upper and lower bike frames is off too much for that to work. The inside of the upper frame where the hitch tubing connects is 14.75" side to side. The outside of the lower frame where the hitch tubing connects is 11" side to side. Taking into account the width of the hitch tubing at 1" for each side that still leaves a 1.75" difference to fill. Adding the 1/4" flat bar to the outside surface of the tubing makes up 1/2" of that difference total. Leaving the remainder to be resolved by putting a few bends in the 1/4" flat bars and also angling the tubing. This also resulted in making the square tubing at the lower frame connection more flush with the bike frame. This also resulted in the tubes being just a little MORE parallel than without that flat bar welded on, but still nowhere close to being parallel. At the very ends after the downturn of the tubes I am expecting something around 11" or 11.5" to the outside of the tubes so from the lower frame mount point to the end the tubing will be another inch closer to each other. From the front mount point to the very rear end of the hitch frame the tubes get closer by close to 2 inches.

Second, the square tubing only has a 1/8" side wall so half the thickness of the 1/4" flat bar. I wanted something a bit more substantial than that. Most mc hitches I have seen and owned have mounting plates that are about 1/4" or 5/16" thick. Automobile hitches generally use 1/2" or 5/8" thick plates. One of the big differences between car/truck hitches and mc hitches due to the difference in load and forces being considered.

@SMSW , I did get some Nylon insert lock nuts but they are only a metric grade 8.8 which is only a SAE grade 5. My bolts are a higher grade so I need to use the same grade for the nuts. I can't find Nylon insert lock nuts grade 10.9 to match the bolts.
 
Last edited:
Joined
Aug 21, 2018
Messages
6,775
Location
Richmond, VA
Bike
'01 & '96 ST1100s
STOC #
9007
I did get some Nylon insert lock nuts but they are only a metric grade 8.8 which is only a SAE grade 5. My bolts are a higher grade so I need to use the same grade for the nuts. I can't find Nylon insert lock nuts grade 10.9 to match the bolts.
Isn't the only real stress shear force on the bolts?
 
OP
OP
rjs987

rjs987

Robert
Site Supporter
Joined
Sep 25, 2009
Messages
3,056
Age
68
Location
West Des Moines, IA
Bike
2022 Kymco AK 550
2024 Miles
001059
STOC #
8058
Maybe it would work to use the cut off ends of the square tubing and weld that onto the plate to fit inside the hitch frame ends. Then run the bolts sideways through the hitch frame tubing and the welded on tubing. Just a thought...

Today I bolted on the hitch tubing again and re-measured the angle deviation from horizontal that they now are. The deviation angle did change, but only by one degree. The drop from horizontal is now 3 deg and it won't be changing from that since this is with the final mounting to the bike. I also measured to verify the angles of each bend needed and came up with the upper bend at 36 deg from the straight tubing and the lower bend at 51 deg to make that last leg vertical. I decided to make that last bend 1 deg less to account for extra sag in the rear from if I pack a little heavier than anticipated (though I am anticipating a little extra since I will be pulling a trailer) and also to account for any slop in forming and welding. Being off by one degree will not be significant since the receiver angle will likely change +/- 1-2 deg just for normal suspension variation while riding.

I also drilled the mounting hole in the hanger bar for mounting up under the tail of the bike. I am planning to weld the nut onto the bar at the hole to enable mounting since I am finding it will be impossible to mount that bar after the rear body is installed AND impossible to mount the rear body after that bar is mounted. So this way the nut will be on the bar. I can get to the bolt side but not behind the bar with any tools. This will be a M8 bolt/nut.

I also marked and made the V cuts for bending one hitch tube. For the 36 deg bend I made 2 cuts at 18 deg and for the 50 deg bend I made 2 cuts at 25 deg.
I haven't cut off the end to the intended length yet however. I'll do that after the bend points are welded.
 
OP
OP
rjs987

rjs987

Robert
Site Supporter
Joined
Sep 25, 2009
Messages
3,056
Age
68
Location
West Des Moines, IA
Bike
2022 Kymco AK 550
2024 Miles
001059
STOC #
8058
Isn't the only real stress shear force on the bolts?
Not really. If I torque the bolts properly that would put too much stress on the nuts resulting in the nut possibly failing. It is never a good idea to use a bolt that is stronger than the nut. Not good the other way around either.
 
Joined
Aug 11, 2013
Messages
3,559
Location
kankakee
Bike
R1200rt
I considered something like that early on. But there were 2 factors that made that idea not as good as welding on 1/4" flat bar. First, the alignment of the upper and lower bike frames is off too much for that to work. The inside of the upper frame where the hitch tubing connects is 14.75" side to side. The outside of the lower frame where the hitch tubing connects is 11" side to side. Taking into account the width of the hitch tubing at 1" for each side that still leaves a 1.75" difference to fill. Adding the 1/4" flat bar to the outside surface of the tubing makes up 1/2" of that difference total. Leaving the remainder to be resolved by putting a few bends in the 1/4" flat bars and also angling the tubing. This also resulted in making the square tubing at the lower frame connection more flush with the bike frame. This also resulted in the tubes being just a little MORE parallel than without that flat bar welded on, but still nowhere close to being parallel. At the very ends after the downturn of the tubes I am expecting something around 11" or 11.5" to the outside of the tubes so from the lower frame mount point to the end the tubing will be another inch closer to each other. From the front mount point to the very rear end of the hitch frame the tubes get closer by close to 2 inches.

Second, the square tubing only has a 1/8" side wall so half the thickness of the 1/4" flat bar. I wanted something a bit more substantial than that. Most mc hitches I have seen and owned have mounting plates that are about 1/4" or 5/16" thick. Automobile hitches generally use 1/2" or 5/8" thick plates. One of the big differences between car/truck hitches and mc hitches due to the difference in load and forces being considered.

@SMSW , I did get some Nylon insert lock nuts but they are only a metric grade 8.8 which is only a SAE grade 5. My bolts are a higher grade so I need to use the same grade for the nuts. I can't find Nylon insert lock nuts grade 10.9 to match the bolts.
the other concern is if the aluminum frame is hollow tightening the bolts could crack the frame. Usually when a bolt goes through a frame there is a sleeve welded in there. Might look into rivet nuts.
 
OP
OP
rjs987

rjs987

Robert
Site Supporter
Joined
Sep 25, 2009
Messages
3,056
Age
68
Location
West Des Moines, IA
Bike
2022 Kymco AK 550
2024 Miles
001059
STOC #
8058
the other concern is if the aluminum frame is hollow tightening the bolts could crack the frame. Usually when a bolt goes through a frame there is a sleeve welded in there. Might look into well nuts.
I guess you are a little behind in the conversation here.
The aluminum frame is a C channel as is clear in the photos. For the rear lower mounting bolt the hitch frame tube is flush with the solid flat side of that frame. For the upper mounting bolt the hitch frame tube is against the opening in the C channel but I am using a fat walled spacer to fill that space. So all 4 mounting bolts are being tightened at the solid points in the aluminum frame.

Although, it might be possible to put 2 90 deg bends in the flat bar to put it on the other side of the bike frame so it would be directly mounted to the flat side of the C channel on each side.
 

Ron

Joined
Feb 5, 2005
Messages
1,679
Location
Orlando
Bike
ST1100s
STOC #
2432
I guess I am leaning more to using bolts for that end plate now. Simply for the reason that I may have to remove the hitch frame at some point.
I am still thinking of using M8 stainless bolts/nuts/washers since both the frame tubes and plate are stainless. The plate is 4 inches high so that would be what is bolted to the frame tubes on each side. I would use two bolts on each side.
Would that be good? Or should I be using M10 bolts/nuts/washers or make it 3 bolts on each side in the 4 inch sections? I would think 3 bolts each side would be too many for a 4 inch plate.
In regards to the question about 2 or 3 bolts. I would think 3 M8 bolts would be stronger than 2 M10 bolts. You could probably squeeze 3 M10 bolts in the 4". Either way, measure the diameter of the washer to be sure it fits into any corners and/or doesn't hang over the edge of the metal. If I remember correctly stainless washers are rather thin. Try to keep the bolt hole diameter as small as possible.
 
OP
OP
rjs987

rjs987

Robert
Site Supporter
Joined
Sep 25, 2009
Messages
3,056
Age
68
Location
West Des Moines, IA
Bike
2022 Kymco AK 550
2024 Miles
001059
STOC #
8058
So far I've been able to drill all holes to 5/16 diameter, which makes for a very snug fit for a M8 bolt. And the stainless washers I have are the same thickness as a typical zinc coated steel washer which I also have for those bolts. They are 3/64" thick. I've used those paper thin stainless washers before and know what you mean about those but what I have are not those. With the bolt holes drilled to the right size I won't need any washer on the bolt head side and might possibly not need them with the nut, but I will likely use them there anyway. Another thing I read (from the link that @DannoXYZ posted on Bolt Science and a few other places) is that using Loctite prevents the removal of the surface coating on a stainless bolt resulting in minimizing if not preventing seizing. Rapid application of torque and/or a few other factors contribute to seizing that sometimes happens with stainless fasteners but avoiding those factors can prevent seizing from happening.
 
Joined
Jul 15, 2023
Messages
520
Location
Mesa, AZ
Bike
VFR750F, ST1300
Why 6" long sleeves? And what do you mean to drill the bolts "vertically" when the tubing ends are vertical? Wouldn't it really be to drill the bolts in horizontally (either front to back or side to side)?
To spread the load. 2-3” in middle to weld on cross-piece. Then 1” at ends for bolt-holes. Drilling bolts vertically means they face practically zero load from cross-piece and receiver. Imagine sliding sleeve and finished cross-piece over your beams. Then add weight to reciever. Most of weight just pushes 90-degrees to sleeves and there’s very little fore-aft load even without any bolts installed.

When bolts are installed, this vertical-loading stresses them in tension only, which is best. If bolts are installed horizontally, they will face shear loads as sleeve & receiver rocks up & down from weight loads. In either case really, the sleeves actually take most of load since it‘s tightly fitted around beams. This relieves huge amount of load on bolts.

Then bolts’ primary job is to generate friction f=mu that locks sleeve to beam and transmit forces across.
 
OP
OP
rjs987

rjs987

Robert
Site Supporter
Joined
Sep 25, 2009
Messages
3,056
Age
68
Location
West Des Moines, IA
Bike
2022 Kymco AK 550
2024 Miles
001059
STOC #
8058
So to clarify for my understanding the bolt would run back to front through the tubing instead of side to side. Where the plate is mounted there is no vertical from ground level other than that the tubing, or "beams", are vertical. The bolts can only be run side to side or back to front. There is no horizontal beam at that part of the hitch tubing. Refer to post 64, the last picture, to see that the tubing (darker blue) and plate (light blue) at the end are both up and down so I'm having a problem understanding how the bolts would run up and down.

What cross piece?

Why not just run the bolts back to front (fore-aft) through the plate and tubing? For the loads expected on the plate and tubing wouldn't there be plenty of strength for that without the sleeves?
Or is it to extend the length of the tubing that the plate is bolted to so that there can be 2+" space between the bolts and 1" from the top and bottom of the plate?

(I'm thinking more overkill than is needed for this application. I'm not saying overkill is bad but wouldn't this be over-overkill?) :shrug2:
 
Last edited:
Joined
Jul 15, 2023
Messages
520
Location
Mesa, AZ
Bike
VFR750F, ST1300
I’m talking about sleeve over tubing interface only. Bolt goes top to bottom vertically through both sleeve and tubing. It has benefit that if nut falls off, it still holds everything together. Do these 2 sleeves 1st.

Then crosspiece is welded to these sleeves. This allows entire assembly to slide backwards for easy removal.

Receiver is then screwed to centre of crosspiece.

Probably different from your design, so bolt any which way you want. I recommend loading bolts in tension. And not use them for locating parts in any way or loading them in shear.
 
Last edited:
OP
OP
rjs987

rjs987

Robert
Site Supporter
Joined
Sep 25, 2009
Messages
3,056
Age
68
Location
West Des Moines, IA
Bike
2022 Kymco AK 550
2024 Miles
001059
STOC #
8058
I’m talking about sleeve over tubing interface only. Bolt goes top to bottom vertically through both sleeve and tubing. It has benefit that if nut falls off, it still holds everything together. Do these 2 sleeves 1st.

Then crosspiece is welded to these sleeves. This allows entire assembly to slide backwards for easy removal.

Receiver is then screwed to centre of crosspiece.

Probably different from your design, so bolt any which way you want. I recommend loading bolts in tension. And not use them for locating parts in any way or loading them in shear.
It seems we are talking about different configurations entirely.
I think you missed where the tubes will NOT be sticking straight out the back horizontally. In my post 128 I showed the cuts made to create the bends in the tube so the end result will be that the section of tubing that the plate is attached to is up and down. If I were to use sleeves the only way to remove is to slide that assembly DOWN.

I know that in my post 101 the last photo shows the tubing sticking straight out roughly horizontally but that is before they are bent to their final configuration.

Here is a picture that I think might help clarify how the plate and tubing ends are situated. Corrected for angles after tubing bolted to the bike frame. The bolting in question are the purple lines. The darker blue thick lines are the hitch tubes after being bent and the bend joints welded.
Alternate frame configurations 2e.jpg
 
Last edited:
Joined
Jul 15, 2023
Messages
520
Location
Mesa, AZ
Bike
VFR750F, ST1300
Yeah, gussets on inside radius will help at bends. Although most stress on it is at outside skin and if you get rid of sharp angle and make bend continuous, it'll be much, much stronger. Like this, special way to cut out on inside and bend to remove gap. Then weld over.

1709840878385.png


I'm looking at the whole thing, start over. Cut 3 sides of the tube off about 2-3 inches. Now you acheived what the welded on plate did and I'll bet the tubes should be almost parallel. If needed you can shim it to get it right.
download.jpg
As mentioned, you can bend it once outside of bodywork into S-shape so beams are parallel. Then you can add sleeve to outside of beam on each side, weld on cross-beams, receiver end-plate and entire hanger can be removed easily. Also bolts mounted vertically will face very little load. This is very similar to how receiver hitches work with a single pin. Although that allows for rocking and pin has to be large and strong enough to withstand ALL shear loads from trailer.

1709843314289.png


Also 1/4" x 1" is not sufficient for where crossbar attaches to beam. Needs to be 2" there and you can taper it down to 1' down by end-plate for receiver. Again, torque at upper joint is much higher than at receiver end. A 1" tube is much stronger than 1" flat bar, even if it's 1/4" thick. Most likely it's weld that will fail first at inside radius from torque.
 
Last edited:
OP
OP
rjs987

rjs987

Robert
Site Supporter
Joined
Sep 25, 2009
Messages
3,056
Age
68
Location
West Des Moines, IA
Bike
2022 Kymco AK 550
2024 Miles
001059
STOC #
8058
@DannoXYZ . I feel like you ignored that last picture I posted... again.
I've already made the V cuts in one tube to make the bends on it. The tube will be bent and the gap formed by the V cut will be welded over. The outside surface of the bend on the tubing will remain uncut. Not as gradual a bend as you show in your photo but similar.

The last picture you posted above shows the sleeve over the straight tube but that tube won't be straight so the sleeve won't go on like that. That would be good IF I left the tubing straight but that is not what will be done.

I asked the question a few weeks ago in this thread about using or not using gussets. It seemed the consensus at the time was that gussets could be used but would not really be needed.

As for the crossbar comment... what do you mean to taper the cross bar down to 1" down by the end-plate? That crossbar really won't be doing a lot of supporting other than some minor downward support for the weight of the trailer on the receiver. Most mc hitches for mc trailers have a 1/8" hanger bar that is 2" wide as what I will have. The Burgman 650 hitch that Uni-Go sells is the same as that except that the entire hitch design is slightly different... only 1 mounting point on each side of the main hitch frame front ends instead of 2 on each side that I have. This is contrary to what Uni-Go recommends (2 mounting points on each side). Most of the Uni-Go hitches only have the 2 mounting points on each side and no hanger bar.
 
Top Bottom