Putting An ABSII Front End On A Standard ST1100

If you have a chance to study the two systems, the front pads on the ABSII are much more 'aggressive' to me (ridges versus flat surface) and have significant additional pad surface compared to the standard front pads. (I have both so I have compared them more than once). I think it is just a matter of physics that more pad contact surface would mean more braking.
nobody here is an expert on it, but my guess is any HH friction rated brake pad is going to work more or less the same as any other HH pad, regardless of its "aggressiveness". If anything, ridges will reduce the contact patch of the pad, you can't do any better than a flat surface in that regard.

Regarding the additional pad surface of the ABS2 models, that's probably cancelled out by the smaller rotor diameter/radius compared to the non-ABS models. You have a stronger caliper working from a shorter distance from the axle, so its probably not all that much of an overall gain in stopping power, if any. It has to be stronger just to compensate for the fact that it has less leverage compared to the non-ABS.

Now, having ridden both, I was much more impressed with the apparent stopping power of the ABS2 model when I took one for a test ride, compared to the non-ABS model on my first test ride. There's no doubt in my mind that upon first application of the brakes, you will feel more confident with the ABS2 model. Where the difference becomes less noticeable is after you get familiar with the non-ABS brakes, and how to apply the front/rear brakes appropriately (Martin's analogue smoothness comment), you can approach the stopping power of the ABS2.

The difference is with the ABS2 bike you don't have to think about it, you just grab the lever and the system does the rest. With the non-ABS you have to gradually learn how to achieve maximum braking potential. Martin has practiced stopping his non-ABS model to it's limit, and I have no doubt that in a controlled situation he can equal or exceed the ABS2 braking capability, especially if the ABS2 is being ridden by a less experienced rider. But the key word is "controlled situation", given the choice in a panic stop situation I'd rather have the ABS2 than the non-ABS.
 
It is also possible to plumb it to use 5 pots on front - three on one side and two on the other. In other words, abandon only one of the center pots. That should give about a 15.8 ratio which may well be perfect. I'm running higher than that on my non-ABS bike with the standard calipers and a 1/2" (12.7mm) M/C.

Worry not about asymmetrical braking force or every single disc bike in the world would be in the weeds somewhere.
 
If power equals the ability to lock up the wheels, then there is no difference between the standard an ABSII.
I agree. Short of braking up to the point of locking up the brakes (non-ABS), or in the case of an ABSII, having it activate, it is a simple matter of brake lever travel and effort. I can lock up either end of my ‘91 non-ABS at will, two fingers only. Know your bike, and practice; however, your ABS equipped bike will bail you out if you screw up.

Don’t get me wrong, ABS is a good thing! If I ever get another motorcycle (or cage for that matter) it will have ABS. Not so sure how I feel about the linked/combined type though...

JMHO

John
 
The ST1100 ABSII system, because of the linked brakes, drives 6 pots. The four in the front plus the two outside units in the rear. According to this diagram.
 

Attachments

  • 5F81E377-6EAD-49E7-8AAD-3CD86EEBFC54.jpeg
    5F81E377-6EAD-49E7-8AAD-3CD86EEBFC54.jpeg
    101.6 KB · Views: 13
Okay, quiz time (cause I'm lazy and don't want to research it) ;) -
There are two hoses to each front caliper.
Is the top one the one that 'fires' the outside 'normal' pots or the bottom one?
Also, what will I need to rebuild the calipers since they've been laying around for a good while and it would probably be prudent preventive maintenance.
 
John & Sirbike - Thanks for the info. I was pretty sure it was the top 'pipe' but I've been wrong before!
One of my concerns about the rebuild is being sure to get all the old fluid out of the calipers since I don't know how long it's been in there.
 
Wow, my three word answer has been beautifully expanded on.
I’ll add that I start blowing out the pistons with compressed against progressively thinner items protected with a rag while the caliper halves are together.
By the time they hit just the rag in place, I split the caliper, then the pistons will usually come out by hand.
Personally, I hate dealing with brake fluid.
Especially atomized fluid and vapor that escapes when compressed air shoots out around the port it’s applied to or when pistons pop out.
Before I had a rubber tipped air nozzle, I would cut a piece of bicycle inner tube, punch a hole, shoot through that as a seal.
I do this all with a rag around things to catch air/fluid mix.
The other technique is using brake lever and fluid to pump them out. This is the way I go if it takes more than a couple minutes to blow them out with air.
 
Been 'studying' the front plumbing this afternoon after church on my work bench. Since the delay valve and the SMC also function as mounting points on their respective forks, I've got to disconnect them from service but leave them in place (Or I could have my company fab up some brackets to replace them). I decided I'll clear them of all fluid then just plug them. The delay valve should be no problem since it will have no input at all. I figure on the SMC I may have to leave a little 'leak' so the fork action doesn't cause it to 'pump up'. With a couple of three way junctions - one to 'replace' the SMC/delay valve connections and one to connect the middle pistons and the main pistons to the master cylinder, I should have it sorted. I plan on using all three pistons in both calipers at first to see how it works and then work my way back from there if need be. Easy enough to disconnect a line and plug it after I get it in all in place. We shall see what we shall see once I get all the bits and pieces in the Holler!
 
Before I thought too long about where the braking forces were headed to without fluid stop to the piston travel, I overhauled the SMC, filled it with brake fluid and capped the ports. May not have been important but I know nothing that is not supposed to is getting hammered.
Can’t quite get the picture of what you are describing for plumbing, so pardon me if I am saying the same thing a different way.
I’d run a splitter to, or jumper line between to feed both brake line ports.
There shouldn’t be anything else tied in to the plumbing. Just master and slave cylinders.
 
There won't be when I'm done. I'm trying to use the 'existing' brake lines as much as possible and just add 'connectors' in place of the ABSII bits and pieces.
So for the caliper rebuild, I think I only need for each caliper - the six seals (from what I see in the fiche), 3 bolts to hold it together, and new banjo washers (assuming the pistons are good). Did I miss anything?
 
Well, while I have things torn apart, I decided I would see if the ABSII rear caliper would fit on the standard rear (it's nice to have extra bits and pieces in inventory! ;)) . As I suspected and it turns out, the ABSII rear caliper will work nicely on the rear of a standard if you put the ABSII disc on the wheel. You just have to deal with what to do with the center linked piston and whether to plumb it to the rear master cylinder. I've decided that since it has more braking contact surface than the standard, I'm going to install it and sort out the plumbing. That way I only have to stock ABSII pads instead of both versions and I should see some improved rear braking. The ABSII discs front and rear are marginally smaller (maybe a 1/2 inch total diameter wise) so they are not 'swappable' with standard calipers.
 
Redbird now has a ABSII rear caliper installed and working. I was able to use all factory hoses with a little 'noodling'.
I chose to hook both brake lines up to the master cylinder (got a longer bolt from my 'reserves') so all three pistons fire at once.
Still got to get a little more air out of the lines, but it passed the 'workshop' stopping test.
Now that I have my rebuild parts for the front, I'll start on that brake system.
 
Next question - I got the pistons pulled out of the front calipers. Since I have never rebuilt calipers before, are the seals 'stuck' down on the bottom when you pull the pistons? I'm sure there's write-up somewhere if anyone can point me to it. :biggrin:
 
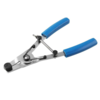
The other way to extract pistons is to use piston removal pliers; these use a knurled surface that you expand inside the piston cup which gives you enough grip to wriggle the pistons free of the seals.
Yeah, got one of those, work nice on new, freshly cleaned, freely moving pistons... ;)
 
[QUOTE="jfheath, post: 2203422, member: 4726"I found a dentist's probe very handy for doing this, but a bent pin held with pliers would also work. Clean behind the seals, getting into the square corners of the groove with anything that will not scratch. Wooden or plastic toothpicks, strip of old credit card.[/QUOTE]
Dental pics are good, I'd install new rings anyway, so punching them wouldn't be an issue...
I also threw complete calipers into the 80°C hot ultrasonic for like 1/2 an hour to soften the gunk inside...
 
Back
Top Bottom