I came across this article which may be useful for someone else with the bushing problem :
http://www.cfht.hawaii.edu/~cruise/hints.html#rear_shock
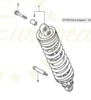
The first step is to remove the OEM bushing assembly which consists of an inner and outer metal sleeve between which is sandwiched a polymer isolator. It's this polymer component that wore out on my bike, just cold flowed right out of place. In my case a 17mm socket turned out to be the perfect diameter to tap the bushing assembly out of the shock eyelet.
Once you have the assembly out of the shock eyelet carefully disassemble it as you will need to re-use the larger, outer metal sleeve. I obtained from Tim at Works Performance a .965 X 10 Igus bushing set which consists of an Igus polymer bushing and two metal adapter bushings that adapt the ID of the Igus part down to the mounting bolt size. (Igus is a company that specializes in self lubricating polymer bushings/bearings). This is the same set as used on their ST1100 shock. The cost is $10 plus shipping. The actual O.D. size of the polymer bushing from Works is 7/8" or .875" while the size of the OEM shock eyelet is approximately .95". Unfortunately, works has only the one size polymer bushing as all of their shocks are designed with 7/8" eyelets. They make up the difference with the inner metal collar to adapt to each application. By sheer luck the thickness of the OEM outer sleeve material is approximately 0.040" making its I.D, approximately 0.870", almost perfect, though a bit tight perhaps, to sleeve down the OEM eyelet to accept the Works bushing.
I carefully chamfered the inner edge of the OEM sleeve with a Dremmel tool and tapped the Works busing into it, so far so good. I next chamfered the outer edge of the OEM sleeve now containing the Works polymer bushing and put it in the freezer. While that assembly was cooling I chamfered the inside edges of the OEM upper eyelet slightly. I used a heat gun to expand the diameter of the eyelet and then, working quickly, retrieved the chilled bushing assembly and tapped it into the the eyelet. It was an extremely tight fit but it went in without too much trouble. Whew, wipe sweat off brow. Now I was ready to remount the shock on the bike.
Throw away the OEM polymer bushing, inner sleeve and bushing collar (the thick walled sleeve that slips over the bolt) and use the two machined metal bushing insert/adapters from Works Performance. To reinstall the shock I cut a 2" X 4" piece of lumber into a wedge and by jamming it under the rear tire was able to raise or lower the wheel until alignment of the bolt holes was achieved. Make sure to start the bolts by hand, especially the bottom one that screws into the aluminum rear drive case, torque them down (17 ft/lbs bottom, 36 top) and yur done.