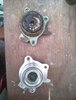
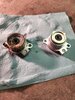
2005 St1300a.
My clutch is normal when the bike is cold, but as bike heats up the friction zone gets closer and closer to the grip. To the point where i dont think i will be able to get the clutch out of gear or downshift.
I did manually bleed the clutch. Sent about 8 oz of dot 4 through the system and dont see any air bubbles.
Replaced the levers brass bushing and pushrod, problem still exists, what should i try next?
Thanks
Frank
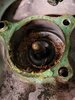
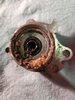
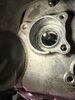
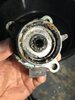
Also, fluid level is normal and doesnt appear to be leaking2005 St1300a.
My clutch is normal when the bike is cold, but as bike heats up the friction zone gets closer and closer to the grip. To the point where i dont think i will be able to get the clutch out of gear or downshift.
I did manually bleed the clutch. Sent about 8 oz of dot 4 through the system and dont see any air bubbles.
Replaced the levers brass bushing and pushrod, problem still exists, what should i try next?
Thanks
Frank