
Rear Shock Removal-provided by another member.
You will need a spring compressor or a press to change out the spring. There is some serious tension on the spring. I used a press.
First you need to get the shock out. Not nearly as easy as the shop manual suggests but it is not as bad as it sounds.
Pull both mufflers, you'll scratch them if you don't. Remove the rear wheel. Pull the last two screws that hold the lower cowl on both sides. On the foot peg mount there is a 6mm bolt on the bottom behind the lower cowl, remove it from both sides. Pull the left foot peg mount. There is a tab on the bottom of the foot peg mount that holds the side stand switch
wire and the rubber mat. Put tape on the top edge of the right foot peg mount. It will be clear where to put the tape to protect the paint on the foot peg mount when the shock is removed. Remove the battery. There is a bolt that sits under the battery, remove it. Pull the bolts from the right foot peg mounts. The brake master cylinder will be attached to the
foot peg mount, no need to remove it. The foot peg mount will move enough to get the bottom shock bolt out. Remove the seat adjuster assembly. There is the bolt through the fuel tank, 4 bolts holding the assembly to the frame and 1 bold holding the brake lines to the seat adjuster assembly. Put a jack under the rear drive. Remove the bottom shock bolt. You will need to swing the right foot peg mount out to remove the bolt. Use a box end wrench on the nut on the top shock mount. Use caution and don't drop the nut. Once you get the nut out put a piece of tape around the nut to make it a tight fit in the wrench when you go to reinstall the nut. Don't drop this nut. Remove the pre-load adjuster from it's mount. You will need to remove the brake master cylinder reservoir to fish out the pre-load adjuster oil line. Get the oil line free from it's mounts. Remove the top shock bolt.
Now some help would be nice but it can be done alone. Lift up on the rear grab rails or brake light. You want the rear frame section to swing up about a inch or two. Don't get carried away. The bike is on the center stand so lift the rear frame section but don't rock the bike off the stand. It's not hard. Remove the shock.
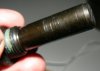
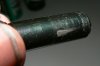
With the shock in hand you will see a small hole on the side of the pre-load adjuster. There is a set screw in there, back it off but not out. I used 2 pieces of angle iron and a piece of metal across the top to press on the pre-load adjuster. You must have a gap on the angle iron pieces and they need to be off the shock body so you can remove the clip holding the pre-load adjuster. Get the clip off, back the press off and remove the spring. The HyperPro spring will only go on in one direction. Just reverse the directions and install the clip, back off the press, tighten the set screw, and reinstall the shock.
Really it's not as bad as it looks and with the rear wheel and shock out you can do some serious cleaning to the swing arm.
You will need a spring compressor or a press to change out the spring. There is some serious tension on the spring. I used a press.
First you need to get the shock out. Not nearly as easy as the shop manual suggests but it is not as bad as it sounds.
Pull both mufflers, you'll scratch them if you don't. Remove the rear wheel. Pull the last two screws that hold the lower cowl on both sides. On the foot peg mount there is a 6mm bolt on the bottom behind the lower cowl, remove it from both sides. Pull the left foot peg mount. There is a tab on the bottom of the foot peg mount that holds the side stand switch
wire and the rubber mat. Put tape on the top edge of the right foot peg mount. It will be clear where to put the tape to protect the paint on the foot peg mount when the shock is removed. Remove the battery. There is a bolt that sits under the battery, remove it. Pull the bolts from the right foot peg mounts. The brake master cylinder will be attached to the
foot peg mount, no need to remove it. The foot peg mount will move enough to get the bottom shock bolt out. Remove the seat adjuster assembly. There is the bolt through the fuel tank, 4 bolts holding the assembly to the frame and 1 bold holding the brake lines to the seat adjuster assembly. Put a jack under the rear drive. Remove the bottom shock bolt. You will need to swing the right foot peg mount out to remove the bolt. Use a box end wrench on the nut on the top shock mount. Use caution and don't drop the nut. Once you get the nut out put a piece of tape around the nut to make it a tight fit in the wrench when you go to reinstall the nut. Don't drop this nut. Remove the pre-load adjuster from it's mount. You will need to remove the brake master cylinder reservoir to fish out the pre-load adjuster oil line. Get the oil line free from it's mounts. Remove the top shock bolt.
Now some help would be nice but it can be done alone. Lift up on the rear grab rails or brake light. You want the rear frame section to swing up about a inch or two. Don't get carried away. The bike is on the center stand so lift the rear frame section but don't rock the bike off the stand. It's not hard. Remove the shock.
With the shock in hand you will see a small hole on the side of the pre-load adjuster. There is a set screw in there, back it off but not out. I used 2 pieces of angle iron and a piece of metal across the top to press on the pre-load adjuster. You must have a gap on the angle iron pieces and they need to be off the shock body so you can remove the clip holding the pre-load adjuster. Get the clip off, back the press off and remove the spring. The HyperPro spring will only go on in one direction. Just reverse the directions and install the clip, back off the press, tighten the set screw, and reinstall the shock.
Really it's not as bad as it looks and with the rear wheel and shock out you can do some serious cleaning to the swing arm.
Last edited:
")