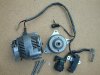
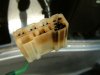
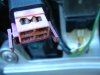
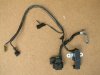
The starter relay harness should have a built in lead to the bottom fuse terminal should it not? This one does not (see pic) so I don't know how to do that fuse connection?
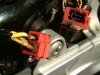
Is this where the red wire bypass can also come into play?
The wiring changes have been one thing holding me back from getting this upgrade done.
also
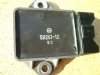
Anybody happen to have a take-off VRR sitting on a shelf?
Is this where the red wire bypass can also come into play?
The wiring changes have been one thing holding me back from getting this upgrade done.
also
Anybody happen to have a take-off VRR sitting on a shelf?
Attachments
Last edited: