- Joined
- Mar 18, 2006
- Messages
- 3,177
- Location
- Ilkley, W Yorkshire, UK
- Bike
- 2013 ST1300 A9
- 2025 Miles
- 002293
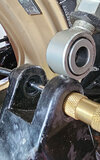
Whatever you do, check carefully how that bolt is supposed to fit. My understanding is that the bolt tightens against the collar at the end of the thread and the head exerts no pressure on the bracket at all. If a collar is used and it is too short, then tightening the bolt will try to pull the two parts of the bracket together - trying to clamp the bottom part of the shock. This must not happen. The final drive housing is cast alloy. It will probably snap. It has been 17 years since I last worked on an 1100, but that is what I remember. Just check.
It is the same sort of arrangement that is used for the clutch lever pivot screw. It tightens against the shoulder at the end of the thread, and does not put any weight onto the top half of the bracket.
It is the same sort of arrangement that is used for the clutch lever pivot screw. It tightens against the shoulder at the end of the thread, and does not put any weight onto the top half of the bracket.
Last edited:
") . Just a quick update. (In between playing polite host to a few Family visitors!)
. Just a quick update. (In between playing polite host to a few Family visitors!)


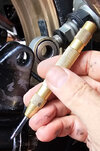
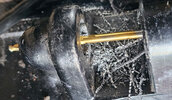
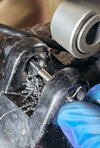
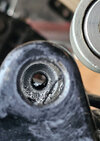
 Bolt out, thread seems still good enough.
 Have included photos for the use of anyone who they may help!!! Video link to share the joy, for anyone who has never used an easy out tool. Be patient on the links, may take a minute or two, valid for 7 days. Enjoy!