
You are using an out of date browser. It may not display this or other websites correctly.
You should upgrade or use an alternative browser.
You should upgrade or use an alternative browser.
Front wheel mounting sequence
- Thread starter IndyST
- Start date
Thought I saw instructions on here about how to properly sequence the mounting of the front wheel. 91 ST.
Anyone know where to find it?Thanks
I'm fairly new here but I think I've seen some reference to that before, and it seemed more complicated than it needed to be, but I don't recall the details. Here's all I do, and if someone has any suggestions above and beyond this, please let me know.
1. get spacer aligned on right, and axle through both forks with the speedo drive in the right orientation with the nub on the left fork.
2. tighten down the pinch bolts on the left fork so the axle doesn't turn when you torque the nut on the other end.
3. torque down the nut on the right side of the axle (actually not a nut but a bolt that goes into the threads inside the axle)
4. tighten the pinch bolts on the right fork.
1.5. Make sure the axle is fully seated inside the left fork before tightening down the pinch bolts on the left fork in step 2.
Uncle Phil
Site Supporter
I always torque the axle bolt before I ever tighten the pinch bolts, otherwise you are not torqueing it to what you think you are. The other end of the axle has a hole for putting a rod/screw driver, etc. for holding the axle so it does not turn.
Do you bounce the bike like on the 1300... tighten left pinch then right then loosen left ,bounce retighten left?
1300 setup;
1. Tighten the left axle pinch bolts to 22 N-m (2.2 kgf-m, 16 lbf-ft)
Note: Indication of ?Left? is if you were sitting on bike
2. Tighten Axle Bolt to 79 N-m (8.1 kgf-m, 58 lbf-ft)
3. Tighten the right axle pinch bolts to 22 N-m (2.2 kgf-m, 16 lbf-ft)
4. Now loosen the left axle pinch bolts
5. Note: During the assembly process, this is where you would be installing the brake calipers.
6. Set the bike down where the bike's weight is on the wheels. Lock the front brake and push the suspension up and down several times.
7. Tighten the left axle pinch bolts to 22 N-m (2.2 kgf-m, 16 lbf-ft)
I always torque the axle bolt before I ever tighten the pinch bolts, otherwise you are not torqueing it to what you think you are. The other end of the axle has a hole for putting a rod/screw driver, etc. for holding the axle so it does not turn.
Are you saying you don't torque any of the pinch bolts before torquing the axle? The purpose for the axle torque is to pull the forks and all the spacers together with the desired force against the wheel bearings, etc. If you torque the axle without any pinch bolts being tightened first, then you've just torqued the axle bolt onto the axle while the forks are floating in air. Or, perhaps whatever you put through the hole in the other end of the axle to hold it from turning is held tight against the left fork while torquing the nut, performing the same function as tightening the left pinch bolts does.
Uncle Phil
Site Supporter
Are you saying you don't torque any of the pinch bolts before torquing the axle? The purpose for the axle torque is to pull the forks and all the spacers together with the desired force against the wheel bearings, etc. If you torque the axle without any pinch bolts being tightened first, then you've just torqued the axle bolt onto the axle while the forks are floating in air. Or, perhaps whatever you put through the hole in the other end of the axle to hold it from turning is held tight against the left fork while torquing the nut, performing the same function as tightening the left pinch bolts does.
Yes and Yes. ;-) I've done it a few times and so far nothing has fallen off ...
 The front wheel bearings on Redbird only lasted for 120,000 miles or so ...
John OoSTerhuis
Life Is Good!
+1 on what Phil sez. Same idea as for the rear axle. Once the bearings' inner races, distance collar, spacer, speedo housing, etc. are locked together between the shoulder on the axle and the right fork slider, the left fork slider pinch bolts then are torqued to keep the axle from turning. This also insures minimum stiction in the left fork. Check the left caliper-to-rotor clearance spec'd in the Owners Manual.
John
John
Last edited:
I always torque the axle bolt before I ever tighten the pinch bolts, otherwise you are not torqueing it to what you think you are. The other end of the axle has a hole for putting a rod/screw driver, etc. for holding the axle so it does not turn.
Well, UnclePhil gots it right......just prior to that tightening, bounce front wheel, rocking on centerstand. No different than our moto-X bikes. Phil's sequence is correct, and I've found that torqeing axle nut and pinch bolts in that sequence as a test DID eliminate a minor extreme high speed weave that existed. Good'n'Tite doesn't play well here, and since scoot has a fork-brace and taper-roller steering head bearings, no reason it should'nt be solid steady no matter what speed. Torque specs and sequence work in this situation.
I agree as well, I always torque the axle first for 1100s.
I don't do 1100 tire changes very often but did do one last week and we, okay I, screwed up on the speedometer housing placement. This was a '98 I believe.
There's a raised section on the wheel where a similar raised section on the cable housing should match up with... but, it can sit in front or behind that notch, it should be behind the notch. We noticed some strange noise spinning the tire that sounded like metal brake pad against the rotor but couldn't find it... after a test ride it was noted the speedometer wasn't working... ding! We moved the notch over to behind the one on the wheel and all was good again.
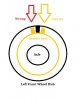
Attaching a crude drawing.
I don't do 1100 tire changes very often but did do one last week and we, okay I, screwed up on the speedometer housing placement. This was a '98 I believe.
There's a raised section on the wheel where a similar raised section on the cable housing should match up with... but, it can sit in front or behind that notch, it should be behind the notch. We noticed some strange noise spinning the tire that sounded like metal brake pad against the rotor but couldn't find it... after a test ride it was noted the speedometer wasn't working... ding! We moved the notch over to behind the one on the wheel and all was good again.
Attaching a crude drawing.
Attachments
Uncle Phil
Site Supporter
Easy to do if you don't do it often enough to remember. If it's in there right, it will fit flush into the wheel. Folks have destroyed the drive by not making it flush then torqueing in down. Good advice! I left the bushing out on the last one I did but figured it out before I tightened down. When you do that, you get to pull the wheel back out since you can't get the bushing in with the wheel in position.I screwed up on the speedometer housing placement.

Lucky
Carpe Diem
I have to once again thank Uncle Phil for helping me out with my 02 ST. He just changed out both tars since I'm headed out west in a few weeks. Thanks Phil!
Les
Les
Yes and Yes. ;-) I've done it a few times and so far nothing has fallen off ...
I don't ride as much as I used to, and so I don't change the front tire as often either. For some reason I was thinking the axle didn't have a stop to keep it from pulling through the left fork bottom, so I thought you had to tighten the pinch bolts to keep it from pulling through. I guess that's not true after all. I always use my dial indicator torque wrench instead of the clicker on the axle nuts, so its easier to read if I'm not grabbing on both ends of the axle at the same time, so I always tighten the left pinch bolts first. Can't imagine this makes much difference either way, and like you I have 95k miles without any negative symptoms, so I guess its not that big a deal.
John OoSTerhuis
Life Is Good!
I was thinking the axle didn't have a stop to keep it from pulling through the left fork bottom
It doesn't have a stop. As I mentioned above, the shoulder on the end of the axle butts up against the speedo housing. The hole in the end of the left fork simply supports the left end of the axle and the pinch bolts are tightened only after the axle bolt gets torqued to spec. Torquing the axle bolt locks the spacer, inner races of the wheel bearings, distance collar and speedo housing all against the inside surface of the right fork slider. All of these parts are then fixed/do not move/rotate, but the wheel rotates around them on the ball bearings between the fixed inner races and the outer races fixed to the wheel itself. The hole in the left side of the swingarm does the same thing for the rear axle... supports that end after the axle shoulder butts up against the brake caliper bracket and draws everything in between to the inside/inner surface of the final drive. Think about it....
edit: tightening the left pinch bolts before the axle bolt will pull the left fork slider to the right, resulting in increased fork stiction and abnormal fork bushing wear, not to mention possibly affecting handling, brake caliper to rotor alignment, etc.
John
Last edited:
It doesn't have a stop. As I mentioned above, the shoulder on the end of the axle butts up against the speedo housing. The hole in the end of the left fork simply supports the left end of the axle and the pinch bolts are tightened only after the axle bolt gets torqued to spec. Torquing the axle bolt locks the spacer, inner races of the wheel bearings, distance collar and speedo housing all against the inside surface of the right fork slider. All of these parts are then fixed/do not move/rotate, but the wheel rotates around them on the ball bearings between the fixed inner races and the outer races fixed to the wheel itself. The hole in the left side of the swingarm does the same thing for the rear axle... supports that end after the axle shoulder butts up against the brake caliper bracket and draws everything in between to the inside/inner surface of the final drive. Think about it....
edit: tightening the left pinch bolts before the axle bolt will pull the left fork slider to the right, resulting in increased fork stiction and abnormal fork bushing wear, not to mention possibly affecting handling, brake caliper to rotor alignment, etc.
John
OK, that makes sense to me, and thanks for the explanation.
My gut feel is if you get all the slop out of the components before torquing, the alignment of the components between the fork tubes is more or less the same using either method, but I think yours sounds a bit more consistent, at least in theory. But using your method, once its torqued down what would prevent you from leaving a small gap between the speedo housing and the left fork tube, and then tighten the pinch bolts down on both sides? Seems to me that holding both tubes together with the torque of the axle nut makes sure the spacing between the two fork tubes is consistently tight, and that there's no gap anywhere along all components riding on the axle.
Not trying to fight, just interested in discussing pros/cons of each technique.
John OoSTerhuis
Life Is Good!
There is a gap, front and rear. A gap between the inside surface of the left fork slider and the speedo housing, and between the inside edge of the swingarm and the brake caliper bracket. This is normal and expected. What you see in the gap is the shouldered portion of both axles. The edge of those shoulders is the 'stopper' you're trying so hard to find.
Don't distort the front and rear wheels' suspension alignment by torquing the left side pinch bolts before torquing the axle bolt/nut.
The only things riding on the axles are the inner races of the wheel bearings.
John
Don't distort the front and rear wheels' suspension alignment by torquing the left side pinch bolts before torquing the axle bolt/nut.
The only things riding on the axles are the inner races of the wheel bearings.
John
Last edited:
John OoSTerhuis
Life Is Good!
Imagine this -
Remove the left fork from the bike. Now mount the front wheel while supporting the end of the axle with a jack stand. Tighten the axle bolt locking everything together to spec'd torque value. Spin the wheel. Move the jack stand in and out along the shouldered portion of the axle. Doesn't make any difference, all it's doing is supporting the end of the axle, same as the left fork slider.
Remove the left fork from the bike. Now mount the front wheel while supporting the end of the axle with a jack stand. Tighten the axle bolt locking everything together to spec'd torque value. Spin the wheel. Move the jack stand in and out along the shouldered portion of the axle. Doesn't make any difference, all it's doing is supporting the end of the axle, same as the left fork slider.
Imagine this -
Remove the left fork from the bike. Now mount the front wheel while supporting the end of the axle with a jack stand. Tighten the axle bolt locking everything together to spec'd torque value. Spin the wheel. Move the jack stand in and out along the shouldered portion of the axle. Doesn't make any difference, all it's doing is supporting the end of the axle, same as the left fork slider.
Yes, I understand that. Web communication is a bit slow and not everything gets said that would be said in a verbal conversation. I'm not saying that there would be play in the components on the front axle, I understand everything is torqued down between the axle lip and the right fork tube. What I'm asking is since the brake caliper is bolted to the fork tube, and the brake rotor is bolted to the wheel, then if too much of a gap exists between the left fork tube and speedo housing you might get improper alignment between the caliper and rotor. The left caliper is attached a bit differently than the right caliper, but I think the spacing is still dictated by the mount cast into the lower fork tube. So if too much gap exists between the left fork tube and everything else, it would seem likely that the caliper might not fit correctly onto the rotor. Not sure if this ever happens, or even could happen, but it had me wondering.
Anyway, after you guys explained it a few posts ago I know your method is the correct reassembly sequence, and mine is not, so I'm not trying to argue that I'm right, just asking a few follow-up questions. Thanks for being patient.
John OoSTerhuis
Life Is Good!
ST1100s have single-action type brake calipers where the bodies slide on two pins. They can easily accommodate a wide variance in original manufactured parts. IMO, only a bent fork tube or triple tree would cause a caliper/rotor alignment problem.
Share: