Headlight Bulb Replacement ST1300

Joined
May 27, 2021
Messages
348
Age
65
Location
Coquitlam British Columbia Canada
Bike
2009 ST1300
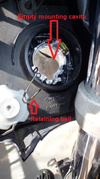
Manual says: removed the three point connector - does that just pull off?

Remove retainer - not sure how that comes off either

No problem getting at it, just don't know how it's supposed to come apart
 
The plug connector should pull off like any 3 wire car bulb.
Then remove the large rubber boot.
There's a spring clip that holds the bulb in. Two sides to squeeze inward and then it pivots like a hinge.

Spring is similar to this:

1792449478083.png

Photo creds to @ibike2havefun
 
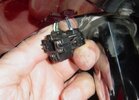
The three point connector requires that you press in two plastic strips either side of the connector - corresponding to the position of the two outer terminals.
With these pressed in, the connector will pull off. It is difficult to do with big hands like mine. I have pictures somewhere ….
 
I don't think my '03 required anything pressed in in order to pull the plug off. I think it was just an interference fit.
 
I don't think my '03 required anything pressed in in order to pull the plug off. I think it was just an interference fit.

04 and later were new and improved! And a real PIA to push in those little tabs! :censored::censored::censored:
 
thanks for the responses second question if anyone has ever replaced these with what seems more commonly available (and cheaper)
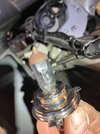
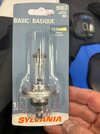
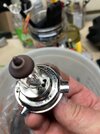
I got a Sylvania H4 903 that is a 60/55W instead of the 45/45W that I removed
Im pretty sure was the original Was a good excuse for a ride but it may be destined for the forever / trip over bucket
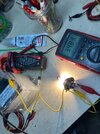
don't expect much additional heat but anyone know if the extra amperage be a not so good thing?IMG_3173.jpegIMG_3171.jpeg

You'll need to bend off the two lower tabs on the h4 bulb to make it fit. Leave the upper tab. The spring will hold it in place.

It will draw extra amps and generate heat, but it was a common update prior to the LED bulb upgrade. I'd done both the H4 and the LED upgrades to mine without issue.

If you want exact draw, it's about 1.25A per bulb on high beam and 0.83A per bulb on low beam.
 
My 2 cents worth.
If memory serves I remember replacing with the Sylvania Blue Star bulbs. They provided a blue hue and you to be more conspicuous in traffic. They were a straight replacement. No breaking off of tabs.IMG_20210603_123009.jpg
 
I too used the Sylvania bulbs without any real problem (*), before switching to the then-best F4 LED. Getting at the dratted things without removing a ton of Tupperware was a real PITA, and it was devilish hard to squeeze the tabs on the connector to pull it off the bulb. I found the best method to be standing at the front of the bike facing the back, and reaching in with the hand closer to the bike.

You want to avoid touching the glass on the incoming bulb with your fingers- oil on your fingertips can shorten the life of the bulb. Wear thin latex / synthetic rubber gloves (think dentist / doctor exam gloves) when handling the bulb, and get it squeaky clean before installation for best longevity.

(* - my bike, a 2004 model, tended to burn out the left bulb more often than it ought to have done. This was, apparently, due to a minor fault in the standard wiring. I also found that the ground connection to the right hand bulb had corroded over time, and had to cut in a new connector.

I had no further problems after switching out the halogens for LEDs. There's an article here somewhere about how that process went.)
 
Yes that's exactly how I did it Keith between that and the previous explanation and pictures no problems
my fail is left side low beam
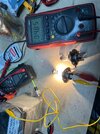
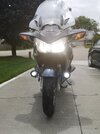
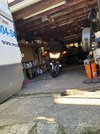
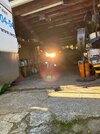
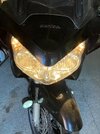
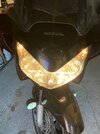
here's a maybe near valid picture of low then high
clear improved high beam and both settings seem to fill the assembly with light better
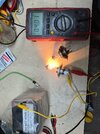
just a little warmer to touch at the back of the socket on high beam at 58F once I get it out will see how that goes
the blue looks like a better color


IMG_3190.jpegIMG_3191.jpegIMG_3192.jpegIMG_3193.jpeg
 
Why not just go LED? No heat or excess current draw concerns.

New math?
Yes it looks like there's a recent thread on LEDs so will read that
I would like as much light as possible
a bit of heat though might be good to keep everything dry (maybe?)
My guess is the new math might be what is measured for a specific LED
(edit) sounds like at least some of the LEDs are a little bulkier and the boot doesn't fit well also I noticed after cutting the wings on my non oem there's a bit of rotation that can be made hopefully the retainer keeps it from moving
 
Last edited:
Back
Top Bottom