I have a question about a Craftsman floor lift?

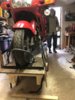
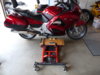
I’ve used the same type of jack for years, with various adapters for various bikes, and never had an issue. However, I always used jacks to support the bike after the lift was complete.

Once the budget was approved to buy a lift table, I sold it to my neighbour, who lifts his Victory, before supporting the bike with jacks.
 
I've been using a harbor freight hoist identical to the one in question for 5 years with no mishaps. All I did was tie wrap a1" thick and 4" wide piece of wood over the rubber base on the left side looking from the operator's side, tie the bike down with straps which makes it solid. I have never had a problem with it. But I guess each one had to do what they are comfortable with.
 
Hope this saves you from dropping your bike.
Igofar, I'm curious - considering a purchase of the Abba SkyLift (rated 3 tonnes & they have a fitting kit for the 13). Any thoughts?

Sorry for the thread hijack...
 
I built a table for the lift. When it's fully raised I have special jacks that I put on either end of the table. Works really well.
 

Attachments

  • cTTWpU+XQg+lTMp1PFza8g.jpg
    cTTWpU+XQg+lTMp1PFza8g.jpg
    144.7 KB · Views: 49
  • EoT0VdS1TIi+vvYfewf0QQ.jpg
    EoT0VdS1TIi+vvYfewf0QQ.jpg
    163.3 KB · Views: 50
  • WPAaMcM8T9S2HbzrJuMHkw.jpg
    WPAaMcM8T9S2HbzrJuMHkw.jpg
    109.6 KB · Views: 45
This is what I built to lift my 2010 ST1300.
The most expensive parts are the castors, then the bottle jack.
 

Attachments

  • IMG_20180612_172550783_HDR.jpg
    IMG_20180612_172550783_HDR.jpg
    104.1 KB · Views: 46
  • IMG_20180612_172604607_HDR.jpg
    IMG_20180612_172604607_HDR.jpg
    106.4 KB · Views: 44
Response to: Paawpabear - Ken Morse

Correction : you DO need to remove the black lowers on each side. Please see attached photos, hopefully they will speak a thousand words.
I do use safety straps that can be hooked to areas of the bike then attached to the Jack Lift safety tabs holes.
Please scrutinize photos.
 

Attachments

  • P1010208.jpeg
    P1010208.jpeg
    130.6 KB · Views: 44
  • P1010209.jpeg
    P1010209.jpeg
    131.1 KB · Views: 44
Last edited:
Ken;

I have some possible dumb questions. I have built the bracket that you have designed. I'm not sure about the procedure that I need to follow to use it. I assume that I first need to remove the lowers on both sides, but I'm not sure how to proceed from there. With the center stand up, how do I stabilize the bike while I slide the bracket and jack under the bike? I'm usually pretty good at visualizing things, but i can't quite picture this in my mind. I just don't want to drop the bike while I'm trying to figure it out. Thank you so much for you time and attention. Also thank you for the great bracket and your willingness to share it with others.

Ken Morse
Please see my reply to you below: Tuesday 3:45 pm Sept 5,2019
I meant to have it under your post.
 
Response to: Paawpabear - Ken Morse

No, you do not need to remove the black lowers on each side. Please see attached photos, hopefully they will speak a thousand words.
I do use safety straps that can be hooked to areas of the bike then attached to the Jack Lift safety tabs holes.
Please scrutinize photos.
Ken: Thank you for the pictures, they helped alot. I almost missed the note on the bracket about using a 2x4 to steady the bike.
 
Last edited:
Ken: Thank you for the pictures, they helped alot. I almost missed the note on the bracket about using a 2x4 to steady the bike.
Ken;

It appears from the photos that the blocks on each side and the one at the rear fit up inside the space between the black lowers which brings the base flat against the lowers. I built my bracket to the specs shown in the drawing that you sent to a previous member, but mine seems too wide to fit like the picture appears. I'm sorry for being so dense on this. Do you have any suggestions on what I am doing wrong?
 

Attachments

  • 20190913_102147.jpg
    20190913_102147.jpg
    77.7 KB · Views: 25
Paawpabear : I apologize sincerely. The black plastic lowers do need to be removed.
This allows the blocks on each side to also give support under the exhaust headers, that gives the bike more stability.

My reference to not removing the lowers is for another adapter I have, but that other adapter is not as stable or supportive.

As you know the black plastic "lowers" are very easy and quick to remove.
Again I apologize for misleading you and any time wasted I caused you.
Hope you find the adapter as useful as I have afterall. Ken
 
Nevada -
Here are the dimensions of the adapter I made. My lift is (was) made by Handy Industries called "Jak-Lift", Model 1800, Item#10753, very similar to other lifts of this type. Note: (the carpet on my adapter is optional, the piece at the left (or rear) is because my center stand is not quite level when up, the piece on the right side block was to fill a minor gap).
Now that is done very well. Should be very easy to duplicate
 
Paawpabear : I apologize sincerely. The black plastic lowers do need to be removed.
This allows the blocks on each side to also give support under the exhaust headers, that gives the bike more stability.

My reference to not removing the lowers is for another adapter I have, but that other adapter is not as stable or supportive.

As you know the black plastic "lowers" are very easy and quick to remove.
Again I apologize for misleading you and any time wasted I caused you.
Hope you find the adapter as useful as I have afterall. Ken
No need to apologize at all . You can ease my trauma by swapping me your red Tupperware for my black. I'm sure that's what the "Ken's club of America" would want us to do. Thanks for all your help.
 
Back
Top Bottom