Newbie ST1100 carb question

OP
OP
Techman
Joined
Oct 17, 2017
Messages
67
Location
St. Louis area
Bike
2000 ST1100
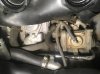
The V65 is a fun bike to ride. Old school sit upright position with a zippy motor. I spent a lot of time trying to fix mine up to do long trips, but finally got too nervous about it with all the problems that kept popping up. The main problem was leaking valve seals, at one point causing some valves to crud up. The other problem was floats that would leak. When I changed the valve seals and carb floats I started making forward progress.
I tried the ST1100 and ST1300 and the 1300 was too much forward lean for me. The 1100 felt much better and doable.
I know the sound of wisdom when I hear it......I will do KNOWN working mods for performance. I had two things working against me.....first, I didn't know I had a California bike (I might have passed on it if I knew), the second is I don't think it has run on all cylinders at idle since I got it. Hard to evaluate a bike for power when it isn't running quite right. Ran pretty good on the freeway, though.
My jets come in on monday, so I will be going thru the carbs during the next week.
Thank you all for your help and insight.
 
OP
OP
Techman
Joined
Oct 17, 2017
Messages
67
Location
St. Louis area
Bike
2000 ST1100
I got in there with a pressure washer today and cleaned the frame and engine. I stupidly got a bit too close to the radiator and flattened some of the aluminum fins....I may try to get in there and open them back up.
I emptied the gas tank and started to take the fuel pump out, but there is a rubber hose connected to a pipe in the tank that is making it hard. There isn't much clearance to get a hold of that hose to pull it loose.
I did get a look in the tank and it looked worse than I expected for a 2000 ST tank. I see some pretty big concentrations of accumulated rust and crud in the bottom near where the fuel pump lies. I also am seeing some light rusting in the top part of the tank and around the seams. See some white corrosion around the collar up by the gas cap. I was going to use the pressure washer to blast the tank out, but I got to get the hose off that assembly first.
At this point, I am trying to figure out how to deal with this tank. Do I wash it out, use some steel wool and knock the light rust off, wash it again, then fog it with some light oil OR use some kind of acid to wash it out. Not sure if anyone here knows the best approach for this.
It looks like the PO cleaned the carbs and didn't change the filter or clean the tank and the carbs were starting to clog up again.
I don't want this happening again.
Thanks for your thoughts on this tank situation.
 
OP
OP
Techman
Joined
Oct 17, 2017
Messages
67
Location
St. Louis area
Bike
2000 ST1100
Got the tank cleaned up pretty good....lot of crap in it. Used some phosphoric acid to convert some spots at the top inside of tank. Blasted out with pressure washer and soap.... rinsed. ....rinsed out with alcohol....wiped out as well as I could.....added some seafoam for the machine oil to keep rust from restarting.
UPS brought the water hoses. Started to replace them. Drained radiator and removed the hose by the drain. Found out the PO spaced and put 100% antifreeze in. I have done that before, too, accidentally. I got about 1/2 gallon of antifreeze out. I am wondering if that is enough to change the top end hoses without antifreeze going everywhere. (especially on the other cylinder head). Really ready to be done, but want to do it right and ride for a long time with no drama!
 
Joined
Mar 13, 2012
Messages
5,059
Location
soCal
Bike
'97 ST1100
STOC #
687
I think if you removed the lower hose, as it sounds like you did, then the coolant from the engine should have drained along with the coolant from the radiator. Its been a few years since I did mine, but I don't recall there being any coolant in the top hoses when I removed them, or at least not enough that it made any kind of mess that needed advanced planning.
 
OP
OP
Techman
Joined
Oct 17, 2017
Messages
67
Location
St. Louis area
Bike
2000 ST1100
You are absolutely correct, as I found out today. Took upper hoses off and no antifreeze mess. Kind of a pain to get all the hoses off the fill piece where they all connect. Lots of corrosion on that piece. Almost made me want to replace it and the thermostat too, but I didn't want to wait another week to get it. I had to wire brush it off real good. I missed ordering the big hose to the radiator from the fill piece and a small hose that runs out the bottom and over into the block. I found some hose for that at the honda shop, but couldn't find something acceptable for the big hose. At least that isn't under the carbs; I can get to that another time. I did replace the hose that connects the filler to the reserve tank....I see where that is a common problem and bought a new one. That lead to taking the reserve tank out and cleaning all the crap out of it.
It seems like one thing leads to another! I started to change some vacuum line out, but it really didn't look too bad, so I didn't' change it all. Anyway, got all the coolant issues dealt with, next comes cleaning the carbs and reinstalling.
It all has me thinking I should probably check valve clearances, too. I'm sure that has never been done.
 

Erdoc48

Site Supporter
Joined
Jan 25, 2009
Messages
1,440
Age
60
Location
Myrtle Beach, SC/ Sometimes Colorado
Bike
94/00/04 STs, FSC600
So far, so good. One you’re done with all of these items, you most likely will never have to do them again (or again in about 20+ years). If you do a valve check and some valves are out of spec, you have to pull the cams to install the new tappets (for the adjustment), so if doing all of that, you would want to consider putting a new cam belt (timing belt) on since you’re at 68K miles already and already in there (I checked mine at ~ 18K, they were fine, and I haven’t checked them again now that the 94 is at 34K and the 2000 is at 32K- lots of conjecture on how critical it is with these bikes as on many with use of better oils, the valves have not needed any adjustment). When you reinstall the carbs, it’s OK to use a little WD-40 on the boots at the meeting surfaces of the carb bottoms and the inside of the boots. I tried to reinstall, unsuccessfully, the carbs using silicone grease. I fought with that for several hours and just a light coat on the boots and bottoms of the carbs with WD-40 and they popped right back in with minimal effort. Some will say that WD-40 decays rubber but since you’re not soaking the boots in the product, I doubt a little WD will harm the boots in the long run.

You’re doing well, keep it up. When I did each of my STs, I had each one torn down for about a week in a garage so I was taking my time. You’ll feel very good when it’s all done and you see how much $$$ you saved doing it all yourself.
 
Joined
Mar 13, 2012
Messages
5,059
Location
soCal
Bike
'97 ST1100
STOC #
687
If you do a valve check and some valves are out of spec, you have to pull the cams to install the new tappets (for the adjustment), so if doing all of that, you would want to consider putting a new cam belt (timing belt) on since you’re at 68K miles already and already in there
This advice is wrong, the ST1100 valve adjustment and timing belt replacement are in two completely different parts of the engine, so the "while you're already in there" logic doesn't apply.

However, the cam removal is easier on the ST1100 than on most other bikes because you don't have to remove the timing belt, the cams are gear driven. So if you've ever done a valve adjust on any other bike, you'll likely find the ST1100 easier.

The timing belt recommended replacement interval is 90k miles, and we have dozens of people (myself included) who have changed timing belts that were approaching 20 years old and still looked like new, so don't worry about the timing belt.
 
Joined
Jun 3, 2006
Messages
3,521
Location
British Columbia
Bike
2021 RE Meteor 350
To add to dwalby's comments, you can check the condition of the timing belt by removing the left side cam reduction cover and the timing inspection cover and rotating the engine by hand (spark plugs out) to see how the belt looks.

If you do check the valves, best to mark the root and crown of one gear tooth to its mate, with a marker pen, before removing the cam holder bolts. The cam will slip out and rotate as those bolts are loosened, making it more time consuming to have to line up all the timing marks properly again.
 
OP
OP
Techman
Joined
Oct 17, 2017
Messages
67
Location
St. Louis area
Bike
2000 ST1100
I'm at 33K, and I am short a car and need to get this thing going. I got started on the carbs today and finally found a way to get the D shaped pilot screws out. I bought a bit, but it was too short. I saw a YouTube video where a guy did it with a red butt connector for crimping wires. He put a tight fitting Allen or torx bit in one end and tapping the assembly onto the D. It worked good enough to get them out. (similar to the bro on here who used the home depot small size yard irrigation tubing....1/4" I believe).
None of the pilot screws looked great, but 1&3 looked pretty cruddy. Also, it is strange, but carb #1 looked black in the float bowl. The others looked OK. I am not sure why that one looked so bad....it wiped out black on a rag using seafoam. I have been using some spray seafoam and it seems like it works as good as the carb spray and is less toxic and not dangerous to rubber.
The float bowl gaskets look like they could be original, and the pilot screw O rings look flat. It looks like the carb kits don't have the pilot screw O rings. The honda breakout doesn't give a separate part number for the O rings.
 
OP
OP
Techman
Joined
Oct 17, 2017
Messages
67
Location
St. Louis area
Bike
2000 ST1100
OK....I found the K&L 18-5591 is the float bowl gasket only. I think pilot screw O ring is Keihin 16075-KG8-9010. Ordered some, will find out soon.
 
OP
OP
Techman
Joined
Oct 17, 2017
Messages
67
Location
St. Louis area
Bike
2000 ST1100
Got everything cleaned out pretty good and float levels set. I did start fiddling with the choke mechanism to adjust it to work better and found slop in the main lever link. Threads boogered up on link, so I have a replacement coming. Choke was on good for two carbs but wasn't moving the two carbs connected by the rod well. Got to wait for parts now until friday or so. Would like to get the choke working better. Closing in on completion.....
 
Joined
Jun 3, 2006
Messages
3,521
Location
British Columbia
Bike
2021 RE Meteor 350
Got everything cleaned out pretty good and float levels set. I did start fiddling with the choke mechanism to adjust it to work better and found slop in the main lever link. Threads boogered up on link, so I have a replacement coming. Choke was on good for two carbs but wasn't moving the two carbs connected by the rod well. Got to wait for parts now until friday or so. Would like to get the choke working better. Closing in on completion.....
Upon re-assembly, be sure you have the carb boot clamps on the right side in proper position, otherwise, they will interfere with that choke linkage when you put the carbs back on.
 

Ashley

Site Supporter
Joined
Aug 16, 2009
Messages
870
Age
61
Location
Jacksonville, Florida USA
Bike
2020 Africa Twin
STOC #
4906
Just skimming this post I haven't seen any mention of the PAIR system. Is it intact or has it been removed? If removed are you absolutely sure the blockoff plates are not leaking and that there are no vacuum leaks?
 
OP
OP
Techman
Joined
Oct 17, 2017
Messages
67
Location
St. Louis area
Bike
2000 ST1100
Thank you for the warning on the choke linkage.
I have looked the Pair system over and everything looks fairly clean. The hoses all look OK. I was toying with changing out the small vacuum hoses running down to it, but one connection was underneath; I would have had to do it when I took the water outlet off that side. This picture is before I power washed it all out down there.
IMG_0283.jpg
 
OP
OP
Techman
Joined
Oct 17, 2017
Messages
67
Location
St. Louis area
Bike
2000 ST1100
Thi doesn't show the PAIR after cleaning, but it does show things as they are now ready for carb reinstall....IMG_0296.jpg
 
OP
OP
Techman
Joined
Oct 17, 2017
Messages
67
Location
St. Louis area
Bike
2000 ST1100
Choke linkage repaired, gaskets installed, carbs reinstalled, motor started and running good! Synced carbs, but could not adjust pilots without honda tool. Seemed to run smoothly where preset. After some thought, I put them at 1 7/8 turns. It seems good for now, would still like to check with the Honda tool someday. SUCCESS!! I was a little nervous when I had a quarter sized pool of gas...couldn't figure at first where it came from, but found it later. It seems the fuel tank gauge sensor assy leaked a bit when I filled the tank, but seemed to stop after the initial seepage.
One carb syncing question I have is this: On the carbtune, I lined the columns up at idle fine, but I noticed when I revved it up, that 1&3 were higher than 2&4. It made me wonder if perhaps the throttle linkage could be set better OR not having the air filter assembly on makes a difference OR if it is a difference in valve clearances. If it was clearances, It would be unlikely to be a 1&3 and 2&4 split like that. I never took the carb assembly apart, so I don't know if there is a course linkage adjustment I should have made prior to the idle screw adjustments. The bike runs smooth now over the whole range, so it isn't a big deal, but I like to get those carbs working in unison as best I can.
 
Joined
Mar 13, 2012
Messages
5,059
Location
soCal
Bike
'97 ST1100
STOC #
687
just curious why you had the air filter box off, there's plenty of access to the vacuum lines and adjustment screws with it installed, and it represents the real air flow operating environment.

That being said, the typical method is to adjust at idle, Honda spec is 40mm variation or less between cylinders.
 
Top Bottom