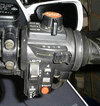
My 1999 ST1100 developed the familiar headlight problem associated with the starter button. The starter switch does double duty: when you press the button it interrupts the headlight circuit during cranking, then reconnects it when the button returns.
Mine had reached the point where the starter disengaged normally, but the headlight contact would not reliably remake. At first I could bump the starter button with my thumb and the lights would come back. Eventually I had to keep pressure on the button to maintain contact.
I opened the right-hand switch housing and tried to get at the offending contact, but on mine the part I needed to repair was essentially inaccessible without getting far more destructive than I wanted. I decided to quit fighting a 27-year-old little spring contact and give the bike a dedicated old-fashioned headlight switch.
The goal was simple: key on, headlight switch OFF, start the bike, then click the headlights ON. Just like 1974.
Red/Black (R/Bl): headlight-control supply
Blue/White (Bu/W): output toward the headlight/dimmer circuit
Honda already uses the factory headlight relays, so I did not add another relay. The new switch simply replaces the connection the starter-button contact was supposed to make.
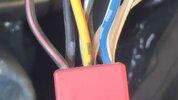
I wanted the modification to be reversible, so I did not cut the factory harness. I removed the R/Bl and Bu/W terminals from the red 9-position connector and inserted two new jumper leads into those same cavities.
The original Honda connector uses narrow 2.8 mm / .110-inch male terminals, essentially the Sumitomo MTW/1500-0071 style. After some trial and error with terminals that were much too large, I used the Baomain 2.8 mm male non-insulated terminals, Amazon ASIN B01MQ2VUGC. Those fit the factory red housing correctly.
The DAIER switch comes with very heavy wire, roughly 12 gauge, which obviously was not going into those little Honda terminals. I therefore made short 20-gauge jumper leads at the motorcycle end.
I soldered the jumper connections. I know some people dislike soldered joints in automotive and motorcycle wiring because of the possibility of creating a rigid stress point. I am comfortable with solder here. The connections are supported and do not flex in service. Each individual soldered connection got its own heat-shrink tubing, and then I put another piece of heat shrink over both conductors together.
The original starter-switch wiring remains intact and can be returned to the connector if I ever want to put the bike back to stock.
DAIERTEK DK-264346-101
12V 30A
SPST latching ON/OFF
IP67
2-foot prewired leads
It is comically overrated electrically for this application, but that was intentional. I wanted a substantial mechanical switch with a long lever and a very positive CLICK, enclosed and weatherproof, rather than another tiny motorcycle switch.
The result feels exactly the way I wanted it to.
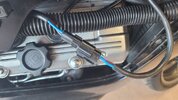
I added a two-conductor waterproof disconnect using a Furukawa QLW 250-series connector:
QLW-A-2F-B, female housing
QLW-A-2M-B, male housing
The QLW is a proper sealed two-wire automotive connector. I put the female/socket half on the motorcycle side and the male half on the removable switch/panel side. Cycle Terminal
Now the panel comes off normally: unplug one connector and the entire switch assembly leaves with the panel.
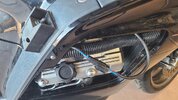
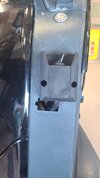
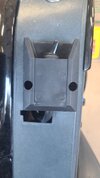
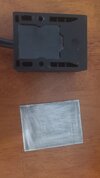
I made a thin aluminum backing plate and bonded it to the back of the switch housing with WEST SYSTEM G/flex epoxy. The G/flex fills the recesses and gives the aluminum both adhesive and mechanical support.
That left me with one large, perfectly flat aluminum mounting surface.
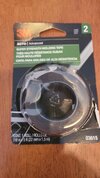
I mounted that surface to the bike with 3M Auto Advanced Super Strength Molding Tape, part 03615, 7/8" wide. The switch is light, the footprint is large, and the tape is intended for exterior automotive trim.
The exposed edge of the aluminum/G-flex assembly was blacked out so it disappears visually against the housing and bodywork. I used SEM Trim Black Ultra Satin 49143.
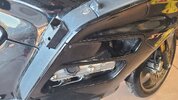
The finished switch looks deliberately installed rather than like a project box stuck to the motorcycle.
Factory red 9P connector
│
├── R/Bl cavity
│ │
│ 20-ga jumper
│ │
│ solder/heat shrink
│ │
│ heavier switch lead
│ │
│ QLW disconnect
│ │
└──── DAIER SPST switch ────┐
│
┌───────────────────────────┘
│
QLW disconnect
│
switch lead
│
solder/heat shrink
│
20-ga jumper
│
└── Bu/W cavity
Operation is now wonderfully primitive:
Key ON.
Headlight switch OFF.
Start engine.
CLICK.
Headlights ON.
The high/low switch continues to work normally.
The installation is also completely independent of the worn headlight contact inside the starter button. There is no intermittent connection left to nurse along with my thumb.
The switch is mounted, everything is back together, and it works fantastic. I am very happy with the result.
It probably cost me somewhere around $150 all-in once I count the switch, connector pieces, terminals, epoxy, molding tape, paint, wire and miscellaneous materials. That is obviously a lot more than the bare minimum necessary to make the headlights illuminate. I looked at it as a permanent repair to a known weak point on a motorcycle I intend to keep. I now have a dedicated, weatherproof, serviceable solution that I understand completely and should never have to think about again.
And, frankly, I like having a headlight switch.
1974 had this figured out.
Mine had reached the point where the starter disengaged normally, but the headlight contact would not reliably remake. At first I could bump the starter button with my thumb and the lights would come back. Eventually I had to keep pressure on the button to maintain contact.
I opened the right-hand switch housing and tried to get at the offending contact, but on mine the part I needed to repair was essentially inaccessible without getting far more destructive than I wanted. I decided to quit fighting a 27-year-old little spring contact and give the bike a dedicated old-fashioned headlight switch.
The goal was simple: key on, headlight switch OFF, start the bike, then click the headlights ON. Just like 1974.
The circuit
On my '99, the two wires involved in the starter-button headlight interrupt are:Red/Black (R/Bl): headlight-control supply
Blue/White (Bu/W): output toward the headlight/dimmer circuit
Honda already uses the factory headlight relays, so I did not add another relay. The new switch simply replaces the connection the starter-button contact was supposed to make.
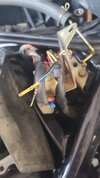
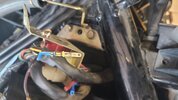
I wanted the modification to be reversible, so I did not cut the factory harness. I removed the R/Bl and Bu/W terminals from the red 9-position connector and inserted two new jumper leads into those same cavities.
The original Honda connector uses narrow 2.8 mm / .110-inch male terminals, essentially the Sumitomo MTW/1500-0071 style. After some trial and error with terminals that were much too large, I used the Baomain 2.8 mm male non-insulated terminals, Amazon ASIN B01MQ2VUGC. Those fit the factory red housing correctly.
The DAIER switch comes with very heavy wire, roughly 12 gauge, which obviously was not going into those little Honda terminals. I therefore made short 20-gauge jumper leads at the motorcycle end.
I soldered the jumper connections. I know some people dislike soldered joints in automotive and motorcycle wiring because of the possibility of creating a rigid stress point. I am comfortable with solder here. The connections are supported and do not flex in service. Each individual soldered connection got its own heat-shrink tubing, and then I put another piece of heat shrink over both conductors together.
The original starter-switch wiring remains intact and can be returned to the connector if I ever want to put the bike back to stock.
The switch
The switch is a:DAIERTEK DK-264346-101
12V 30A
SPST latching ON/OFF
IP67
2-foot prewired leads
It is comically overrated electrically for this application, but that was intentional. I wanted a substantial mechanical switch with a long lever and a very positive CLICK, enclosed and weatherproof, rather than another tiny motorcycle switch.
The result feels exactly the way I wanted it to.
Making the panel removable
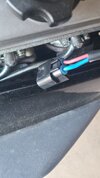
Because the switch is mounted to a removable body panel, I did not want panel removal to mean disturbing the wiring at the motorcycle.I added a two-conductor waterproof disconnect using a Furukawa QLW 250-series connector:
QLW-A-2F-B, female housing
QLW-A-2M-B, male housing
The QLW is a proper sealed two-wire automotive connector. I put the female/socket half on the motorcycle side and the male half on the removable switch/panel side. Cycle Terminal
Now the panel comes off normally: unplug one connector and the entire switch assembly leaves with the panel.
Mounting the switch
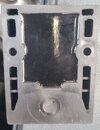
The back of the DAIER housing is full of ribs and recesses, so it did not provide a good flat surface for adhesive mounting.I made a thin aluminum backing plate and bonded it to the back of the switch housing with WEST SYSTEM G/flex epoxy. The G/flex fills the recesses and gives the aluminum both adhesive and mechanical support.
That left me with one large, perfectly flat aluminum mounting surface.
I mounted that surface to the bike with 3M Auto Advanced Super Strength Molding Tape, part 03615, 7/8" wide. The switch is light, the footprint is large, and the tape is intended for exterior automotive trim.
The exposed edge of the aluminum/G-flex assembly was blacked out so it disappears visually against the housing and bodywork. I used SEM Trim Black Ultra Satin 49143.
The finished switch looks deliberately installed rather than like a project box stuck to the motorcycle.
Final wiring and result
The finished arrangement is basically:Factory red 9P connector
│
├── R/Bl cavity
│ │
│ 20-ga jumper
│ │
│ solder/heat shrink
│ │
│ heavier switch lead
│ │
│ QLW disconnect
│ │
└──── DAIER SPST switch ────┐
│
┌───────────────────────────┘
│
QLW disconnect
│
switch lead
│
solder/heat shrink
│
20-ga jumper
│
└── Bu/W cavity
Operation is now wonderfully primitive:
Key ON.
Headlight switch OFF.
Start engine.
CLICK.
Headlights ON.
The high/low switch continues to work normally.
The installation is also completely independent of the worn headlight contact inside the starter button. There is no intermittent connection left to nurse along with my thumb.
The switch is mounted, everything is back together, and it works fantastic. I am very happy with the result.
It probably cost me somewhere around $150 all-in once I count the switch, connector pieces, terminals, epoxy, molding tape, paint, wire and miscellaneous materials. That is obviously a lot more than the bare minimum necessary to make the headlights illuminate. I looked at it as a permanent repair to a known weak point on a motorcycle I intend to keep. I now have a dedicated, weatherproof, serviceable solution that I understand completely and should never have to think about again.
And, frankly, I like having a headlight switch.
1974 had this figured out.
Attachments
-
 1000025510.jpg127.6 KB · Views: 8
 -
 1000025353.jpg52 KB · Views: 8
 -
 1000025511.jpg127 KB · Views: 7
 -
 1000025393.jpg116 KB · Views: 8
 -
 1000025356.jpg76.5 KB · Views: 8
 -
 1000025359.jpg83.7 KB · Views: 7
 -
 1000025504.jpg97.7 KB · Views: 7
 -
 1000025507.jpg96.4 KB · Views: 8
 -
 1000025506.jpg82.7 KB · Views: 7
 -
 1000025438.jpg67.8 KB · Views: 6
 -
 1000025508.jpg106 KB · Views: 7
 -
 1000025509.jpg98.1 KB · Views: 7