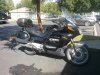
So I had fun and games with a timing belt this weekend.
I started off the weekend by plastic welding the cracks in the fairing I knew of, and painting the air-box cover, which I managed to get a couple of good coats on before I ran out. I understand that rattle cans will never hold a huge amount, but on something this size, I had hoped to get at least 3 or 4 coats of an $18 can. What I have looks good, but I?d like to have as few more coats before I begin rubbing down, cutting, and polishing. So I guess I?m stopping to pick up one or two more on the way home today. By the time I?m done in materials, I?d probably have been cheaper sending it out???.oh well!
The last big job I had to do was change the timing belt, and so figuring I had the manual (Clymer) I may as well use it, I began by draining the oil and coolant, and pulling the plugs.
While the oil was pretty much as expected, used, but not bad, no metal, or other debris in it. But was a good bit darker than I expected by looking at the sight glass. Checking the glass again after draining, it still looked like it was full of fresh oil. So I realized the sight glass was contaminated, so I had to pull that off and clean it. What a delightful job that was, but tedious, rather than difficult. When cleaned it made a good difference.
So far so good. The coolant was a different story. It was a pale muddy color, and opaque. It made me wonder if someone had added some kind of radiator sealant chemical to it, and the filler was crudded-up with some semi-solid material of the same color. I was surprised how little fluid seemed to drain out. More on this later.
However, the rad came-off easily enough, there was no sign of any damage, and when flushed didn?t take long until things were flowing clear, so I don?t think there was any issues there.
This where the fun began, or should I say, ?The comedy of errors?.
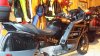
Next steps in the manual were to remove the clutch slave cylinder, and the clutch cover. The manual says ?you may have to move the RH exhaust slightly to allow access to the slave cylinder bolts, which can be done by loosening the exhaust clamps? and gave a nice pic to illustrate. What it didn?t say was, In order to get sufficient movement for you to be able to clear the exhaust with the bolts for the clutch cover, you will need to fully remove the exhaust clamps, disconnect the stainless pair control pipes at the head, and remove the engine guard bar. But in order to access the one of the securing bolts for the engine guard, you need to relocate the plastic box (part of the fuel system) below the tank.
So I removed the securing bolt for the plastic tank, and moved that out of the way, so I could remove the engine guard, disconnect the pair pipes, and pull the exhaust pipes loose. This allowed me sufficient movement, to wrestle the exhaust around, and get the clutch cover bolts out. So just over two hours after the rad came out, I got the clutch cover off. BTW, when the slave cylinder came out, there was a bunch of goop on it that needed cleaning off, before I hung that up out of the way.
With this off, the plastic covers came off really easy, and the belt was exposed.
But by this time, I had been out in the Florida sun wrestling with the bike for about five hours so I was tired, hot, and wary of making mistakes, so I wheeled her back inside, and decided to tackle the belt change in the morning. I went for a much needed and deserved shower, and a drink.
Saturday evening I did some research, and that?s when I learned I didn?t really have to remove the clutch cover, which would make the whole job a fantastic amount easier. I read about the mod to the plastic cover, but wasn?t really getting it. But I figured that as I?d already got everything off, and it it?d be another 90K miles before I needed to do it again, I didn?t have to be too concerned about this. I?d just put it back together. I also watched the belt fitment video on you tube a few times to get that down pat.
Sunday morning, and the belt change went simply and smoothly, not a difficult job at all. I had an OEM belt, so didn?t encounter the issues some of those using the Gates belt have encountered, and it only took me two attempts to get the belt on without moving anything, and having everything perfectly aligned. I was pleased with that.
I was changing the belt because the bike had 102K mile son it, and the PO told me he?d had it for a year, but could not tell me if the timing belt had been replaced. So, better to be safe. Once I got the old belt off I could examine its condition, and was basically new. The water pump and idlers were in perfect condition (I?d elected to review these once the belt was off, and order then if I needed them. I see no point in replacing things for the sake of it, you could be taking out a proven item which may have another 200K left in it, to fit a new, but defective item, which could fail in a short time. So sometimes it?s better the devil you know), so saw no need to mess with these. I believe this had been done on schedule, so I now basically have a spare belt which should be good for 60K-90K miles yet. Maybe I?ll stick it on my 01 when it?s got another 30K or so under its belt.
So onto reassembly. I put the plastic cover on unchanged, and the clutch cover went back on far more easily than it came off, and the cleaned slave cylinder too. Now over the years, I have gotten into the practice of putting bolts back into the holes they came out of whenever possible, if I?m leaving things disassembled for any length of time.
And so it came to pass that as I was removing the bolts for the for the cam pulley cover to refit them, I allowed myself to get distracted with a neighbor walking past, and dropped one into the cover. I exclaimed ?Oh dear?, or words that effect??..and I began removing the cover to get the bolt out.
This time I wasn?t going to mess with the clutch area, and I remember reading that the cover could be removed with a bit of prying, and commenced to do this. This is when the epiphany occurred?..I immediately saw exactly what everyone was on about with the cover, and exactly what modification would be needed to make this a whole bunch easier. So when I got the cover off and retrieved the offending bolt, I broke out the Dremel, and modified the cover. Things went back really easily after that, even getting all the exhaust stuff done.
With it all back together, I fitted new plugs, and filled up with fluids??.and that?s when I discovered the coolant leak!
From the evidence I have, I don?t believe this was anything I had done but had been there since I owned the bike. There is a small pipe coming down from the thermostat, and going across the top of the engine, which had a split. This explains why there was so little coolant to drain out, why it looked like someone had been adding radiator repair chemicals, and why I had been getting white smoke faintly from one side of the engine. I?m surprised that there was no overheating issues. So I believe that this has been there for a while, and the coolant level has dropped to a point where it wasn?t an obvious leak, but just the occasional spurt when under pressure onto a ho engine, giving the visible tendrils of smoke I was seeing when I stopped a hot engine.
So now I just have a coolant leak to take care of, and I?m ready to fully reassemble and put on the new decals. If I can put in a hour or two most evening this week on the air-box cover, I may have her back on the road next weekend.
Color me happy!