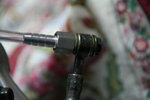
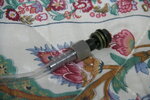
What is important is thata there is hardly any free space above the clip or below it. Mine is showing a certain amount of gap above the clip. It is actually the lower part of the alloy recess that has worn away. Whether or not that tage is supposed to be central, I don't know. I saw mine and it seemed a good 'at-a-glance marker.
Since observing this - I haven't done anything with it - except read the Honda manual - and in the General Information section at the start, there are all sorts of tables describing fluids and lubricants and such like. Right at the end of the table - just before the detailed drawn diagrams of cable harness and routing, there is this little snippet:

It isn't mentioned anwhere else in the manual. It certainly doesn't need to be glued in place. It has got clips to stop it falling out when pads are removed, and it cannot go anywhere when the pads are in place. The three bond 1521 is described as a high strength chloroprene rubber adhesive. My guess is that its purpose it simply to stop the clip rubbing against the metal alloy of the caliper bracket and wearing it down.


@Igofar has a photo which shows more significant wear - which I have pinched and copied here. This can result in the caliper bracket twisting each time the brakes are applied which can lead to constant drag at the rear brakes. One tell-tale symptom of this is the james bond gun bore rifling.
Mine hadn't got to that stage, even with that large gap - and it didn't get any worse once I had glued the clip into position. This was my old bike. My 'new' one (now 11 years old and at 72,000 miles, has no such gap - but at the first tyre change (@5,000 miles) I glued that clip into place.
Your clip has got a small gap at the top, so from the photo, it looks as though it is starting to wear - but it doesn't look as bad as mine - although the clip looks to be in a smilair position - Photo parallax might account for that.
You have just put in new pads. My new pads always drag when they have just been fitted - nothing that you can feel on the road, and nothing that gets the disks too hot to touch. Just a gentle Sssshhhh, as I push it around the garage. After I have left the bike a week or two, that develops in a resonating howl - purely as a result of the surface rust that gathers on the brake disc surface. The bike moves easily when I have just brought it in from a ride.
If it is a niggle, then get a new bracket while they are still available. But that small gap wouldn't niggle with me. I'd glue it in place as it should be, and be keep an eye open for the symptoms. My tyres get changed every 5,000 miles, and I often clean up the brakes every 2-3,000 miles.
Note that the clip is not glued in place on a new bike. I got a new SMC caliper bracket once and that clip wasn't glued in either.
In the UK, 3-bond products are available, apparently - I've never noticed them if they are. I used UHU Extreme repair - which seems to be similar - a high strength, ploymer 'rubber' adhesve flexible, resistant to shock, water, heat and UV. It seems to work for me.
Having said all of that, if your brakes are not releasing and you can find no other cause for it, then the rear caliper bracket is certainly a contender.
But - you have also installed your pads at the front. Pads at the front should not have the white heat shields fitted. THey have the thin chrome anti-squeal plate fitted to the pad backing plates - but they must not have a thin white pad shaped insert between the chrome and the backing plate. Only the rear pads have that.
You might have had the wheel out - so make sure that you put it back and tightened everything up IN THE CORRECT ORDER.
Check whether your front braks are dragging a little.
All of the above may be the reason for rear brake drag. If the front left drags, that will apply the rear brakes. So with any rear wheel drag, it is always wise to eliminate the front left brake caliper as the cause. (ANd if you are wondering why the order of tightening the front wheel matters - it is because the left caliper is on the left fork leg. The left fork leg should be free to move about on the axle when the axle bolt is tightened. After bouncing the forks, it should end up with the axle end flush with the face of the fork leg at the axle bolt hole. Only then are the left hand bolts tightened to clam the fork leg. So if the spacers are out of position, the wrong way round, or if the axle was tightened with the left pinch bolts clamping the axle, or they were not released to bounce the forks afterward - then the left fork leg will be out of position, which means the left caliper will be out of position, which means the left front brake will drag, which means amongst other things, that I have just wasted a load of time talking about the rear caliper.
I'm just laughing to myself. One of my first attempts at servicing the brakes on the 1100 resulted in odd brake behaviour. It had to be something that I did. I had to take it back home after riding less than a quarter mile. I put it into the garage, sat on the stool looking at the left hand side, head in hands. What the hell has gone wrong. What have I done that wasn't correct ?
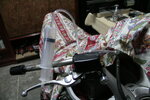
Then something caught my eye. What the hell is that ? Something that didn't look right. I'd not seen it before. I took my long nose pliers and grabbed hold of it, and pulled out a loose woven cloth - a rag which I had been using and absent mindedly placed on top of the mudguard. It had fallen onto the caliper and was jammed between the brake pads and the brake disc. I had to drop the pads out to get all of it out.
So add to reasons for rear brake drag: Rag left on top of front mudguard.

")