Tips needed in using my new bike lift table

STBernard

BlewBayou
Joined
Aug 10, 2009
Messages
104
Location
Bellevue, WA
Bike
2004 ST1300A
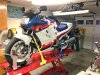
Santa arrived early. I picked up a 1000 pound hydraulic lift table for maintenance of my 3 bikes. It was the Harbor Freight version with a coupon costing only $299. I upgraded to the auto-locking wheel chock, so I can just ride on, and the wheel chock will flip up and support the front, back and both sides of the front wheel. Now I just step off, and attach tie downs, right? Do I need 4 tie downs or just 2? Cleaning wheels, and lubing chains on my sport bikes was a large reason for the purchase, but how can I spin the wheels? It seems using a center stand on the lift is not possible, unless I jack it up on the lift, then drop the center stand. One of my bikes only has a side stand, and I was using a rear wheel stand for that. Maybe I should buy that low profile, 2-roller, wheel cleaning accessory.
The table is still in my SUV because I have not had enough man power assembled to lift it out. It will need 4 to 5 people to pull it out.

Any tips would really be appreciated. I have 2 VFR's an and ST1300 to work on. First task will be a valve adjustment on my original 1986 VFR. My back and knees are so going to thank me for this new tool.
 
Many of us have built "out-rigger" stands that give us some extra foot-room when riding the bike up/down the lift, and a place to stand when putting the bike on the centerstand. 2x6s on edge with 2x4s on top (or whatever combinaion gives you that height) is almost the exact height of the lift. I use a small scissors jack under the oil pan to lift the front wheel for maintenance/cleaning. Congrats on the lift, it's the handiest (motorcycle) tool in the shop!

Left Side.JPG
 
Last edited:
With the locking wheel chock and the appropriate tie-downs use a small scissor style jack (rectangular contact face about 4x12 inches) under the engine/swing arm area to elevate the back end. My lift (Princess Auto CDN) has a panel that slides out where the back wheel is so it's easy to take the back wheel off or do oil/diff changes. Hope this helps. Marty
 
I have a 1000# Handy air lift with the wheel vise. I use two soft hook tie downs for the front end if I'm going to lift the rear end. I use a small scissor jack from a small SUV to lift the rear end enough to put the center stand up or down. Also have exposed rafters in the garage with a manual chain hoist that can lift the rear end for tire changes. Both work very well! I made a set of side extensions out of 2X8's and some plywood for the ATV's. Sometimes I leave the side extensions unattached but on the floor next to the lift, makes walking the bigger bikes up on the lift much easier.
 
Wow, is the 13 that much shorter than the 11? I see in Fred's pic that the center stand is well in front of the drop out. My 11's center stand comes down on top of the drop out. I need to make some changes to the wheel stop to let it roll forward more. :(
 
I've lost that front wheel clamp already while uncratingthe hydraulic lift... (pneumo-hydraulic operated)
It only hinders working on the bike, like swinging the handle for removal of Tupperware/bolts, changing front brake pads, replacing/filling brake fluid, removing the front wheel, etc...

The thing I'd replace it with is a 'safety rail, a 3mm thick steel plate, kinked upward at ~45?, bolted across the front end of the platform, preventing me from 'going over the cliff' when riding the ST onto it.
The ST stands very firm on the main stand, for jacking up the front I use a genuine motorcycle scissor-jack, with adaptors that fit right on the lump holding the drain bolt in the oil pan.

Might need to rework the ramp-plate though, cause lack of momentum can hinder the rear wheel to go up and the tire just won't get enough grip on that wart-sheet (maybe riveting a couple of cheese-grinders onto it might solve this... ;)
)

The other, more advance method would be to 'sink' the platform flush into thegarage floor, easing the process of getting the bike/s on, eliminating the need for mentioned 'out-riggers' as well as getting the thing out of the way ingeneral.
But this will require cutting concrete, intense use of a jackhammer, welding a frame which includes hinges for a trap-door under which the pedal for the emergency foot-pump and the lowering release for the hydraulic are accessible...so its still kinda postponed, I guess...
:eek::
 
I have the same harbor freight lift.

The wheel chock you are talking about is nice but it will make it harder to work on the bike in some cases. I wouldn't toss the clamp that comes with it but rather have both and be sure to be set up to switch back and forth. Like mentioned, if you are doing work on the plastic you need to be able to swing the front wheel left and right or remove those parts before you put it on the lift. Your choice really. Also the big chock will get in the way if doing any front end work, pads, tires and such.

I am farily tall and just walk along side the bike when I run it up on the lift. Once up there I will either pop it up on center stand (no problem with that on the 1300 but it is tight with the 1100 as Mark mentioned) or tie down the bike with no stand (if doing oil changes). As mentioned there is a plate for the rear wheel which you can pull to drop the rear wheel out if you need to. I typically still pull the rear fender when doing tire changes as it is 4 screws and easier to lift up there than trying to get it through the hole in the lift.

For tie down points, it will come with 2 U bolts and be predrilled for a couple places to mount them. They are fine but pick up another set to populate the other holes or do what I did. I picked up 4 x 1/4" eye bolts so I have two points on each side. There are times that with different bikes you need different tie down points. Just pick up two nuts and a few washers for each and they work great. Another tip to protect your lift is to take the wooden crate that it comes in and cut some of the lid to drop onto the platform of the lift. The centerstand on a ST has a lot of weight and I have seen where some people have dented their lift. It protects it well. The wood is only 1/4" so it is nice and thin so it isn't a problem getting the bike on and off. I cut mine down to where it is about 2' or maybe 2.5' long and the width of the deck of the platform. I also used the jig saw to cut out knotches where my tie down points are. It keeps the wood in place. I wouldn't go with wood any thicker as the bike would be higher than the lip. Also by having the CS on a bit of wood it gives you a little more clearance for the rear wheel when jacking the front or doing other maint.

While it isn't a perfect lift, for the money they can't be beat. I would love a better one but for my use it is fine.

I will say that the box is heavy so have plans to haul it. A SUV isn't a good optoin. I had them put it in my pickup which worked but it was put in there with a forklift and I have a tractor with a loader to get it out. Wihtout those tools it is a bit of a bear to do alone. Possible but a trailer would be better.

Some also say to replace all the cheap nuts and bolts with better quality ones but I haven't had any issues. I have had mine for about 2 years now.
 
To add to the suggestions. Oil level may be low from the factory, several of us have had to service (top-off) ours. The original grease zerks are made of brass colored cheese, and several may break off when you try greasing the lift for the first time. Don't remember the size but steel replacment zerks are available.

I painted mine with non-skid deck paint just in case the tires wanted to slip as I was going on and off, and used a square of plywood under the centerstand until a member with access to plate steel gave me a quarter inch thick plate to replace the plywood.

Sure, it's a cheap lift, but IMO, it's more than adequate for the diy'er home mechanic. I've used mine since 2007, and other than low oil and zerks, have had zero problems/issues.
 
Here is a pic of my lift. Make your outriggers, and you can park the bike on the lift with the center stand. Add a couple more tie down points and on the left front add a PVC tub for storage of your safety bar. That way it is always with in arms reach.

When working on the bike, stand the out rigger boxes up in the corner of the garage, out of the way.
My lift is the permanent parking spot for my NT.
 
Last edited:
Here is a pic of my lift.

Almost 100% identical with the thing I got over here in Europe... I'm pretty positive its made somewhere in China or such... but it works!

BTW: nice man cave! Are you a sientist? Looks like a lab ;)
 
I found the pictures I had posted earlier of my lift set up in the garage.

Here is what I picked up to lift my projects with. I have had the ST on it, just have to get some pictures of it.

DSC01037.jpg


[
DSC01036.jpg


DSC01039.jpg


This is with the side extensions I made, held in place with 1 1/2" black pipe. Front has a 5' pipe with eyebolts to put tiedowns in place. Rear pipe is 4' and holds the rear.

DSC01030.jpg


DSC01029.jpg


DSC01026.jpg


It works great for the bikes and the ATV.
 
Almost 100% identical with the thing I got over here in Europe... I'm pretty positive its made somewhere in China or such... but it works!

BTW: nice man cave! Are you a sientist? Looks like a lab ;)

Yes the lifts are made in China.
No I am not a scientist. I am retired, Blame it on my Viennese heritage. I too, was born in Vienna.
 
I too, was born in Vienna.

The world is a village... :D

BTW: I tried that 'safety bar' with the ST1100 on, once... bended like a fishing rod...

Plan to get a decent 3/4", thick walled steel pipe (plumbing) as replacement.
 
Here is a pic of my lift. Make your outriggers, and you can park the bike on the lift with the center stand. Add a couple more tie down points and on the left front add a PVC tub for storage of your safety bar. That way it is always with in arms reach.

When working on the bike , stand the out rigger boxes up in the corner of the garage, out of the way.
My lift is the permanent parking spot for my NT.

Ok Chuck, I think I see alittle dirt on the floor in that 3rd picture. Let's try & keep that place clean ok? For crying out loud...:well1:
 
I regularly park my ST1300 on handy lift table due to limited garage space. There are extension wings on the lift so I ride on deploy side stand dismount and place bike on center stand when ever on lift, I feel the center stand is more stable on the lift. When removing the bike I generally get on bike and rock off center stand, fold up side stand, and back off lift. Now here are a couple safety tips, 1. make sure the lift is completely down and air or hydraulic system is completely relieved or when the weight of the bike is off the lift it will go back up some possibly causing loss of control of bike balance while backing off. 2. Make sure side stand is up when backing bike off stand of it will catch and cause loss of bike balance. Combine both of these scenarios and disaster will happen, dont ask how I know:mad: lesson learned :money1::cry::money1:
 
Guys, thanks for some of these great tips. I managed to get it unloaded, assembled and put into use this weekend. I did drill it for the upgraded self locking wheel chock, but I retained the original device. To make it easier to remove, I used M10 toggle bolts. I also added 2 eye bolts towards the rear in order to have both front and rear tie down points. It is a tight fit with 3 bikes on one side of a 2 car garage, but if I push the table, with a bike loaded, at an angle, I can still get all three in the garage. My first attempt was my lightest bike, the '86 VFR. Do you see any problems in how I secured it to the forks? The chock actually did hold it in place allowing me to load it unassisted, get off and tie it down. I may need to raise the lock on the chock for the larger wheels on my other VFR and my ST1300. All and all, I just love it. Being able to putter, polish and maintain the fleet without bending, squatting and angering my lower back makes me wonder why I waited.
 

Attachments

  • VFR-lift1.jpg
    VFR-lift1.jpg
    372.2 KB · Views: 83
Last edited:
Back
Top Bottom