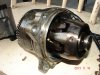
The new alternator is in
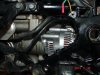

.
")
Firstly, the information provided on st-owners, st-riders, and mike martins web pages, not to mention the links there provided are indispensable. also my clymer shop manual was a great asset with helpful info.
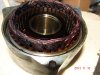
Disassembley of old alternator and assembling the parts for the new alternator went smoothly
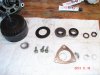
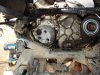
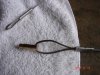
then came installing the base unit into it's new home. I borrowed a homemade lewis pin from krummenacker on this site and I was ready, haha. I put a little grease on that pin put it in the hole to hold the gears aligned, worked the base plate into place and finagled with it for say 5 min and it slipped right in. Oh this is so easy I thought. Put the rest of the alternator on, installed the flange bolts to hold it in place while I pull the lewis pin out. So now I ready, set and snatch...........nothing happened bu me grunting, hmmm. I proceed to snatch and pull and snatch and finally.......the cable broke and the pin was still in the gear, oh darn I thought (sure that's what I was thinking). Well I took everything out, and waited until today. I called my dad up and told him I've got a project for you. It pays to know people with talent and a lathe. That man never ceased to amaze me. In no time at all I've got a brand spankin new lewis pin, I was ready freddy to get this done.
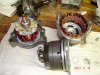
Well 5 for attempt and yes the pin was out. Firstly read everything on all those pages a few time over and hope you remember it all, haha. Secondly, think about having the correct angle between the pin and the oil drain hole. I pulled from the left side of the bike instead of the right lower side. Thirdly, make sure when you insert the alternator gear into the bike that the pin is in the 4 to 5 o'clock position. If it's at the 6 o'clock when the gears line up and it slides into place the pin is going to be hindered by cast metal in front of it.
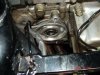
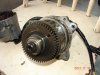
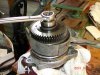
I decided to split the new alternator. No special reason, it just worked better for me doing it that way. There is a little trick to assembling the alternator in that tight space. I'd be glade to share it, just ask but for now it would take me...ah heck. Once you have the front portion of the alt butted up to the baseplate, pull it out enough to rotate the back upward a little bit. With you right hand ease the back portion down onto it, being patient it will fit together. Once it's together, wiggle it till the splines line up and slide her in. In reality it didn't happen quite that fast but that's the jest of it.
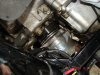
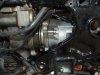
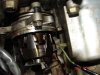
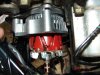
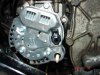
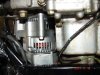
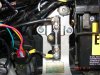
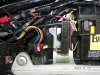
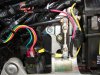
The wiring seems straight forward. I've provided some pics of it. I would appreciate you guys looking it over and letting me know if anything looks awkward, wrong or could be done a better way.
I'm not done yet but overall it has been challenging but not overwhelming. The cable break was a sure "oh crap moment" but still it has gone smoothly in retrospect.
The next task is the drive shaft.
Terry