Replacement Header Pipes For A ST1100

Uncle Phil

Site Supporter
Joined
Feb 26, 2007
Messages
11,310
Age
71
Location
In The Holler West Of Nashville, Tennessee
Bike
4 ST1100(s)
2024 Miles
002064
STOC #
698
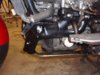
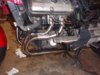
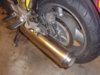
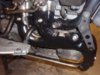
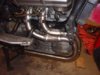
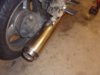
Before I proceed any further, I need someone to double check the torque setting for the 2 long nuts (8 nuts in total, takes a 10mm socket to tighten them) that secure each exhaust header to the head. I'm showing 12 ft lbs but I am tired and could be cross-eyed at this stage. I sure don't want to 'under' or 'over' torque them. Your kind responses will be greatly appreciated.
 
Joined
Sep 4, 2013
Messages
8,196
Location
Cleveland
Bike
2010 ST1300
Do that when you are rested, Phil. You do NOT want to over torque those nuts. I assume you are using new copper gaskets, aren't you (my 1300 uses copper ones, does the 1100)?
 

Andrew Shadow

Site Supporter
Joined
Jan 28, 2012
Messages
5,127
Location
Montreal
Bike
2009 ST1300A9
12 Ft-Lbs. is the final torque.
There is a pre-torque of 9 Ft-Lbs. and a torquing procedure to ensure that equal clamping force is maintained by both nuts once final torque is achieved and the copper gasket has crushed.
- Both nuts should be installed snugly to ensure the gasket remains perpendicular to the pipe and head.
- One nut in each pair of two should be torqued to 9 Ft-Lbs.
- The second nut is then torqued to 12 Ft-Lbs.
- The first nut is then final torqued to 12 Ft-Lbs.
- Repeat for the remaining three pairs.

A kind fellow, who looks suspiciously like you, posted an ST1100 fastener torque specification cheat sheet a while back where this torque specification can be found- ST1100 - Torque Settings
 
OP
OP
Uncle Phil

Uncle Phil

Site Supporter
Joined
Feb 26, 2007
Messages
11,310
Age
71
Location
In The Holler West Of Nashville, Tennessee
Bike
4 ST1100(s)
2024 Miles
002064
STOC #
698
A kind fellow, who looks suspiciously like you, posted an ST1100 fastener torque specification cheat sheet a while back where this torque specification can be found- ST1100 - Torque Settings
However, sometimes the 'verbiage' used to describe the particular fastener can be a little less than 'clear' to me. ;)
Thanks everyone.
 

CYYJ

Michael
Joined
Jun 10, 2013
Messages
2,399
Age
69
Location
Toronto & Zürich
Bike
None any more.
STOC #
2636
Hi Phil:

When I took the header bolts off one side of my ST1100 last year, when I was changing the clutch slave cylinder, I noticed that the threads were quite corroded. I think it would be wise to clean the bolts up as best you possibly can with a wire brush or similar before re-installing them. Otherwise, you might hit the torque setting (which is very low) before the gaskets are properly compressed, this as a result of corrosion debris on the bolts causing excess friction in the threaded hole that the bolt fits into.

Be aware that the (presumably steel) bolts fit into an aluminum block - resist that temptation to give them just a wee squeeze tighter, because threads in an aluminum casting will strip out very, very easily. Don't ask me how I know that.

Michael
 

John OoSTerhuis

Life Is Good!
Joined
May 10, 2005
Messages
5,221
Location
Bettendorf, Iowa
Bike
1991 SSMST1100
STOC #
1058
A kind fellow, who looks suspiciously like you, posted an ST1100 fastener torque specification cheat sheet a while back where this torque specification can be found- ST1100 - Torque Settings
Not to put too fine a point on torque value lists... they’re in two places in the excellent Honda Manual. My take on it, again: LINK
 
OP
OP
Uncle Phil

Uncle Phil

Site Supporter
Joined
Feb 26, 2007
Messages
11,310
Age
71
Location
In The Holler West Of Nashville, Tennessee
Bike
4 ST1100(s)
2024 Miles
002064
STOC #
698
Well, here's some 'after' pictures of the install. Everything connected right up like it should and is working just fine. I had to 'refurb' the heat shields as the rust had corroded a few of the bolt holes. I put everything back with all stainless steel fasteners since the Delkevic is all stainless steel, including the clamps -

ST1100 Left Heat Shield.jpgST1100 Left Side Delkevic.jpgST1100 Left Silencer.jpgST1100 Right Heat Shield.jpgST1100 Right Side Delkevic.jpgST1100 Right Silencer.jpg
 

ST1100Y

Site Supporter
Joined
Dec 4, 2012
Messages
5,037
Age
59
Location
Vienna, AuSTria
Bike
ST1100Y, ST1100R
STOC #
637
Nice, quite close to the OEM design (always wondered if installation of heat-shields is possible on pattern downpipes...)
So the OEM silencers also fit 1on1 or any modifications required?
 
Last edited:
OP
OP
Uncle Phil

Uncle Phil

Site Supporter
Joined
Feb 26, 2007
Messages
11,310
Age
71
Location
In The Holler West Of Nashville, Tennessee
Bike
4 ST1100(s)
2024 Miles
002064
STOC #
698
Nice, quite close to the OEM design (always wondered if installation of heat-shields is possible on pattern downpipes...)
So the OEM silencers also fit 1on1 or any modifications required?
Those are the OEM silencers polished up a bit and the paint removed from the tips.
The tips appear to be stainless steel and polish up nicely.
The Delkevic pipes are a perfect replacement with all the bolt holes in the correct place even for the heat shields.
I did replace the Honda bolts with stainless steel socket heads and washers on the heat shields.
It comes all the needed gaskets and sealant.
I like them because they are all stainless steel and hopefully will last a long time.
How do they sound?
Just like stock since I have the OEM silencers fitted.
 

ST1100Y

Site Supporter
Joined
Dec 4, 2012
Messages
5,037
Age
59
Location
Vienna, AuSTria
Bike
ST1100Y, ST1100R
STOC #
637
The Delkevic pipes are a perfect replacement with all the bolt holes in the correct place even for the heat shields.
It comes all the needed gaskets and sealant.
And for a decent price too (already bookmarked a dealer)
A few years ago those kits where horribly expensive and a PITA to install as non really fitted properly (I recall endless woes about the Motard sets...).
€ 250,- for the Delkevic PR1633 exhaust manifolds are so tempting, that I'm actually considering just getting a kit for my spares-storage...
 

STraymond

Site Supporter
Joined
Oct 18, 2009
Messages
1,740
Location
Cincinnati Area
Bike
'01 ST1100
STOC #
8700
Well, here's some 'after' pictures of the install. Everything connected right up like it should and is working just fine. I had to 'refurb' the heat shields as the rust had corroded a few of the bolt holes. I put everything back with all stainless steel fasteners since the Delkevic is all stainless steel, including the clamps -

ST1100 Left Heat Shield.jpgST1100 Left Side Delkevic.jpgST1100 Left Silencer.jpgST1100 Right Heat Shield.jpgST1100 Right Side Delkevic.jpgST1100 Right Silencer.jpg
But, how did you get the gold color on the body of the mufflers (silencers)?

Ray
 
OP
OP
Uncle Phil

Uncle Phil

Site Supporter
Joined
Feb 26, 2007
Messages
11,310
Age
71
Location
In The Holler West Of Nashville, Tennessee
Bike
4 ST1100(s)
2024 Miles
002064
STOC #
698
But, how did you get the gold color on the body of the mufflers (silencers)?
Ray
That's just the lighting, they are actually nice and shiny stainless.
I found some metal polish called White Diamond at the auto parts store.
I decided to clean them off since they hadn't been cleaned in probably 10 years and they were off the bike.
That stuff is pretty amazing as it gets all the junk off but the scratches. ;)
 
OP
OP
Uncle Phil

Uncle Phil

Site Supporter
Joined
Feb 26, 2007
Messages
11,310
Age
71
Location
In The Holler West Of Nashville, Tennessee
Bike
4 ST1100(s)
2024 Miles
002064
STOC #
698
And for a decent price too (already bookmarked a dealer)
A few years ago those kits where horribly expensive and a PITA to install as non really fitted properly (I recall endless woes about the Motard sets...).
€ 250,- for the Delkevic PR1633 exhaust manifolds are so tempting, that I'm actually considering just getting a kit for my spares-storage...
Martin - I plan on getting a 'spare' also when things settle down a bit.
As I said, the fitment is dead on but you do have to loosely assemble it in place before you start tightening everything down.
 

ST1100Y

Site Supporter
Joined
Dec 4, 2012
Messages
5,037
Age
59
Location
Vienna, AuSTria
Bike
ST1100Y, ST1100R
STOC #
637
As I said, the fitment is dead on but you do have to loosely assemble it in place before you start tightening everything down.
The smart way of doing this... even with OEM down-pipes... :thumb:
(plus that I always apply copper slip on every joint and thread, even under and on those graphite bushings, to prevent things corroding together...)
 
OP
OP
Uncle Phil

Uncle Phil

Site Supporter
Joined
Feb 26, 2007
Messages
11,310
Age
71
Location
In The Holler West Of Nashville, Tennessee
Bike
4 ST1100(s)
2024 Miles
002064
STOC #
698
Well, another one of my ladies (97 ABSII) had the exhaust bite the dust right at the right side connection into the collector box.
So I ordered 3 sets of Delkevic pipes (for the other two when they decide to fail) - just in case at some point Delkevic decides to quit making ST1100 stuff like Mother Honda. ;) The heat shields are in good shape on this one and all the bolts came out. BTW, I use a cutoff wheel to cut the exhaust pipes just before the collectors past the back of the engine. This makes removal a whole lot easier as you are doing it in pieces and lot less weight to deal with. I've got the whole system removed now which ain't bad for a nearly one-armed mechanic! I also found you can get to the middle hanger bolt back by the center stand from the left side with a long extension if you poke it through the small opening. Now to clean things up and begin reassembly!
 
Top Bottom