Told the brake pads are shot, how do I tell?

OP
OP
HondaInTheSun
Joined
Apr 21, 2019
Messages
160
Age
49
Location
San Jose, CA
Bike
2003 ST1300
Thanks everyone for all the kind help. This job is well outside my level of comfort but I figure I'll give it the old fashioned college try and see how far I can get by myself. I'm starting to assemble a list of parts for the job. I have a 2003 ST1300 WITHOUT ABS, these seem to be the right parts...

Rear pads: https://www.hondapartshouse.com/oemparts/a/hon/5053f0e1f870021c54be62a8/rear-brake-caliper - 06435-MCS-G03
Front right pads: https://www.hondapartshouse.com/oemparts/a/hon/5053f0daf870021c54be62a2/right-front-brake-caliper - 06455-MCS-G02
Front left pads: https://www.hondapartshouse.com/oemparts/a/hon/5053f0dcf870021c54be62a3/left-front-brake-caliper - 06455-MCS-G02

Looks like about $120 total for all the pads.

Also open to other vendors if anyone has better recommendations.

In addition to the pads it sounds like I will need the following:

Brake grease ( to grease the pin ) - any particular type/brand?
Brake fluid ( to clean the pistons with ) - any particular type/brand?
Blue Loctite ( for use on caliper bolts )

My plan would be to do the front pads first, that seems doable for my skill level, but removing the rear wheel to do the rear pads scares the s@#t out of me, that might be where I have to say uncle and seek more qualified help. :rofl1: Any recommendations on someone who could do this in the San Jose, CA area?

Thanks again as always! After sitting in traffic this morning watching my lane splitting brothers breeze by, motivation to get this fixed ASAP is high. :rofl1:
 
Joined
Dec 6, 2018
Messages
1,069
Age
41
Location
UK
Bike
2002 ST1300A
STOC #
9004
Just to add here, my discs (rotors) are close to the legal minimum thickness. The local shop has quoted in the region of £750 GBP + tax just for the parts.

Seriously, talk to Larry, get your pads changed before they destroy your discs!

Daily preflight check (POWER)
- Petrol
- Oil
- Water (coolant)... not so easy on the 13, I do it weekly but do look for signs of a leak daily.
- Electrics (lights still work?)
- Rubber (tyres, condition & pressure)...and brakes (pad life, disc condition and effectiveness before riding away).
 

rjs987

Robert
Site Supporter
Joined
Sep 25, 2009
Messages
3,057
Age
68
Location
West Des Moines, IA
Bike
2022 Kymco AK 550
2024 Miles
001392
STOC #
8058
leaky fork seals actually are NOT a SURE sign they need replaced. It could be simply grit that has worked its way between the seal and fork piston as happened on my bike. If the leaking is minimal all that MAY be needed is to clean them using a SealMate tool. That is a flat plastic tool that is held around the piston part of the fork and run into the seal past the dust ring and moved completely around the fork seal. I used a SealMate on my forks and had no more problems after that. If the leak had continued then I would have replaced the seals. Sometimes the simple fix is all that is needed.
 

GGely

Site Supporter
Joined
Oct 28, 2018
Messages
706
Location
Oshawa, Ontario, Canada
Bike
2001 ST1100 Non ABS
STOC #
8997

I don’t intend to hijack this thread but I do have to challenge dduelin’s use of a compact with a rosy tone powder to check pad thickness. Nowhere in the Honda universe is it recommended or acceptable to use anything beyond a natural or translucent regular #2 pressed powder when checking the state of a brake pad.

Just saying...
 

Igofar

Site Supporter
Joined
Jan 8, 2011
Messages
7,120
Location
Arizona
Bike
2023 Honda CT125A
I don’t intend to hijack this thread but I do have to challenge dduelin’s use of a compact with a rosy tone powder to check pad thickness. Nowhere in the Honda universe is it recommended or acceptable to use anything beyond a natural or translucent regular #2 pressed powder when checking the state of a brake pad.

Just saying...
You've heard the term Garage Queen......:rofl1:
We've only seen his video in Crocks...wonder if he traded 'em in for 8 inch heels ;)
 
Joined
Mar 13, 2012
Messages
5,056
Location
soCal
Bike
'97 ST1100
STOC #
687
I don’t intend to hijack this thread but I do have to challenge dduelin’s use of a compact with a rosy tone powder to check pad thickness. Nowhere in the Honda universe is it recommended or acceptable to use anything beyond a natural or translucent regular #2 pressed powder when checking the state of a brake pad.

Just saying...
OK, we're talking about gun powder here, right??? So, are we comparing different brands of ball powder, flake powder, or one of each? I think for pad thickness checks a slower burning powder is preferred, it provides a longer flash of illumination compared to faster burning powders.

BTW, nice one Larry
You've heard the term Garage Queen......
 

Obo

Joined
Oct 22, 2019
Messages
4,298
Location
East Coast Canada
Bike
'03 ST1300A
leaky fork seals actually are NOT a SURE sign they need replaced. It could be simply grit that has worked its way between the seal and fork piston as happened on my bike. If the leaking is minimal all that MAY be needed is to clean them using a SealMate tool. That is a flat plastic tool that is held around the piston part of the fork and run into the seal past the dust ring and moved completely around the fork seal. I used a SealMate on my forks and had no more problems after that. If the leak had continued then I would have replaced the seals. Sometimes the simple fix is all that is needed.
You can always make your own SealMate fork seal tool from some plastic you have at home if you are too frugal to pay what SealMate wants for theirs. I know - I was frugal ;) If I recall it was from a plastic milk jug.
 

Obo

Joined
Oct 22, 2019
Messages
4,298
Location
East Coast Canada
Bike
'03 ST1300A
A 35mm roll of film end works a charm.
Does anyone still use 35mm film anymore?
More than 110 I'd imagine.

Off topic.

I still have a wind up 8mm Kodak Brownie movie camera (I scrapped the Super8 that used cartridges), 8mm & Super 8 reel to reel film (slowly transferring it to digital), 2 projectors, splicer, mini reviewer, light bar etc. that was my dad's in the 60's. I don't use them just do to the difficulty and cost in finding film and sending it away for processing. Plus the camera is a bit bulky to mount on the bike vs my Garmin & Polaroid action cameras. ;)

1576154144300.png
 

ReSTored

Site Supporter
Joined
Nov 6, 2005
Messages
1,458
Location
Mississauga, Ontario
Bike
2019 Tracer GT
STOC #
4463
.................... reel film (slowly transferring it to digital), 2 projec ................
This is off topic as well in that I have a bunch of compact VHS tapes and DAT tapes that I want to convert to digital format. Can you post what device you are using and how well it works. Thanks.
 

GGely

Site Supporter
Joined
Oct 28, 2018
Messages
706
Location
Oshawa, Ontario, Canada
Bike
2001 ST1100 Non ABS
STOC #
8997
Maintaining the off-topic momentum for a minute, I have a friend who has a business here in the Toronto area, converting various film tapes to digital formats. I’m always surprising that his business continues to grow every year.
 

Obo

Joined
Oct 22, 2019
Messages
4,298
Location
East Coast Canada
Bike
'03 ST1300A
This is off topic as well in that I have a bunch of compact VHS tapes and DAT tapes that I want to convert to digital format. Can you post what device you are using and how well it works. Thanks.
Danged hijackers.....

VHS can be converted a couple of ways if you don't want to outsource it.

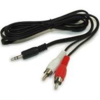
Hook a VCR up to a DVD recorder or hook a VCR up to your computer using one of these types of interface.
I have not used this unit, I normally hook a vcr up to a DVD burner I have.

As for DAT, it's already digital. The problem is how to transfer it. If you are talking DAT audio cassettes you can run the line out from your DAT player to your computer audio in with a cable and then use audio recording software on the computer to re-record it. 1576162479727.png
If it's a DAT video tape (minDV etc) just follow the same procedure for the VCR but use your player where the VCR would have been.
 
OP
OP
HondaInTheSun
Joined
Apr 21, 2019
Messages
160
Age
49
Location
San Jose, CA
Bike
2003 ST1300
Finally got around to this job with the help of articles and information on this site. Took me waaaay longer than it should have because I’ve never done anything close to this before. Got it done though! :)

Here’s the before and after pics on the rear, now I see the difference. :)

Thanks everyone for all the help!!!
 

Attachments

Joined
Nov 17, 2015
Messages
88
Location
San Diego, CA
Bike
‘19 Versys 650LT
STOC #
9029
Just pulled my rear wheel for a tire replacement.

I'm no expert, but am I correct that I have plenty of life left in these rear pads?

20200102_145326_HDR.jpg
 
Top Bottom