
Hi ST owners!
I recently learned that my brake pads need replacing, more context on that here if you’re interested:
 www.st-owners.com
How do I verify this for myself? They were clearly able to without taking the calipers off.
I’ve tried to attach pics here, but not sure if I’m capturing the right thing.
Thanks in advance for any help!")
I recently learned that my brake pads need replacing, more context on that here if you’re interested:
Test rode a BMW K1600 and K1200 today... | BMW
A quiet Friday at work had me curious...are those big BMW bikes I see on the highway as amazing as I suspect they might be? I swung by our local BMW dealership and had an absolutely wonderful, hassle free, test ride experience. I was interested in looking at the K1600, within 10 minutes of...
How do I verify this for myself? They were clearly able to without taking the calipers off.
I’ve tried to attach pics here, but not sure if I’m capturing the right thing.
Thanks in advance for any help!
Attachments
-
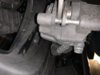 79.2 KB Views: 196
 -
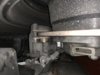 112 KB Views: 202
 -
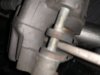 57.4 KB Views: 188


