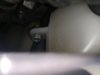
Next steps...buy coolant, refill what seems to be empty reservoir ( is it really as easy as adding coolant to the full line in the reservoir?
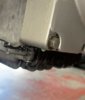
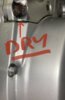
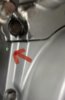
Congratulations on the excellent job you did cleaning up the engine and identifying the leak. It doesn't matter if the liquid is coming out of the square hole or out of the gap between the front panels of the engine, the conclusion is the same either way.
A couple of suggestions for you:
1) While you have the fairings off, aim a garden hose into the V of the engine to rinse out any dried coolant that may be in there. It's best to have the bike parked with the front wheel pointed downhill when you do this.
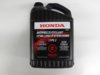
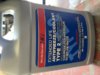
2) Refilling the antifreeze reservoir is as simple as you suggest - you just add the premixed coolant (buy it at a Honda automobile dealer). Be aware, though, that if the reservoir is dry now, the level in the reservoir will drop rapidly as air gets eliminated from within the cooling system. So don't draw any conclusions about leakage rate until the motorcycle has gone through half a dozen thermal cycles, from cold engine to fully warmed up & riding for a while at different throttle settings. Once all the air has evacuated from the cooling system, coolant loss via the leaks in the V will stabilize and you can then make a judgement call about how soon you need to attend to the leaks.
You can speed this process up a bit by removing the cap from the radiator and adding coolant directly to the radiator. I suggest you do this, because if your reservoir is dry, it is 99% certain that the coolant level in the radiator is low. Just be sure that the engine is stone-cold (has sat overnight) before removing the rad cap.
If you already have the left lower fairing off, take a moment to remove the coolant reservoir and clean it out. It is much easier to see the level of the coolant in the reservoir if the inside and outside surfaces of the reservoir are clean. Fill it up with water & Simple Green, let it soak for a bit, then add a small handful of rice and shake it vigorously. That will clean the inside of the reservoir. At the same time, check the overflow hose that attaches to the top of the reservoir, and the suction hose that attaches to the bottom - make sure they are unobstructed.
-------------------
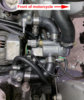
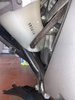
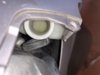
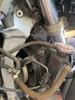
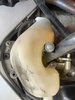
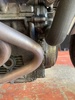
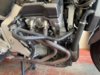
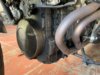
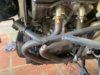
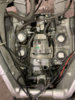
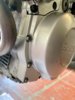
@SMSW has suggested (post 28) going in from the front, via the radiator, to identify and correct the leakage. I very much respect SMSW's knowledge, and I appreciate what his rational is for this suggestion, but I don't think that's a good idea in your case. Going in from the front is an option for someone who is already familiar with the layout of the components inside the V - it's not the best approach for someone doing the job for the first time. See the photos below, which show the view from the front (radiator removed) and from the top (fuel tank, airbox, and throttle bodies removed).
Michael
View from Front (Throttle Bodies removed - there won't be this much space above if you only go in from the front)
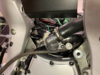 View from Top

 145 KB Views: 26


")