Article [13] ST1300 - Fuel Pump Replacement

Thanks a bunch!
But how does draining the lower tank from the hose connection #6 on the top of the lower tank drain the gas out of it?
 
The gas gets siphoned out as long as the hose that you put in to your catch-can is kept below the level of the bottom of the lower tank.
 
I just got through doing this. Pull the fuel return hose. (The one with the clip) Attach you siphon hose to this and suck. (I got a cheap siphon from Harbor Freight and it worked great.) The return line goes to the bottom of the tank and you can just about get it sucked dry this way.
 
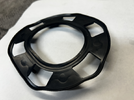
When I did mine, I ordered a new gasket and it leaked... I reused the old one with all the indentions from being installed and it didn't, I just cleaned it real good.
Here's why I replaced my "packing". Note the indentations from the contact and extended compression of the material, likely hardened with agetempImageKpsbVP.png, retained after removing:
 
Good idea using the OEM hoses, however, looks like you may have tightened the one at the fuel pump a little too tight.
Is that bits of rubber coming through the worm clamps?
Many failed fuel pump repairs are due to leaks from these clamps.
The spring clamps HONDA used are safer.
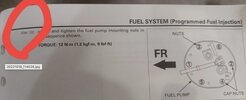
Did you also follow the correct torque sequence and pattern on the nuts?
The cap nuts only fit on certain studs.
And the sequence is different between some years.
 
Good idea using the OEM hoses, however, looks like you may have tightened the one at the fuel pump a little too tight.
Is that bits of rubber coming through the worm clamps?
Many failed fuel pump repairs are due to leaks from these clamps.
The spring clamps HONDA used are safer.
Did you also follow the correct torque sequence and pattern on the nuts?
The cap nuts only fit on certain studs.
And the sequence is different between some years.
Thank you for your scrutiny! It will be worth me pulling the assembly and double checking the hose clamps. As for the torque specs, I saw and followed the >'03 pattern for my 'LowerFuelTankTopInstall.jpg06. I torqued in 2 steps; 45"lbs, then 100"lbs. Of note, #4 cap nut would not acknowledge, so I stopped by feel. I have experienced that painful "SNAP" before, and it can REALLY ruin your day.... I guess I will have a look at number 4 cap nut when I open it up again.
 
I trust your feel more than an unknown torque wrench.
I wouldn’t open back up just to check the hose clamps as you can’t do anything at this point.
Wait for failure, then use the spring clamps next time.
Nice job replacing everything.
Don’t break those studs as the lower tank is now obsolete.
 
I trust your feel more than an unknown torque wrench.
I wouldn’t open back up just to check the hose clamps as you can’t do anything at this point.
Wait for failure, then use the spring clamps next time.
Nice job replacing everything.
Don’t break those studs as the lower tank is now obsolete.
Larry,
Thank you much for your advice!
/r
Brad
 
Just finished reading this very informative thread. My 2007 ST1300 has 43,000 KMs (or around 27,000 miles) and since I did not get a maintenance history when I took possession, I have done just about every (preventative) steps (flush/fill coolant, new thermostat, new brake pads, serviced calipers, bled brake and clutch fluid, new spark plugs, new air filter, oil filter, changed engine and final drive oils). However, the fuel pump and filter never occurred to me---until I found this thread. I would assume that the fuel filter is due for a change, but I am debating whether I should also change the fuel pump while I am inside that second tank. From what I have read, fuel pumps tend to last around 100,000 miles but considering the age of the bike (18 years), should I go ahead and change it? What do you guys think?
 
Just finished reading this very informative thread. My 2007 ST1300 has 43,000 KMs (or around 27,000 miles) and since I did not get a maintenance history when I took possession, I have done just about every (preventative) steps (flush/fill coolant, new thermostat, new brake pads, serviced calipers, bled brake and clutch fluid, new spark plugs, new air filter, oil filter, changed engine and final drive oils). However, the fuel pump and filter never occurred to me---until I found this thread. I would assume that the fuel filter is due for a change, but I am debating whether I should also change the fuel pump while I am inside that second tank. From what I have read, fuel pumps tend to last around 100,000 miles but considering the age of the bike (18 years), should I go ahead and change it? What do you guys think?
I spent right at 50 years restoring old Hondas....and one triumph, one Kaw H1. I'm in the habit of not trusting old stuff, especially if it is crucial to the proper running of the bike. Blew a whole lot of $$$ putting them back into showroom condition. Nasty, expensive, rewarding habit. I bought spares for that bike, and the 2006 1300 I got from my little brother. Old habits are hard to shake so I stocked up on spares that may be needed based on all my previous experiences.
Did a major refurb of our 1991 1100 and was absolutely amazed at the number of parts I replaced with new that did not need replacing. One of the few exceptions was the fuel pump assembly. There was no visible rust on the walls of the fuel tank, I removed the pump assembly to check the filter. It had trapped a bit of rust which was falling from the underside of the top of the tank, not visible looking into the tank from the filler hole. Since I had prepared for the worse, I had a nice used tank, new cap, new level sensor assembly and new pump assembly. Got all that for around $100 from various sources. Guess I was lucky and found spares at the point when the model's desirability is waning and just before it becomes collectable....part prices follow suit.
Looooong story short, to me it's common sense to inspect while you are on a roll. One way or another, you will be surprised with what you find.
So far, our ST1300 has just needed fluid changes, tires and two batteries now. Always inspect what's visible when you do any maintenance. Leaks may be difficult to see, corroded wiring connectors and ground wires may be waiting, look for over heating indications on all the wiring/connectors you can see...same with the hoses of all sorts and their clamps....don't forget to clean and lubricate anything in your path...the shifter linkage comes to mind.
If you have questions or concerns, ask away here. Most responders are familiar with the bikes and DO know what they are doing.
Glad I stumbled onto it while searching online for 'Honda ST1100 Parts'.
 
Very interesting @Oldbikefixr!!. You can be sure I will inspect, clean and lube everything in the most inaccessible places while I have the chance. And, I agree, this place is a treasure trove of knowledge. I have been reading and bookmarking quite a few threads for future referenence.
 
@Dobby , I recently completely your "overhauling" actions (and many more) on my '06 at 70k miles. A few thoughts come to mind:
1. "43km may be premature", however;
2. "While your in there...", however;
3. If you do replace the pump, it wasn't needed but you'll never have to do it again; if you don't, for some reason it will fail ("I wish I had..."), and you'll have to go in again.

I replaced my fuel pump. Here's what I used:

Fuel Pump/Filter $100

https://www.highflowfuel.com/search.php?Year=2006&Make=Honda&Model=ST1300
 
Does anyone have a link to a video on how to access/change fuel pump and filter? Searched Youtube but could not find anything. The Opening Post refers to a document on this but that link does not work for me.
 
Tonight I replaced my fuel filter and while I was in there I tossed in a new fuel pump. The bike has 94000 miles and I had some bad fuel a while back and have been wanting to replace the filter. A member here mentioned another fuel pump option rather than the entire assembly option that Honda has for $400. The fuel pump motor in the ST1300 is a common automotive pump. I would post the link to ebay but it will be gone soon and just be a dead link the model number listed is:

HFP-382

A Google search of that will result in several options. The kit I bought off ebay was $68. Here is an example of the kit. (note over 400 vehicles use this pump)

High Flow Pump

The one problem with this option is the small sock that attaches to the pump pickup has to be reused. Honda doesn't sell this part. While I was in there I also replaced the Fuel Filter (16900-MBG-013); Filter, Fuel Return (16714-MBG-000) and when the assembly is removed you should replace the gasket (17574-MN5-000) which seals the fuel pump assembly. There are also some crush washers on the banjo fitting that could be replaced if you are ordering parts anyhow. I don't have the part number handy.

There is already an article on fuel filter replacement so I will focus this on the fuel pump. It is pretty much the same process so I would recommend looking at both articles. Since the tools needed and the process for the removal of the assembly is documented there I will skip that part of the job. It is pretty straight forward.

Ok I will start by saying that the towel is clean. Just stained. You do want a clean surface to work on.

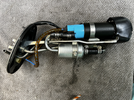
Here is the assembly removed.

attachment.php


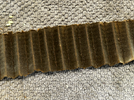
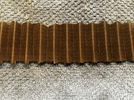
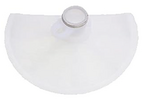
At the bottom of the assembly is a rubber boot that holds the Fuel Return Line Filter. This material is a stainless steel wool looking material. I have seen stuff for cleaning dishes that looks very much like this. I probably didn't need to replace it but it was cheap and I was ordering stuff anyhow.

attachment.php


Here is a comparison of the old and the new. The pic didn't turn our that well.

attachment.php


Once removed you can see the sock on the intake of the fuel pump.

attachment.php


To remove the pump there is a single screw that holds a band around the pump. There is also a ground wire attached to this screw. Remove it and then straps will bend back. Also disconnect the power lead from the pump.

attachment.php


Since I was replacing the filter and the pump I found it easier to remove them together and disconnect them separate from the assembly.

attachment.php


Swapping the part was as simple as disconnecting hoses and reconnecting them. The sock is held in place by a friction washer. I popped off the old one and used the new one that came with the packaging. There wasn't an easy way to get a shot of that but it is pretty simple. As long as you have the pump and possibly the filter out of the way, now would be a good time to replace the gasket. You can do it at the end but it is easier to do it now at this point with the pump and possibly the filter out of the way.

When reassembling make sure the return filter is where the return line dumps fuel back into the tank. Basically between that and the sock that has to get reused as seen here.

attachment.php


Button the rubber boot back up and you are done reassembling the pump assembly.

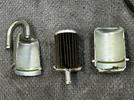
Here are some shots showing the old pump and the new pump side by side.

New pump on top

attachment.php


New pump on the Right. This shot is the intake of the pumps. The post in the middle are there for the friction washer to retain the pre-filter sock.

attachment.php


New pump on the Right. This shot shows the output and the connector for the power.

attachment.php


When I opened up the rubber boot on my pump this is the debris that was located on the pre-filter sock.

attachment.php


Since it may come up, there isn't a real reason I am replacing the pump. I am having some issues with stalling where I wanted to replace the filter. At $68 I figured I might as well throw a new pump in as I have close to 100K miles on this pump. My stalling issue is more likely related to the fuel filter, fuel pressure regulator or vac leak which I will address if the filter doesn't resolve my stalling issue. The new pump comes with a new pre-filter sock but it will not fit in our application. Blowing on the old filter and comparing it to the new one showed that it was pretty restricted. The entire process was a little over an hour.

Hope this option helps someone out there if there is a fuel pump issue.

I just replaced my fuel filter and pump gasket but I get a leak I’m on my second gasket and back to original gasket and still it leaks from the front of the gasket area. I must be missing a small detail. I did tighten in order per service manual. I wonder if I am not using c correct torque settings. According to service manual torque to my manual 9 ft lbs. but there are two different patterns in manual start at 1 or after 03 start at 12 o’clock. I started at 1 my st13 is a 2003. Any ideas to resolve this?
 
Back
Top Bottom