Just for the record I made an error in the design and construction of the headset cables.
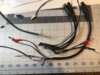
I have three helmets with cables installed. Two are fully operational. One is intermittent on the audio side so that is what I want to replace. Its in my wife's helmet.
The mistake I made is in purchasing a new cable from Autocom and using it as the basis for building my own cable. I made the assumption that it was just bad manufacturing techniques that made this cable not work. (Well it did have an obvious cut wire).
Prior to installing the new cable in my wife's helmet, I removed the old cable and began a wiring check. Did that for two reasons. One, to confirm the issue was a bad wire connection and Two, to insure (for the third or fourth time) I had the wiring right. The answer is, if you make the assumption that the last four headset cables I purchased from Autocom were done correctly, the one I just purchased was just flat WIRED WRONG!!!!!!!!!
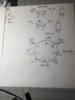
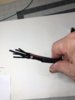
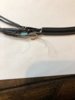
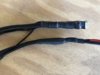
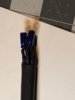
When I checked the headset interface after removing it from my wife's helmet, I noted that there are, in fact, capacitors wired in series with the headphone audio leads. So, I went back and checked all the other cables I had and yes, every one has a capacitor wired in series with the main audio from the Autocom unit.
I do not know, for sure, why this is. It might well be just a safety precaution so that you cannot short the headphone jack by accident and damage the SPA.......
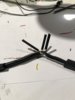
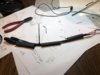
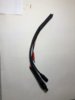
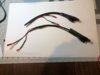
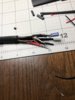
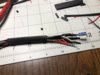
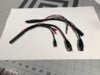
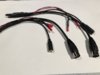
Anyway, if you look at the two pictures you will see that the ends of the cable have different dimameters. This supports the notion that there is a 10uf cap and most probably a 68 ohm resistor in the audio lead destined for the headphone jack. Also the ground is different. The ground for the headphones is the same pin used by the mic.
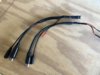
My next decision is do I leave the cables I have built as is since to take them apart might cause damage so that could not be used or take them apart and rewire.
I have the capacitors and resistors on hand, so...... I just need to decide. I will probably opt for new cables and just chalk it up to "experience". But now, I firmly believe I can build the exact cables Autocom was selling, at one time and keep my unit operational.

 61.1 KB Views: 2
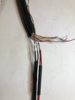

")