Nice for you...... I was a bit tired until now to post all that again, later I'm doing it.
... I've resigned... travel reports... build & maintenance threads... nope...

Nice for you...... I was a bit tired until now to post all that again, later I'm doing it.
It's been a long, long road for you to get to where you are.I was posting a really long post when happened the last website crash and lost a long job of showing stuff, so I was a bit tired until now to post all that again, later I'm doing it.
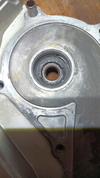
"SANDED THE THING with 80 ppp sandpaper"
From the looks of the curved gouges, they must have used a disk sander for the attack!!
Nice for you...
... I've resigned... travel reports... build & maintenance threads... nope...


Check the clearance between the rear flap and the rear tire. When I installed the one I made I had to shorten it on the bottom. Mine hangs just below the top of the swing arm. Your motorcyle is looking good.


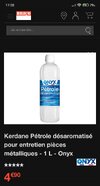
When I was a teenager and started repairing my moped, I also used gasoline to clean it. For many years now, I've been using kerosene ( "pétrole désaromatisé" en Français) It's very effective for degreasing and removing tar stains from plastics and painted bodywork without risk, and it's not aggressive on seals like chain O-rings, for example.I wasn't playing games, so I brushed it with gasoline, the only thing I know that dissolves grease and oily goo without damaging anything. I got really bad sniffing gasoline vapors, even using masks (carbon ones). I got to the point where even after showering I smelled gasoline in the air I was exhaling. ....
When I was a teenager and started repairing my moped, I also used gasoline to clean it. For many years now, I've been using kerosene ( "pétrole désaromatisé" en Français) It's very effective for degreasing and removing tar stains from plastics and painted bodywork without risk, and it's not aggressive on seals like chain O-rings, for example.
currently double the price of a liter of gasoline in France. The other name seems to be "Kerdane"I'm looking forward to try that, but it's expensive and not too easy to find around here and now. It was so popular before that I even recall my father having a bottle around with kerosene for those purposes. But now... Thing's expensive!