OK
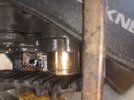
Check that the front brakes are not dragging If they are maybe check the front wheel installation / disc caliper clearance. (image 0.7mm min both sides of disk)
Check that the wheels moves OK. ie you can rotate them.
Make sure that the back brake pedal stops the rotation.
Make sure that the front wheel spins ok and that the front brake stops the rotation.
Make sure that the back wheel rotates OK and when the SMC applied (its only 1-2mm movement remember) it
locks it solid and immediately you release the SMC the rear wheel can be turned again.
If the SMC moves more than 1-2 mm before it locks the rear wheel, then there is air in the system. You MUST get rid of that air before you take the bike onto the road. And when the SMC is applied using hand pressure it
must lock the rear wheel - ie prevent it from being turned by hand.
If you don't verify that the SMC locks the rear wheel and then releases it, give you a false sense of security;
But surely if the rear wheel is turning after the SMC has beenreleased then all is OK, isn' it.
No. (And don't call me Shirley).
The SMC isn't locking the rear wheel by normal brake lever hand pressure, then there is air in the system. So the SMC is spending most of its time squeezing a bubble of air, and very little effort goes into applying the brakes. The SMC returns, the pressure comes off, but a tiny bit of fluid can not return through the compensation port in the SMC. So the bubble remains slightly squashed. The cycle repeats itself, but each time the bubble gets slightly smaller. Eventually, the bubble cannot be squashed any more and the pressure is applies the brakes rather than to the bubble of air. And the pads cannot release.
That is a technical way of saying that the SMC appears to be OK, the rear brakes appear to free up each time and then suddenly they remain locked.
However - IIRC you said that you ordered a new SMC so that build up of pressure should not be happening.
A Possible test ride - assuming that you have checked that the SMC action locks and releases the rear wheel.
This comes with a disclaimer. My opinion is that your bike is not fit to ride.It is also possible that the brakes will get very hot and then suddenly lock up. And that could be fatal.
But you have extablished that the rear wheel bearing is a problem in that the wheel isn't turning much without the brakes in. You have also fitted new pads, and they always drag a little bit when new. Your discs are not shiny. So it is possible that there is a settling in factor.
But you must do this on a quiet road. A road where can pull in and stop safely at any moment. If you don't have this then don't go out.
When brakes are binding and you are coasting along at 60mph - you cannot tell. The engine is extemely powerful. You might need a lower gear. You might take longer to accelerate. You might be aware of a little drag. But once your hand on the throttle is in a position where you are going the speed that you want, there is no feedback, the engine will overcome the brake drag. Except, when you pull the clutch lever in. Normally, with the clutch pulled in you should not feel anything on a level road apart from a very gradual slow down. I fthere is any brake drag, pulling in the clutch lever will feel like you have applied the rbrakes. So while you are testing a bike in this condition - keep pulling in the clutch lever every few seconds to get some feedback. If it slows downrapidly when you pull in the clutch lever, you MUST stop, becasue it isn't going to get any better.
(You might want to take something with you so that you can release the brakes when they have cooled down in order to get the bike home again, but still have them available to stop should you need to),
Take the panniers off. It makes it easier to check.
Put both brakes on hard while stationary and release.
Check that the bike moves freely.
Go ride a
very short distance. (200 metres) Bike on centre stand. See how the rear wheel rotates.
Lift front wheel - see how that rotates.
Go for a slow ride for about half a mile without touching the brakes. Stop without touching brakes.
Check the temperature of the discs. Front brakes should be cool/cold. Rear ones should be cool. (They will be warmer because of engine / exhaust heat).
Another short ride. This time, while riding take the precaution of pulling in the clutch lever every 10 seconds or so. Just briefly. The bike should not slow down. If it does, you have some serious drag going on and you need to stop - because they could be about to lock up. Assuming that the bike free-wheels ok for that brief moment with the clutch disengaged, do some hard emergency stop braking. Front brake lever only. Say from 40mph down to 10mph. Then set off again. Do 3 or 4 of these and then come to a stop. The idea is to get the brakes hot.
Check the temperature of the discs. Dont touch. It will take the skin off your fingers. Both should be very hot.
Ok - go and ride slowly for a couple of miles - keep doing the clutch check. If at any time the bike slows significantly on level road with the clutch pulled in,
you have to stop.
Do not touch the brakes - unless you have to - in which case start again. The idea is to ride for a couple of miles without touching the brakes after you know that they were hot. So you need to plan this - you need somewhere where you can pull in safely and come to a halt without touching brakes. The last few mph - you can apply the brakes sharply -as that will just grab the disc without any friction - so no heat.
Stop without braking and check the disc temperatures. The fronts should be cold. The rear should be cold, but will probably be sightly warm. Cool enough to grab hold of.
Now what you are looking for.
1. The front brake discs. These will cool down from very hot within a minute or so. They are moving rapidly (spinning and moving forward) through fresh, cool air. If they are retaining their heat, are hot when you come to a stop without touching the brakes.
2. The rear brakes - should have cooled down significantly from your last stop.
If after riding without touching brakes, the front brake disc is hot or even warm. Then you have a problem with the front brakes. If the front left is warm, that will create issues with the rear brake. No point in looking any further until that is sorted out.
3. Check the rear wheel spin. (Centre stand, neutral).
3. If you are confident that the brakes are cooling down properly and that the the wheel is turning, then do some more riding with a series of emergency slow downs. (make sure no traffic is behind you), then ride for a while and keep checking the clutch/freewheel).
When you have had enough fun, bring it back, let it cool down and then see how it behaves in the garage. Having had a bit of a workout, it may have settled into some different behaviour.


.jpg")