ST1100 Motor Pull / Transmission Swap

I hear yah John, and agree. Today I took the clutch cover that had the clear coat nearly all but gone on and cleaned it up good. I started with cleanser and a little water to get most of the scratches off of it, then went to Mothers aluminum polish and a bench buffer. Final hand rub brought it close enough so I clear coated it with a high temp clear. Should show nicely through the front cowl vents and stay fairy clean from oxidizing soon.
 

Attachments

  • 1100 restore 001.jpg
    1100 restore 001.jpg
    350.3 KB · Views: 46
  • 1100 restore 004.jpg
    1100 restore 004.jpg
    188.9 KB · Views: 51
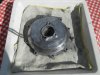
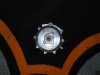
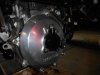
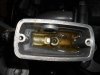
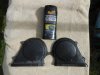
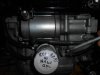
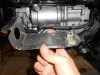
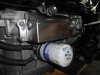
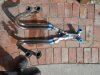
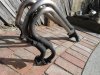
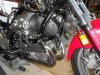
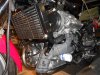
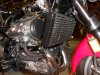
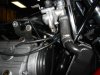
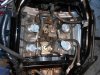
Today I installed that semi polished clutch cover plate, polished the slave pin, cleaned and greased the rubber seals to the slave and assembled those. After discovering that the slave line should have been brought around to the inside of the frame, prior to stuffing the engine in the frame, my simple solution was to unbolt the bango bolt at the slave and reroute it to the proper spot. Knowing I was going to spill a bit of brake fluid a catch pan prevented a messy spill. Back to the clutch reservoir I found a small pond had begun to sprout and cleaned it up before bleeding the system to the clutch slave. The motion pro tool came in handy bleeding the clutch line here, with a good clutch actuation at the lever. I cleaned the plastic timing belt covers with Meguiar's plastic restore. (left, before/right,after) Starter cables were installed, (frame to engine ground below) The red color on the clutch pin is Mobile 1 synthetic grease.
 

Attachments

  • 1100 rebuild 2013 002.jpg
    1100 rebuild 2013 002.jpg
    242.2 KB · Views: 43
  • 1100 rebuild 2013 003.jpg
    1100 rebuild 2013 003.jpg
    211.3 KB · Views: 41
  • 1100 rebuild 2013 004.jpg
    1100 rebuild 2013 004.jpg
    240.9 KB · Views: 35
  • 1100 rebuild 2013 005.jpg
    1100 rebuild 2013 005.jpg
    498.3 KB · Views: 42
  • 1100 rebuild 2013 006.jpg
    1100 rebuild 2013 006.jpg
    178.9 KB · Views: 40
Last edited:
The starter heat shield was then installed The two cables were tied together with small zip ties. Together they seemed to allow space between them and rubbing on the engine block. The stainless heat shield cleaned up nicely with the help of some Mothers aluminum polish.
 

Attachments

  • 1100 rebuild 2013 007.jpg
    1100 rebuild 2013 007.jpg
    258.1 KB · Views: 36
  • 1100 rebuild 2013 008.jpg
    1100 rebuild 2013 008.jpg
    300.8 KB · Views: 33
  • 1100 rebuild 2013 009.jpg
    1100 rebuild 2013 009.jpg
    241.3 KB · Views: 33
  • 1100 rebuild 2013 010.jpg
    1100 rebuild 2013 010.jpg
    234 KB · Views: 32
Last edited:
The exhaust header system (on the aluminum portion) was cleaned with a wire brush wheel and prepped for high heat header paint. All welds were painted, including the tabs for the heat shields. The stainless pipes were cleaned with Scotch Brite pads.
It might be noted that I use Lemon Pledge on the stainless exhaust parts of my 1300, and will go over the stainless headers with it to remove all finger prints prior to start up. Heat doesn't seem to effect the Pledge at all...even applied when pipes are warm/hot.
Try it on your stainless BBQ hood, kitchen range hood or fridge. Smudges wipe away clean and leaves stainless like you waxed it.

With the exhaust finished and installed the bike is ready for the radiator to be installed.
 

Attachments

  • 1100 rebuild 2013 011.jpg
    1100 rebuild 2013 011.jpg
    468.1 KB · Views: 41
  • 1100 rebuild 2013 012.jpg
    1100 rebuild 2013 012.jpg
    439.5 KB · Views: 38
  • 1100 rebuild 2013 013.jpg
    1100 rebuild 2013 013.jpg
    448 KB · Views: 37
  • 1100 rebuild 2013 015.jpg
    1100 rebuild 2013 015.jpg
    287.2 KB · Views: 49
  • 1100 rebuild 2013 016.jpg
    1100 rebuild 2013 016.jpg
    411.3 KB · Views: 52
Last edited:
The radiator fins were sprayed with Engine Brite and K&N type filter cleaner to loosen the bug guts and
wings trapped in the fins, then sprayed out with a fine fast stream of water. The inside was flushed as well.
The fan and plastic parts were gone over with Meguiar's plastic restore, before assembly on the bike.
 

Attachments

  • 1100 rebuild 2013 017.jpg
    1100 rebuild 2013 017.jpg
    402.7 KB · Views: 55
  • 1100 rebuild 2013 018.jpg
    1100 rebuild 2013 018.jpg
    415.9 KB · Views: 42
  • 1100 rebuild 2013 019.jpg
    1100 rebuild 2013 019.jpg
    328.9 KB · Views: 44
Last edited:
Our next step is all under the hood. There was one last bit of grime left on this motor....under the carbs. The bike had nearly 18 inches clearance under it hanging by our homemade sling so I slid the big galvanized tub under it and went after it. After plugging a few lines I carefully sprayed some Engine Brite foam under the carb intakes and brushed it around with a long bristle paint brush, followed up by hot water in a Hudson sprayer. Walla ! Clean as a whistle ! Ready for hoses and carbs.
 

Attachments

  • 006.jpg
    006.jpg
    358.4 KB · Views: 57
  • 007.jpg
    007.jpg
    391.3 KB · Views: 59
Boy do those pics look familiar. Had to do the hose job that last fall with mine. Worked out great and now she purrs like a kitten.

Good Luck on finishing the job. Looks GREAT so far!!!
 
All air and water hoses will be replaced so a new owner won't have to worry about any of those leaking. The valve clearances have been checked and adjusted as well.
If anyone has interest in this bike when it is finished, keep us in mind. It should prove to be a solid machine.

Thanks for the efforts you've put into photo-documenting this restoration project. It's quite an educational thread for someone such as myself who's new to the inner workings of the ST1100. Knowing that things such as the underlined info about has been done certainly contributes to knowing a bike is a "solid machine" and ready to lay down a lot of fun maintenance free miles!!
 
Gee, at 21 years old this is now a partial restoration of a vintage vehicle. Maybe we should dig it out and finish her. I think what was needed was a right side heat shield for the exhaust pipes. There may be folks here waiting to purchase this bike as soon as its together. The frame paint is in perfect shape.

Maybe we could have a small tech event to celebrate the finished bike.... with PIE !!
 
Last edited:
Wow, what a great project to read about. Sure thought it was completed already, given it was a few years ago. But glad you are seeing it to completion.

Peace and All Good
 
Wow, what a great project to read about. Sure thought it was completed already, given it was a few years ago. But glad you are seeing it to completion.

Peace and All Good

TIS a great read, for sure, but its still in mothballs. Lets hope we get some interest here to bring her back out for a photo finish.
 
Back
Top Bottom