My maintenance and upgrades

Gus1300

Site Supporter
Joined
Apr 5, 2007
Messages
567
Location
Haymarket VA
Bike
04 1300A
Didn't want to just throw this in the general section, so thought I'd start here and see where this goes. I had a winter punch list that the weather didn't cooperate for (or did, however you want to look at it) and it never was bad enough to take out riding for more than a week or so. Long overdue are some brake caliper cleaning and flushing/fluid replacement, coolant check, rear and front wheel condition check, taking a look to see if I can figure out why my vacuum driven CCS-100 won't hold speed like it used to, clean the 5-way Ts and replace the old rubber lines with silicone (hope I can get to them all without pulling the throttle body!), look at installing a dual camera outfit I bought, install a SparkBright LED voltage indicator, see about a dash shelf for my GPS and phone, take a look at the SMC (it moves, not sure if enough, but want to get it off and apart to see what kind of condition it's in), check valve clearances, general clean and lube, starter valve synch, plug change. And although I honestly suspect it won't do any good, I have two new knock sensors ready to go and see if I can ride above 4K RPM without an FI light illuminating; not yet ready to pull the trigger on an ECM.

So ripped things apart today to start. Things I'm happy with: no mouse house under the airbox, bright and shiny upper forks, no major leaks, coolant left in the overflow tank, fairly clean air filter, no breakage getting things off (that I know of yet) and overall things look to be in good condition. Things I'm not happy with: the left side fairing is wetter than I'd like and it appears the source is under the valve cover. Since it'll have to come off for the valve clearance check anyway, I'll take a look at getting it cleaned up and sealed better this time. I hadn't noticed it that bad before but it could have been leaking from one of the half-moon pieces from the last check. The right side also looked like it has wept some, but the fairing wasn't as wet as the left one. Also a drain from the EPA canister (I think that's what it is, right side, just behind the valve area) was resting on the exhaust and burned a hole through unnoticed.

Going to just throw a bunch of pictures in here for those who haven't been this deep in before (don't be afraid!) and so that those who have may be able to keep tabs on my progress, or lack thereof, and offer words of wisdom, or just general encouragement, as to what I find as I hopefully make some progress on completing things on my list.

20200428_130911.jpg20200428_131039.jpg20200428_131053.jpg 
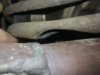
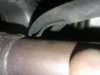
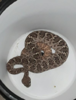
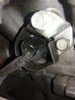
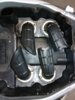
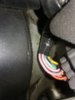
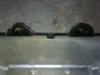
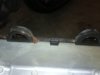
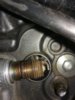
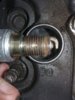
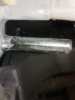
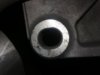
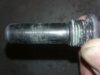
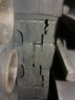
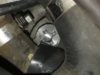
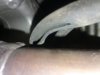
Found this as the lower panel came off; will have to find a replacement hose and route it away from the heat, if it matters.

20200428_131004.jpg 
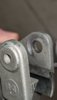
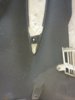
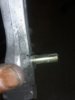
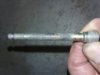
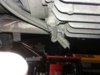
Anyone know why these 'face' forward vs aft? They run ahead from the lower exit point and the angle-cut is facing the front. I would think that one at least could be turned to face aft (rain?).

20200428_131853.jpg20200428_131904.jpg 
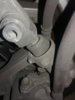
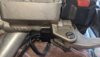
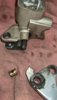
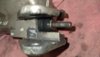
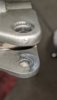
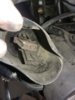
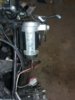
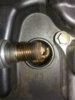
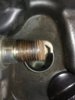
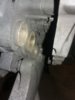
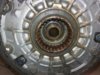
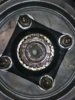
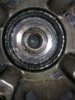
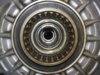
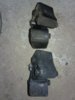
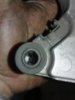
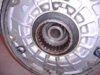
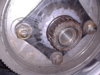
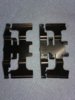
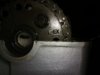
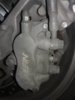
SMC and front left caliper. I will include more of that I find as I get into the calipers. I already know the pistons are dirty (but the pads were recently replaced so they're clean) and I need to check the spring pads to see if I've inadvertantly bent any tabs during my multiple pad replacements over the years. Haven't ever had the calipers off/apart.

20200428_133350.jpg20200428_133427.jpg Left and Right upper (large) cowls to show the wetness and dryness of each.
20200428_133506.jpg20200428_133516.jpg 
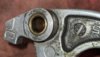
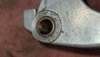
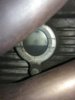
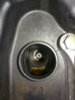
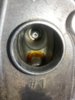
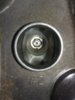
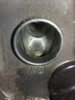
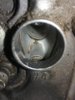
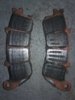
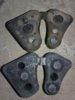
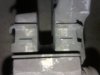
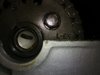
Left and right forward ends of the valve covers; likely source of the wetness on the inner sides of the upper cowls.

20200428_133629.jpg20200428_133704.jpg20200428_133824.jpg 
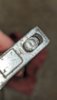
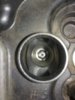
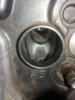
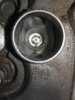
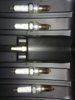
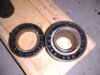
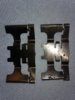
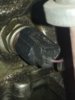
Left (two pics) and Right Knock Sensors; suspect they're fine but have the FI code standard to our bikes saying one is not.

20200428_134011.jpg 
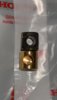
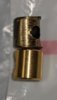
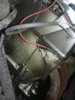
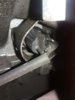
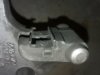
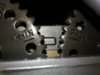
Quiz time, what are these two connectors for? I haven't looked in the Service Manual yet but they could be for additional farkles that didn't come standard on this model. The 'hooded' connectors are located on the left side, under the front fairing/below the instrument cluster. The object on the right is where I blind mounted the vacuum motor for the CCS-100 years ago (and mistakenly routed the pull cable through the windshield tubes! Found that out the hard way when I couldn't take them out without disassembling.)

20200428_162125.jpg20200428_172313.jpg 
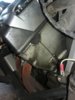
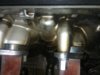
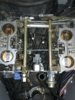
Intake snorkels and the throttle body area after the airbox is removed. Much cleaner this time around!

20200428_172328.jpg 
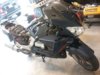
Just a picture of where I mounted my Stebel, in case anyone is wondering where to put one.
 

Attachments

Igofar

Site Supporter
Joined
Jan 8, 2011
Messages
7,123
Location
Arizona
Bike
2023 Honda CT125A
Your oil leak may be the inner gasket around the spark plug wells.
It appears from your picture that it is leaking out the drain hole from the spark plug well, under the header pipe area.
Pull a couple of your plugs and see if there is oil in there.
 
Joined
Mar 21, 2016
Messages
1,135
Location
P.E.I., Canada
Bike
2005 st1300
You seem to have oil leaks from more than one location which would lead me to consider new valve cover bolt "grommets" if I were you. Not sure if that is the proper name for them, but they go under the the valve cover bolts and they control the amount of tension or tightness that is applied to the cover gasket. These wear or compress over time and lessen the compression on the gaskets. Also, be sure and apply a dab of sealant at the corners of the half moons at the fronts of the heads. If not, they will leak
 
OP
OP
Gus1300

Gus1300

Site Supporter
Joined
Apr 5, 2007
Messages
567
Location
Haymarket VA
Bike
04 1300A
Thanks for the advice @Igofar and @Bmacleod! I had previously popped the #1 plug wire and it looked dry in the well before I noticed this problem or saw your replies but will look at the rest. Haven't had any of the plugs out since I bought the bike in '07. Prob wrong, but everything runs 'fine' so never felt the need.

I did do the clutch and brake fluid yesterday but will prob redo the brakes, as the fluid coming out didn't look anything like what was going in. Appears a couple of the caliper slider boots are torn as well, so will need to keep an eye on those and get some replacements at some point. The left front pads were more worn than the right front, so ensure both front calipers were moving when I had them off to clean up the pistons (all look good). Haven't had the rear caliper off yet but expect those pistons to look much the same.

Question on the SMC. How much does it move? Mine feels like it 'stops' at both fwd and aft movement of only a fraction of an inch. Haven't yet compressed it while trying to turn the rear wheel with my foot to test whether the rear pistons are getting pressure but will do that. Was just wondering what it should feel/look like for range of motion. Have looked at the piston boot and it looks good, so I don't expect any internal build-up or corrosion like I've seen in some of the dismantled pictures. Still learning about the finer details of this excellent machine!
 
OP
OP
Gus1300

Gus1300

Site Supporter
Joined
Apr 5, 2007
Messages
567
Location
Haymarket VA
Bike
04 1300A
Tonight this is what the four plug wells looked like:
20200501_180717.jpg20200501_180801.jpg
20200501_181029.jpg20200501_181044.jpg
20200501_180736.jpg20200501_180813.jpg
20200501_181008.jpg20200501_181017.jpg

It would appear that the internal well gasket @Igofar mentioned was only leaking on the #1 cylinder. Not sure if that's an entire valve cover gasket replacement (it appears it is) or if I try again to get it to seal when I replace the cover after adjusting the clearances by (or also) replacing the grommets mentioned by @Bmacleod. First clearance measurements yielded the spreadsheet result of five exhaust valves being out of tolerance, the other three being close to out of tolerance, and two intake valves out of tolerance. Anybody know where the shared shim kit is currently located?! This round of mx may last a little longer than first anticipated...sigh.

1588383708730.png

The half moon sets both have sealant on them as well:

20200501_185523.jpg20200501_192323.jpg

Plugs need some love as well; it looks like they haven't ever been changed. I know I haven't changed them since owning the bike (don't do what I've done!):

20200501_182410.jpg20200501_182716.jpg20200501_182537.jpg20200501_182740.jpg20200501_182819.jpg (1-4, bottom to top on the last picture)

I plan to take another set of measurements yet tonight just to crosscheck the first. I haven't ever had the cams out so have no idea what shims are present under each bucket to calculate what might be needed to bring the measurement back within tolerance. Guess this will be another 'first' experience removing the camshafts! I have some reading to do so I don't drop a timing chain or get things misaligned.

Thanks for following along and hopefully not passing judgement on my poor mx! Testament to these machines that even after being 'abused' like this, my bike runs fine and I have no problem hitting the road for multi hour trips. Assuming I get everything back together successfully, my confidence will be even higher that I won't be stranded roadside anytime soon. Appreciate any additional thoughts or ideas based on the plug condition and other things observed in the photos; trying to get things cleaned up this time, the right way!
 
OP
OP
Gus1300

Gus1300

Site Supporter
Joined
Apr 5, 2007
Messages
567
Location
Haymarket VA
Bike
04 1300A
Got into the rear wheel and caliper some last night:

Initially noticed a bit of a strange uneven wear pattern on the pads 20200511_024231.jpg
Which led to some curiosity about the condition of the slider pins 20200511_034133.jpg20200511_034215.jpg and it appears there's a crack on the spring clip but haven't taken it out yet to confirm (and need to clean off the pistons 20200511_024327.jpg

Happy with the metal bits of the rear drive splines but the dampers need some love (new set ready) 20200511_025942.jpg20200511_024517.jpg20200511_024812.jpg20200511_025924.jpg20200511_034253.jpg The new set has been on the shelf while and look a bit 'dusty' but I'll use them for now 20200511_034350.jpg20200511_034430.jpg

Spent some time cleaning up the damper 'valleys' (what do ppl use to get the packed rubber out w/o scratching the underlying metal?) and will give everything a good once over before doing back together. The bearings feel good; not sure I'll pull the seals and throw some new grease in or not. Probably well enough to leave for now since I replaced them all a while back wilth All Balls and don't feel any roughness yet. (those were pretty bad...you do NOT want to see this when you pull them): 2012-03-12 16.47.46.jpg2012-03-12 16.32.10.jpg NOT a good example of even minimally adequate maintenance!

Feel free to point out any out of tolerance things you note. I did see that the forward caliper brace hole appears to be somewhat oval; hadn't noticed that before but it does look like the entire circumference is machined and consistent, so it doesn't look like wear. Haven't looked for pictures of others to see if that's how it's supposed to be. 20200511_024428.jpg
 

Attachments

jfheath

John Heath
Site Supporter
Joined
Mar 18, 2006
Messages
2,836
Age
70
Location
Ilkley, W Yorkshire, UK
Bike
2013 ST1300 A9
2024 Miles
000679
STOC #
2570
Good pictures and commentary. IT makes it much easier to see what you are talking about.

Some comments.

I think your flange bearings are probably past their best. I wonder where the bits went ?

The oval hole in the caliper bracket is supposed to be oval like that. Larry will tell you that if it has spiral 'rifling' marks inside the hole, then he has the world wide patent on being able to fix the entire back end from that piece of information. I'd listen to him - it's a corker.

The manual says to replace the stopper bolt with new each time. I make my own decisions on that, but if I decide to re-use, I clean the threads and apply thread lock. But the manual says to replace with new, and you shouldn't take advise from some foreigner off the internet. I always have new one in stock ready to use.

The splines - or the 'grease' that is covering them is not doing what it is supposed to. So it is probably the wrong sort. It must be more of a thick paste containing at least 40% Molybdenum Disulphide. Often referred to as Moly Paste. Loctite LB 8012 is probably the easiest to get hold of. Never used it myself (I use the Rocol which is easy to get in the UK) but know a man who swears by it. It smears onto surfaces and doesn't come off very easily, as you will find out when you try to get it off your fingers. Nor does it mix into a gooey, rusty coloured mess like on the splines in your photo. Neither does it get 'spun out' by the speed of the rotating wheel - see those grey streak marks across the face of the plate with the 4 bolts that holds the male part of the spline - your last photo ? That is what the wrong sort of lubricant looks like.

I would thoroughly clean all of that grease and muck from those splines - male and female parts - and take some more photos let someone with a better eye than me take a look to see if they have suffered from neglect and wrong lubricant.

Brake pads are still wearing in. Those are the rear pads and the inner pad has worn less then the outer, which might suggest that the caliper isn't sliding across as easily as it should to pull the inner pad onto the inside face of the brake disc/rotor. This might be the slide pins, the cracked pad spring, the pads incorrectly seated - all of which may be related.

The pads should have the silver backing plate clipped tight around top, bottom and sides. They should hold that silver backing plate securely to the back of the pad. Yours is loose - I assume that you have had them apart ? For the rear pads there should be a thin white heat shield sandwiched between the back of the pad and the silver plate. (The front pads don't have this).

The pad retaining pin - those ridges along its length will just clean off - it is caused by edge of the brake pad resting on the pin as you unscrewed the pin to remove it. Clean up the pin, check it has no roughness (which may easily clean off) and re-use them if they are OK. But if it has ridges, its time to replace. Check the condition of the hex socket too. I always replaced mine if that showed signs or wear and tear. I hate allen key sockets. They are dead easy to tighten up and disintegrate when undoing them.

Slider pins seem OK - clean them up. But one of the rubber boots needs replacing - it looks like a mineral oil based grease on the pins, which tends to make the rubber boots swell and they no longer keep the much and water out. They need a silicone / rubber grease. I can't see a photo of the long one in middle of the underneath of the caliper. The pad retaining clip, which is a silver rectangle-ish clip into which the tab end of the brake pad sits - that is not sitting properly in the caliper bracket. It may just be loose, in which case the casting in which it sits may be worn. I defer to the wisdom of the people who hold the patents diagnosing such possibilities. I'll put his @Igofar moniker in so that he picks it up.

The pad spring has a crack in it ? I'd like to see where that is. You have to be trying pretty hard to break one of those. I could hazard a guess at what has happened there, but I'll wait for the evidence.

Cleaning muck out of the valleys ? I use a bit of pine offcut, sharpened to a point with a penknife, or the plastic handle of a toothbrush - they don't sharpen easily with a knife, but a grinding wheel makes a pretty good impression. Then bristle end of toothbrush and a solvent of some sort.
 

Igofar

Site Supporter
Joined
Jan 8, 2011
Messages
7,123
Location
Arizona
Bike
2023 Honda CT125A
My turn....Good information John, thanks for jumping it.
As far as oil leaks, the sealant should be placed IN the half moon recess, and not put on the gasket itself or they will leak (check your service manual).
Pad wear may be indicating the brake system has issues (SMC may be giving up the ghost)
Guide pins appear dry, like John pointed out they should be lightly greased with silicone friendly grease so the boots don't go soft and die.
Caliper pistons filthy and need to be completely cleaned, and seals inspected. Check behind the pistons for hidden crap most folks miss.
Do NOT put moly paste on guide pins or hanger pins (looks like there may be some old moly on the guide pin in the picture)
Don't like the All Balls flange bearing replacement, I find they fail as often or more than the OEM bearings. I've R&R 2 sets this month.
Clean and search the pumpkin housing for the metal bits, hopefully you'll find them stuck in grease somewhere rather than damaging a seal somewhere.
Looks like someone used copper antiseize and or grease on the splines, clean them with q-tips down to bear metal and inspect for damage on both male and female parts.
rotate your stopper bolt around and see if there are witness marks even on both top and bottom edges, and if there are flutes cut in the oval entry point. This will indicate issues with the caliper and or bracket.
Your pad retaining clip appears to be moved (witness mark on side of bracket) and not sitting square. This may indicate rear bracket damage, clean and inspect.
Clean the Boss on the wheel and inspect the small O-ring (this should be replaced every time you replace your tire) if its flat, the metal flange plate will damage your aluminum rim beyond repair.
 
Last edited:
Joined
Feb 25, 2016
Messages
4,777
Location
Northumberland UK
Bike
VStrom 650
The pad markings seems to be possibly the back fixing starting to show through, but never seen anything like it before. I don't think it looks like copper grease to me but probably water contamination of whatever lube was on there but I'm sure your oily finger had a closer look than I.
They certainly require the attention.
Upt'North.
 
Joined
Mar 25, 2020
Messages
6
Age
58
Location
Florence ky
WOW, you guys are great. You make me want to work on my ST. I finally got my coolant leak to stop. I replaced the water pump cover, new gasket and bolts, really don't think that was the problem. I found the back hose clamps of the large hoses to the thermo housing that I replaced were loose. Long snap-on 6mm wrench got to them from behind the rad.
 
OP
OP
Gus1300

Gus1300

Site Supporter
Joined
Apr 5, 2007
Messages
567
Location
Haymarket VA
Bike
04 1300A
Awesome feedback, thanks! A little clarification...the bits of metal and trashed bearings were the old ones I replaced in 2012 (filenames are dated). Was surprised the bike was doing as well as it was back then. The current bearings feel fine.

Guilty as charged on not having cleaned the pistons in awhile but the fronts looked good when I pushed them out, assume the backs will as well but will clean up and report.

I have a tube of 20200512_092248.jpg to put on the splines; someone suggested when I first joined here to get a tube ('It will last longer than you or the bike will!) so I did. What I didn't do was take the rear wheel off back when the STealer replaced the tire when the bike was in the shop with my intermittent fuel pump so don't know what they used on it. Probably should have as a rule, just to make sure it was the way I wanted. I have both O-rings ready to go as well. I think the splines will clean up fine but will give them a good look once I have all the gunk off. Also have new boots all around for the three calipers; I've never replaced them and I know a couple are split. I was expecting some of the slider pins to be in worse shape than they are based on seeing the torn boots when I started to look at things this time around.

Looking a little closer at the clips, they look good to me, don't see any bent tabs. 20200512_092342.jpg20200512_092434.jpg20200512_092442.jpg But I know I have a large tab on the shelf, and may also have the smaller one if needed. I'll clean them up. I think the 'crack' was where the bend is and was just a photo perspective above before getting a better view.

Have a couple days strung together at work so won't be spending much time on the bike until this weekend/next week; let me address the things above, get things cleaned up and I'll document what it looks like as it goes back together.

Again, appreciate the reviews and comments! This site is so awesome for those who want to dig a little deeper than just fluid changes! We'll see if my attitude about that still holds after I tear into the cams next week. My Hot Cams shim kit arrived so have a good selection ready to go for when they're off. Also 'tested' out what the left tensioner feels like, so I know what to expect on the right side but haven't tried to access yet. Plan to get a much longer screwdriver for when I do though! Stay tuned...
 

Igofar

Site Supporter
Joined
Jan 8, 2011
Messages
7,123
Location
Arizona
Bike
2023 Honda CT125A
WOW, you guys are great. You make me want to work on my ST. I finally got my coolant leak to stop. I replaced the water pump cover, new gasket and bolts, really don't think that was the problem. I found the back hose clamps of the large hoses to the thermo housing that I replaced were loose. Long snap-on 6mm wrench got to them from behind the rad.
Make sure you didn't over tighten the large hoses going to the radiator itself, as they will become egg shaped and crush VERY easily.
If yours are oval, and or leaking, get yourself 2 ball peen hammers, one small, and one large. Place the large ball end into the metal pipe end, then use the smaller hammer to tap the face of the larger one. This will true the pipes up. Just be gentle, go slowly, and be careful.
 

Igofar

Site Supporter
Joined
Jan 8, 2011
Messages
7,123
Location
Arizona
Bike
2023 Honda CT125A
Awesome feedback, thanks! A little clarification...the bits of metal and trashed bearings were the old ones I replaced in 2012 (filenames are dated). Was surprised the bike was doing as well as it was back then. The current bearings feel fine.

Guilty as charged on not having cleaned the pistons in awhile but the fronts looked good when I pushed them out, assume the backs will as well but will clean up and report.

I have a tube of 20200512_092248.jpg to put on the splines; someone suggested when I first joined here to get a tube ('It will last longer than you or the bike will!) so I did. What I didn't do was take the rear wheel off back when the STealer replaced the tire when the bike was in the shop with my intermittent fuel pump so don't know what they used on it. Probably should have as a rule, just to make sure it was the way I wanted. I have both O-rings ready to go as well. I think the splines will clean up fine but will give them a good look once I have all the gunk off. Also have new boots all around for the three calipers; I've never replaced them and I know a couple are split. I was expecting some of the slider pins to be in worse shape than they are based on seeing the torn boots when I started to look at things this time around.

Looking a little closer at the clips, they look good to me, don't see any bent tabs. 20200512_092342.jpg20200512_092434.jpg20200512_092442.jpg But I know I have a large tab on the shelf, and may also have the smaller one if needed. I'll clean them up. I think the 'crack' was where the bend is and was just a photo perspective above before getting a better view.

Have a couple days strung together at work so won't be spending much time on the bike until this weekend/next week; let me address the things above, get things cleaned up and I'll document what it looks like as it goes back together.

Again, appreciate the reviews and comments! This site is so awesome for those who want to dig a little deeper than just fluid changes! We'll see if my attitude about that still holds after I tear into the cams next week. My Hot Cams shim kit arrived so have a good selection ready to go for when they're off. Also 'tested' out what the left tensioner feels like, so I know what to expect on the right side but haven't tried to access yet. Plan to get a much longer screwdriver for when I do though! Stay tuned...
The 1st picture of the upper spring clip appears damaged (look at the bottom of the photo, it appears bent to the right, underneath the smaller side).
The 2nd picture looks good.
The 3rd picture looks like there is a gap on the left bottom side, but it may just be the lighting or photo. The clips are supposed to be secured in place with a 3M locking agent, and not easily moved about or removed.
I would also suggest using Loctite LB8012 (also known as 51048) instead of your Honda stuff.
 
OP
OP
Gus1300

Gus1300

Site Supporter
Joined
Apr 5, 2007
Messages
567
Location
Haymarket VA
Bike
04 1300A
Thanks @Igofar, your eyes did not deceive you! 20200516_120409.jpg20200516_120522.jpg I will be replacing that clip in the rear caliper, and rechecking the fronts when I take a closer look at the boots once my parts order arrives. I had one of the front small clips and the back small clip fall off so not sure there was any 3M locking agent used on them. They also appear to have tabs bent to meet a recess in the brake assembly that helps keep them in place but I'll be looking in the manual for what agent to possibly use.

I also got the SMC to actually MOVE vs just wiggle the 1-2mm it was doing before...plunger depressed quite a bit and the rear pistons moved as advertised, although one was more apt to move than the other. Not sure it's refilling very fast but the holes are very small, so maybe it will in time. More attention to this as I finish up the brake work, and probably bleed them one more time now knowing how far the SMC actually moves! I think that movement will help push some of the old fluid out that was in there from my previous (now known to be insufficient!) flushes.

Got the cams off and shims swapped; however, in my eagerness to get started, I took photos of the left side before removing but didn't mark the chain and tooth (I know, I know...I did do it on the right side!) so now am wondering if I got them both realigned again the way they were supposed to be, and how critical one tooth off is if I can't get this figured out.

Here are some pictures to go along with what I think was happening:
20200517_132443.jpg This is the way the left exhaust cam lined up at T1 TDC before removal. The left intake cam is very similar in alignment.
20200519_071517.jpg This was how the left exhaust cam lined up after first attempt at finding the right spot (left intake cam is almost perfectly on the line, same as the above picture). I figured it was off by about one tooth, comparing the number of links between the two cams to the right side prior to removal matched up as well.
20200519_082510.jpg After I marked the chain and gear one tooth off, removed the exhaust cam and aligned the two marks, this is how the left exhaust cam now lines up at T1 TDC. It seems it was too much, but it was only moved one link.
20200519_082530.jpgAnd in the same position, just for a symmetry check, the other marks on the inside appear to be aligned as well (I know they may not apply here and are for when the gears are installed on the other cams - was just trying to get a second ref point).

So my question is...are my left cams aligned, or is there still some way to get the exhaust ref to line up like it did in the beginning? Common sense tells me yes, but if those are the two closest tooth positions, I don't see how it will end up in a midpoint.

Moving on to other things while waiting for some input and parts.

I think I solved the problem after looking at jfheath's post on another site; moved the exhaust cam back a tooth, but then noticed when it was lined up, it appeared the intake cam was off by a tooth as well (thought I had this one correct earlier). Sigh. Lesson learned: mark the chain before taking it off if all you're doing is changing shims/pulling cams. If you're taking things further apart than that, it may take a couple times of setting the cams to get the presentations on the two affected cylinders to match the book after tightening everything up and rotating the engine through the firing sequence.

The current headache is trying to get the right tensioner bolt and washer back in place. I think at some point I started it crossthreaded and now can't get it aligned and turned into clear threads without it crossing again. There sure isn't much room in there. I've dropped the pair at least three times but managed to fish them both out again (sometimes upside down, so no chance to lose the washer) with a magnet. Sometimes right side up but the grease that was holding the washer on retained it. Beginning to think I'm running out of luck and I'm either going to lose the washer or both in the abyss! Any ideas on what sort of mechanism to give the bolt enough flexibility to align but still retain enough ability to turn it lightly by hand to start? There's a piece of plastic hose covering in the way (aft side of the hole) and a hose clamp (left/inward side of the hole) that keeps pushing the socket out of alignment.
20200519_212847.jpg

I need more, and smaller, hands!
 
Last edited:
OP
OP
Gus1300

Gus1300

Site Supporter
Joined
Apr 5, 2007
Messages
567
Location
Haymarket VA
Bike
04 1300A
Buttoned everything up today and went for a shakedown ride. Couple things still on the punch list:

- Add-on LED on the right mirror housing that indicates the turn signal is on somehow stopped working (turn signals are fine); prob just a broken wire.
- Idle point changed; rolling off the throttle puts RPM too low and motor dies. Normal release yields about 1500 RPM (low spring force to return to idle; I didn't mess with the clutch or throttle cables). I did turn the idle adjustment when doing the starter valve synch, prob didn't need to do that as it was fine before all of this, so will look at that.
- Still have the cruise control problem where it sets but slowly rolls off the hold point. I replaced the injector to 5-way hoses and the 5-way to MAP sensor hose to relocate the 5-way out from under the throttle bodies and didn't find any leaks. Also took apart the cruise vacuum unit as far as I could without breaking something and making it totally useless but didn't see any valves to the unit that looked serviceable. There was a write-up a while back about replacing the valve material but I haven't been able to find it and was hoping just messing with things would fix the unit.
- Still have the FI above 4k RPM (kicks a RT knock sensor code) that likely won't go away without an ECM replacement. I'm not looking for one just yet, but know that probably will be the only way to get it to go away for good.

Work that was done:
- Installed Sparkbrite LED voltage monitor
- Attempted to fix Audiovox cruise control (unsuccessful; doesn't hold set point, slowly decelerates); sealed control (when it gets wet, it auto turns on and auto accelerates...not good)
- Flushed clutch/brake fluids
- Cleaned brake calipers (replaced one spring that was bent) and pistons. Lubed pads, sliders/boots, pins, etc. Functional check of pedal, lever and SMC; all passed from what I can tell. I didn't pull the pistons to check the seals as they all functioned fine and I don't have any leaks anywhere.
- Inspected rear wheel drive splines, axle, and bearings (looked fine), replaced wheel dampers, new O-rings (didn't pull the front wheel)
- Replaced front footpeg pads
- Valve clearance check (needed new shims on 14 of 16 valves)
- Starter valve synch
- Checked/relocated 5-way tee to fwd area under airbox (ahead of throttle bodies)
- Replaced air filter (no mice evidence this time!)
- Checked main fuel tube; looked good so left the replacement I have in the bag for later
- Checked/adjusted balancer shafts
- Hopefully fixed oil leak on left cylinder bank (#1 plug hole had oil in it from the cam cover seal) and the half moons on the valve cover likely were leaking (both sides, added new RTV in the recesses before reinstalling the same seals (I have a new one should I need it)
- Replaced spark plugs
- Replaced various plastic fasteners that had deteriorated/lost locking segments

I didn't get my cameras installed, nor did I get the GPS power harness installed that I wanted to (thought I had all the parts for a dash shelf but discovered I didn't, or couldn't find what I thought I had!) so those will wait until another time. I also was going to work on a backrest mount for my Givi topbox plate but haven't done that yet either. So I'm still where I was before this all started on those three things.

Brakes feel good, shifting is fine (I did manage to tear the dust boot on the right side swivel (just inside of the brake pedal) trying to put it back on after taking it off thinking I needed to lube it. So much for good intentions! Will keep an eye on it to ensure it doesn't get gunked up before I get a replacement on there. I didn't replace any of the slider boots on the calipers (checked all 6) as they looked good. However I didn't figure out a way to get them back on both sides of the pin and caliper (the raised rings that keep the boot in place across the pin as the caliper moves) and didn't want to tear them trying. Any suggestions?

I didn't have any leftover screws/fasteners, but I think there are a couple that ended up in the wrong place (ie hex bolts vs flat head JIS screws on the front fender next to the reflectors); will research the parts list later and see if I can't figure that out.

Overall happy with the mx that was done, the big thing being the valve clearance/shims, balancer shafts, starter valve synch, and clutch/brake fluid flush/replacement. Thanks for following along and the advice that was provided (feel free if you have more)! If you're reading this and don't know if you're ready to do your own maintenance, read up on the system you're thinking about working on, ask questions, and dig in there! You'll be glad you did and you might just learn something along the way to saving $$$s vs having the STealer do the work!
 
Last edited:
OP
OP
Gus1300

Gus1300

Site Supporter
Joined
Apr 5, 2007
Messages
567
Location
Haymarket VA
Bike
04 1300A
Wow. Just wow. @Igofar spent almost an hour and a half with me on the :WCP1: today going over several of the items I've mentioned above/the general service actions I recently did. And this while wrestling with a plaything the neighbor kids found!
1591135418846.png

Bottom line, I have a few things to go back and check, and some other things to do that I hadn't touched. Two full notebook pages of notes, writing as fast as I could while he talked, which is also fast!

Good news, it should all be fairly straightforward. Bad news, the airbox is coming off again. I'll prob just go ahead and pull all the plastic down to the engine again anyway (not the front fairings) just to see if the leaks are holding, and whether or not I've introduced any 'new' squawks.

Thanks for your help Larry...I'll be sure to keep you advised!
 
OP
OP
Gus1300

Gus1300

Site Supporter
Joined
Apr 5, 2007
Messages
567
Location
Haymarket VA
Bike
04 1300A
Updated the title so I could continue this in 2021 and not have it be incorrect. Sorry if that threw off anyone!

Pulled the clutch master cylinder today to finally get to the leak that's been there awhile, and at the same time threw in an oil change and working a front tire pinhole leak. I tried a worm and it didn't work the first time, so ran it again double and am letting it dry for awhile before putting air back in; I know, I know...replacement tire already ordered along with a new battery because when I went to move it to the workspace it didn't come up despite being on the tender.

Anyway, I'm having difficulty removing the boot from the business end of the clutch cylinder. It says in the manual to remove it before getting to the snap ring, but I can't pull it out even with the plunger pin removed. Is there some trick to doing this that isn't intuitively obvious? Thinking about what have caused the leak, could the condition of the bushing have been the culprit? It may have allowed the piston cups to move beyond where they are supposed to reside...if you're wondering what I'm referring to, check out this pic:

PXL_20210509_045519686.jpg

It doesn't look like it's supposed to be a through hole! And looking at the backside of the bushing, it appears it's worn in the middle and not on the ends:

PXL_20210509_045548706.jpg

So, after tugging on the boot to the point I was afraid I was going to have to tear it getting it off, what do the masses think about just keeping the old internals (I have the kit ready) and seeing if the bushing was the cause of the leak? Or should I just go ahead while I have it off and figure out how to get the boot off, pull the snap ring, and replace the cups and all inside as well? It hasn't ever been done, so I'm not sure what shape the cups are in and if the fluid is already getting by them through some means NOT caused by the piston position due to the bushing being so badly worn.

I have to wait for the battery to get here anyway, so have time to work on this after I see what everyone weighs in with. Also, it looks like there's a bushing in the handle that is allowing the pivot pin to have a little bit of freedom but I didn't see a bushing separate from the handle (part#20 on the diagram); it's likely a full part replacement. I plan to do the brake side as well although it doesn't look like it has a similar bushing at the end of the plunger but instead has a cup in the handle.

PXL_20210508_150140717.jpg PXL_20210508_182810147.jpg PXL_20210508_182823175.jpg
 
Last edited:

Igofar

Site Supporter
Joined
Jan 8, 2011
Messages
7,123
Location
Arizona
Bike
2023 Honda CT125A
The rod has bored a hole all the way through the bushing, which means the inside of the lever is probably damaged as well and should be replaced.
If you look inside the hole on the lever where the bushing sits, your probably going to find the end of the rod peened a recess into the lever.
You were very close to having the rod lock the lever up tight.
If it were me, I'd order a new boot, and a new lever, to go with your new bushing.
I'd also inspect the surface of the perch that the lever rides on, as with the bushing worn that badly, it probably scored the surface up quite a bit, and you may find the lever has a lot of free play in it up and down, which will cause all the parts to wear quickly.
 
OP
OP
Gus1300

Gus1300

Site Supporter
Joined
Apr 5, 2007
Messages
567
Location
Haymarket VA
Bike
04 1300A
Thanks Larry, the lever looks exactly as you expected/described:

PXL_20210509_145907328.jpg PXL_20210509_145914081.jpg

As do the lever and cylinder lever mating surfaces (noting the witness areas, they're on opposite sides, so maybe I'm not pulling the lever in straight and need to adjust the angle when it goes back on the handle bar as well to help that in the future):

PXL_20210509_145941540.jpg PXL_20210509_145958144.jpg PXL_20210509_150141367.jpg PXL_20210509_150147659.jpg

Considering a couple options: a thin washer top and bottom where the lever is making contact with the cylinder mount points, or maybe trying to squeeze together the lever mount area (although the cylinder is probably a casting, so one may not be able to do that without cracking it). Yes, new parts are probably the right way to go, but in the meantime, to make it rideable without getting too much worse if new parts are an eventuality regardless.

Any thoughts as to why the boot won't come out? I pulled on it to the point it was stretched pretty thin and I was totally expecting it to fail/tear and it still didn't want to come loose. I have the entire kit, boot and guts, so can replace everything if needed. I was just thinking it shouldn't be that difficult to get the boot off and be able to see / remove the snap ring to check the condition of internal parts before putting it all back together.

Thanks for the input!
 
Top Bottom