OP
OP
Gus1300
Site Supporter
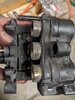
Haven't ever had the calipersoff/apart.
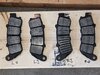
2024 update: Well, I've finally taken apart the calipers for the first time since owning the bike. As expected, there was some crud in the front calipers, mostly the left, and most likely due to earlier when I had let the fluids get too old. The SMC has always passed the 'spin the rear tire and compress the piston' check both with stopping the rear tire AND releasing it again, so I assumed it was good. I can't get the boot off to see what it looks like inside, but the piston compresses and doesn't return to it's fully sprung position (free play by the piston rod and U-shaped connector after being compressed) for quite a while, so I'm sure it's dirty inside. I'll probably take it apart eventually to verify, but am almost certain sure what I'll find. I'm going to put the new one on and fully expect to see better braking, provided I can get all the air out of the system! (am aware of @jfheath's articles and have them at the ready, THANK YOU!)
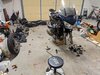
While the bike is apart, I'm going to also knock out a few other punch list items:
- contemplating removing the old Audio Vox vacuum cruise control that no longer works (haven't yet ordered the McCruise version (but have permission to do so!) but not sure I want to get into the under-tank area; if so, I'll also verify the ignitor wiring remains and replace the air filter (which means I prob should...)
- tend to the fork leak that has manifested itself of late
- recharge the preload
- verify the front/rear wheel bearings are still good
- address the melted right knock sensor that may be contributory to the FI code I am living with on my second ECM
- attempt to reattach the Stuff Stopper front fender extension that came off after the previous try
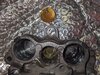
- determine why the power outlet in the right glovebox isn't...um, powered
- fix the power to the alarm (not sure when these detached, but that's obviously why it's not working!)
...and whatever else I find along the way. I was hoping to be retired by now and take a trip this summer to go see the Whisperer in Tucson, but I guess I'll have to chance it and do it alone this time around. Besides, Larry has said he's retiring; maybe next year the trip will be to see the new Whisperer!
For the spin test, my front wheel went around 3 times both with the brake calipers on and with them removed, so they're releasing as designed. The rear wheel, however, barely goes around once, both with the caliper installed and with it removed, which makes me think there's something going on with the bearings or the final drive is dragging it down while spinning all that mass. Others haven't mentioned that though, so I suspect I have something else happening. I'll report back with what I find!
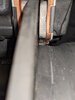
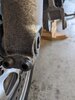
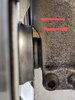
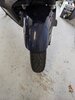
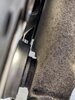
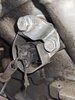
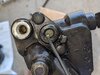
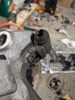
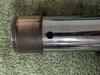
In the meantime, curious what the 'buildup' is from on the right fork:
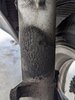
The left has some too, but isn't as bad...or maybe it is? <sigh>
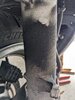
My suspicion is they have something to do with the fork leaks, as I didn't see any brake fluid leak (nor evidence of loss at the reservoir), but the buildup is heavier on the front side of the forks than the rear. Due to the direction of wheel spin in that area, I would think the location would be on the backside (receiving side) of any road dirt/grime/etc? Maybe when I get into the forks, the lack of fluid will verify; if the fluid levels are relatively equal, the mystery will still exist, at least for me.
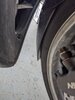
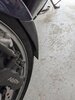
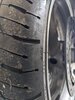
I also found this part of the rim is bumped out (possibly related to the forks starting to leak?); my commute to work has some bumps and I vaguely recall having a hard front end hit a while ago, but didn't think it would do this to the rim. Noticed it during the wheel spin test.
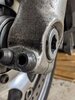
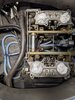
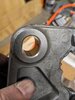
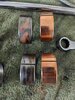
Something else I need to read up on is how to get the old piston and dust seals out of the calipers; they look pretty flat and unless I use something sharp or pointed (very carefully, obviously!), it doesn't appear intuitively how to remove them. I have a couple new ones but since all the pistons look pretty good once cleaned up, I think they're fine. A few of the bleeder valves were teflon wrapped; I'll be cleaning them up and wrapping all upon replacement. I also bought a MotionPro bleeder and will see if that combined with my hand-pumped vacuum bleeder does the trick on an almost fully drained system.
Thanks for reading, and if you have any helpful comments (yes, I know the fluid was dirty!), I'll be glad to read them! And for those hesitant to dig into their own bikes, hopefully some of what I've provided here in the past, and with this latest mx, will help you to have the confidence that you too can do your own work as you learn about your bike and how to keep it healthy and operating at full capacity!


Later this afternoon:
Thanks @Willsmotorcycle, I do have a table, I wish I had a lift, and for the brake stuff, sitting on a stool was working fine. I did break out the table to have someplace to set the fork parts; problem is if I stand there too long, my back starts killing me (my son and I used it to swap his Prius C battery cells and I about couldn't stand by the time we were done!)
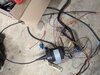
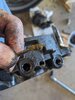
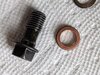
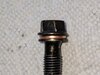
Took the forks off, got the right one apart fine, but the socket bolt at the bottom of the left is just spinning now that it's broken loose. I have tried the service manual suggestion about putting the spring and cap back on but it doesn't seem to be making any difference. Comparing it to the right fork, the inside piece spins independently from anything attached further up. Thoughts on how to get that socket bolt out would be extremely welcome!
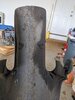
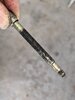
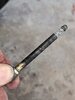
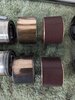
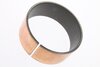
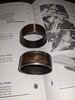
I'll probably go ahead and get new seals, as well as guide and slider bushings. There's an uneven discoloration on the right ones (haven't seen the left ones yet...grrr!):
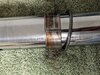
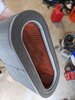
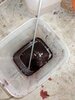
The right tube had 17.5 oz of fluid, compared to the left which had 18.5. I don't remember how much I filled them with, but the service manual provides a capacity of 22.5 oz or so. It looks used/old, not quite as dark as this picture makes it appear to be, but definitely not new 'red':
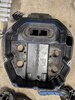
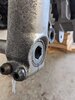
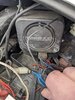
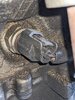
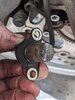
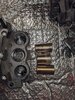
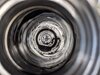
While I ponder how to get the socket bolt out, the rear wheel bearings feel good and the dampeners aren't that old so leaving those in for now. The rear ABS sensor was also in bad need of a cleaning:

Stopping for the night before I get too frustrated and do something irreversible trying to get the #*$@& socket bolt out!
Last edited:

 and chat a bit before you jump on the bike for a test ride.