Article [13] ST1300 - Rear Flange Bearing Replacement

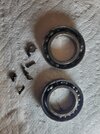
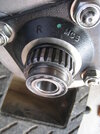
So I have removed it and grease seems to be dry on the bearing,
Also, should I clean and repack them with fresh grease too?

If I'm reading this correctly.. some clarification is needed.

Grease on the outside of the bearing does nothing, what you are probably seeing is dried moly grease from the spline lubes. Those are sealed ball bearings suporting your tail wheel, you can't pull and pack them like tapered wheel bearings. Yes, technically you could pry up the seal, inject some fresh grease underneath. It's debatable if doing this really helps as you are leaving the worn out base grease behind.

You can put some grease on the inside of the bearing, but this just helps the axle slide through and prevent corrosion. Do not use moly grease here, not enough movement.
 
If I'm reading this correctly.. some clarification is needed.

Grease on the outside of the bearing does nothing, what you are probably seeing is dried moly grease from the spline lubes. Those are sealed ball bearings suporting your tail wheel, you can't pull and pack them like tapered wheel bearings. Yes, technically you could pry up the seal, inject some fresh grease underneath. It's debatable if doing this really helps as you are leaving the worn out base grease behind.

You can put some grease on the inside of the bearing, but this just helps the axle slide through and prevent corrosion. Do not use moly grease here, not enough movement.

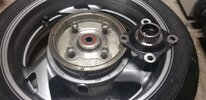
Sorry for the confusion, yes I have put everything back together and left those bearings alone since they were smooth and doing fine.
 
Anyone know the torque value for the four large nuts on the flange drive. They were really tough to get off.Driven Flange.jpg
 
@MerlF
Service Manual, p.1-17, shows "Final Driven Flange Nut", Qty 4, 14mm thread diameter, 150 N-m (111 lbf-ft), with a note that his is a "U-nut".

The Rear wheel removal, disassembly, and reassembly procedure, p. 16-5 to 16-10 just says "install the driven flange assembly to the right wheel hub", no torque for that fastener is listed in that section.

The U-nut appears to be part 90305-GE8-003, but I don't find another source of acceptable torque for it.

Please verify it is 14mm before using the torque I mention here. Or someone else can corroborate that is the correct torque.
 
Thanks BakerBoy, these are the toughest nuts to take off I've encountered on the bike. I should have read this series of posts first. Just checked the manul and it is as you say. 111lb/ft, no wonder they were so tough to get off.
 
Last edited:
victim here to the bearings going . 04 ST with 30K miles. Maybe 130mph at a recent track day had something to do with it. :think1: 1 month ago it was fine. Putting on new rubber I got the marble feeling as i was inserting the axle. I extracted the bearings and they had that crunchy feeling after a mineral spirit cleaning.

my previous 06 with 60K had no such issues.
 
Glad to note that while mounting my new CT to the ST this past week, I cleaned the old moly and re-lubed it, and checked these flange bearings (30k miles) and noticed no notchiness or sloppiness back there.
I hadn't seen this article, having no need through the years, but while I've changed wheel bearings before (only on my inline skates[!]), for some irrational reason I've always slightly feared replacing wheel bearings, maybe because of their critical nature. I dunno.
Having read this now, it's not nearly as intimidating as I'd feared.
I've also learned that much of the "fear" of tackling ST maintenance chores is really more tedious or time-consuming, than actually difficult to perform.
Have I told y'all lately how much I love st-owners.com?
 
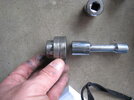
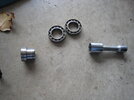
Thanks Mellow for this great instructional article and all the comments from forum members as we'll. It gave me the knowledge and confidence to tackle the job. Just a note to help others who may use this thread, I removed the distance collar with bearings from the flange in Step 3 with a 21 mm socket and extension. I then removed the bearings from the distance collar using a 11/16 socket and extension. Light taps with a two-pound hand held sledge seemed to work well in removing the parts.
 
Re: ST1300 Rear Flange Bearing Replacement


The Story: https://www.st-owners.com/forums/showthread.php?t=54976

I still want to open on the old ones to see if there really was some notching or if I was just imagining it. Either way, I got to see how easy they are to replace.

Just over 15,000 miles on mine. Again, I 'think' mine were notchy.. not sure if that means they would fail in 1 mile or 10,000 miles..
Mine feel notchy replacing, is there a dust seal outside the distance tube?
 
Please: This is my first try at this, those with more experience please
chime in with your tips and tricks that might help make this a better
procedure.


Rear Flange Bearing RR
Step 1


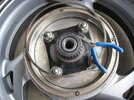
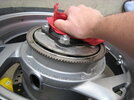
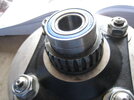
Remove Ring - This is pretty simple, some needle nose pliers will
work, the ring does not have a lot of tension on it.
5293.jpg
attachment.php


Step 2
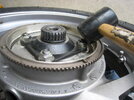
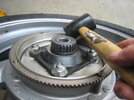
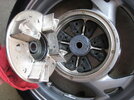
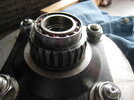
Remove Flange - I had to tap my flange some to help loosen it up.
5290.jpg
5291.jpg
attachment.php

attachment.php

attachment.php

attachment.php

Then, by jiggling it a little it will come right off.
5289.jpg
5288.jpg
attachment.php

attachment.php

attachment.php

Step 3
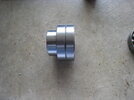
Drive out Bearings
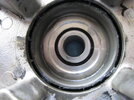
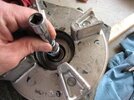
- Using a socket, drive out the distance
collar from the other side of the flange.
5287.jpg
5286.jpg
attachment.php

attachment.php

attachment.php

attachment.php

You don't have to use much force.
attachment.php

attachment.php

5285.jpg
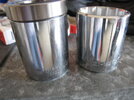
Now, using a smaller socket, drive out the distance collar from
the bearings.
5284.jpg
5283.jpg
attachment.php

attachment.php

attachment.php

attachment.php

Step 4
Install new Bearings
- Some people put the new bearings in the
freezer for a few hrs, I did for a couple and it helped but I should
have left them in longer.

The new bearings will tap into the distance collar pretty easy.
attachment.php

attachment.php

attachment.php

attachment.php

5282.jpg
5281.jpg
Then line it up on the flange.
attachment.php

attachment.php

5280.jpg
To drive the near bearings into the flange, you can try using a
large socket but make sure the socket only touches the outer
race/part of the bearing - force on the bearings or inner race
could render them inoperable.
attachment.php

attachment.php

5279.jpg
I had a couple socket that looked like they might work however,

they had a beveled edge and I was afraid that would harm the
outer race or do other damage.

So, I used the old bearings and tapped the outer edge a little at a
time to push the new bearings into the flange. Worked better than I
thought it would.
attachment.php

attachment.php

5278.jpg
Some have used a board to drive in the bearings also.

That's it! It's a lot easier than I thought.
​
Need to change mine at 50,000 miles, was doing a new tire, thought to check, glad I did, glad I told AI to tale a hike and looked here, thanks for the great pics, AI had me totally mind boggled, now wondering about a dust seal for the flange bearings, wasn’t one doesn’t look like on tear down, in process of knocking out the bearings and distance tube
 
Re: ST1300 Rear Flange Bearing Replacement


The Story: https://www.st-owners.com/forums/showthread.php?t=54976

I still want to open on the old ones to see if there really was some notching or if I was just imagining it. Either way, I got to see how easy they are to replace.

Just over 15,000 miles on mine. Again, I 'think' mine were notchy.. not sure if that means they would fail in 1 mile or 10,000 miles..
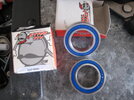
Mine felt smooth once removed but were notchy in the wheel, the blue side of The bearings looks like they have a blue seal but only on one side, bearings exposed on the other, so should the bearings face inward toward one another with blue seals out? Seems logical now that no dust seal anywhere
 
Last edited:
Re: ST1300-Rear Flange Bearing Replacement

I got a call from my local STealer this afternoon that my tire had been mounted and was ready to be picked up, the guy said that the rear bearings were in need of replacement. I thought that this was just a ruse to do additional work that wasn't needed. I only have 48k on the bike and was not aware that they were so weak.
Thanks for the info.
Doing new rear tire, thought to check mine, notchy feeling, about to go out, 50,000 miles, sounds like a good stealer,
 
Please: This is my first try at this, those with more experience please
chime in with your tips and tricks that might help make this a better
procedure.


Rear Flange Bearing RR
Step 1


Remove Ring - This is pretty simple, some needle nose pliers will
work, the ring does not have a lot of tension on it.
5293.jpg
attachment.php


Step 2
Remove Flange - I had to tap my flange some to help loosen it up.
5290.jpg
5291.jpg
attachment.php

attachment.php

attachment.php

attachment.php

Then, by jiggling it a little it will come right off.
5289.jpg
5288.jpg
attachment.php

attachment.php

attachment.php

Step 3
Drive out Bearings
- Using a socket, drive out the distance
collar from the other side of the flange.
5287.jpg
5286.jpg
attachment.php

attachment.php

attachment.php

attachment.php

You don't have to use much force.
attachment.php

attachment.php

5285.jpg
Now, using a smaller socket, drive out the distance collar from
the bearings.
5284.jpg
5283.jpg
attachment.php

attachment.php

attachment.php

attachment.php

Step 4
Install new Bearings
- Some people put the new bearings in the
freezer for a few hrs, I did for a couple and it helped but I should
have left them in longer.

The new bearings will tap into the distance collar pretty easy.
attachment.php

attachment.php

attachment.php

attachment.php

5282.jpg
5281.jpg
Then line it up on the flange.
attachment.php

attachment.php

5280.jpg
To drive the near bearings into the flange, you can try using a
large socket but make sure the socket only touches the outer
race/part of the bearing - force on the bearings or inner race
could render them inoperable.
attachment.php

attachment.php

5279.jpg
I had a couple socket that looked like they might work however,

they had a beveled edge and I was afraid that would harm the
outer race or do other damage.

So, I used the old bearings and tapped the outer edge a little at a
time to push the new bearings into the flange. Worked better than I
thought it would.
attachment.php

attachment.php

5278.jpg
Some have used a board to drive in the bearings also.

That's it! It's a lot easier than I thought.
​
Great job Mr Mellow, but next time use

6905-2RS, double sealed bearings, I lucked out and ordered these, AI suggested them as I began the job (new tire) , Discovered flange bearings going out,turned in to a nightmare UNTUL I SAW YOUR PICS thanks​

 
Back
Top Bottom